
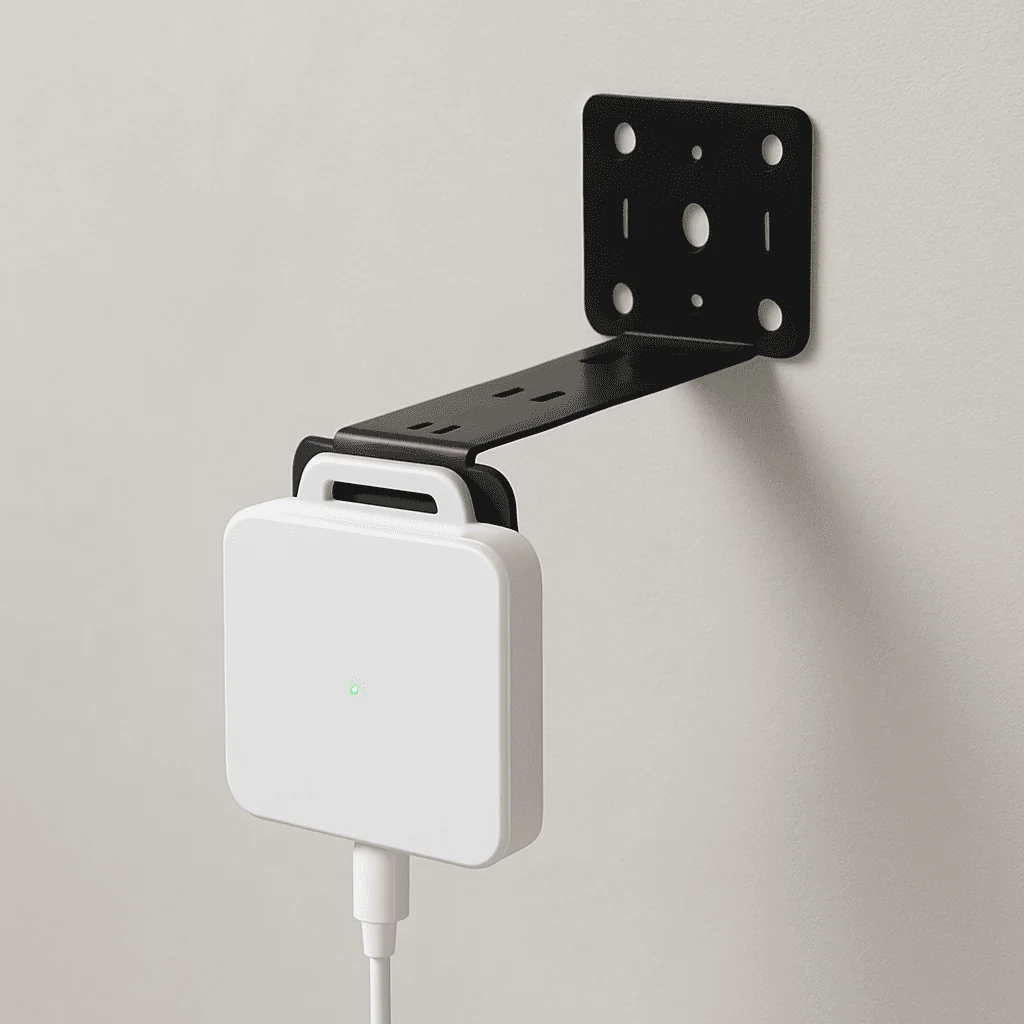
A bracket is used to securely mount an anchor to a wall, pillar, or similar surface.
Correct installation directly affects UWB signal quality, and maintaining proper clearance from the wall is especially important.
Following this guide will optimize anchor performance and keep your system running reliably over the long term.
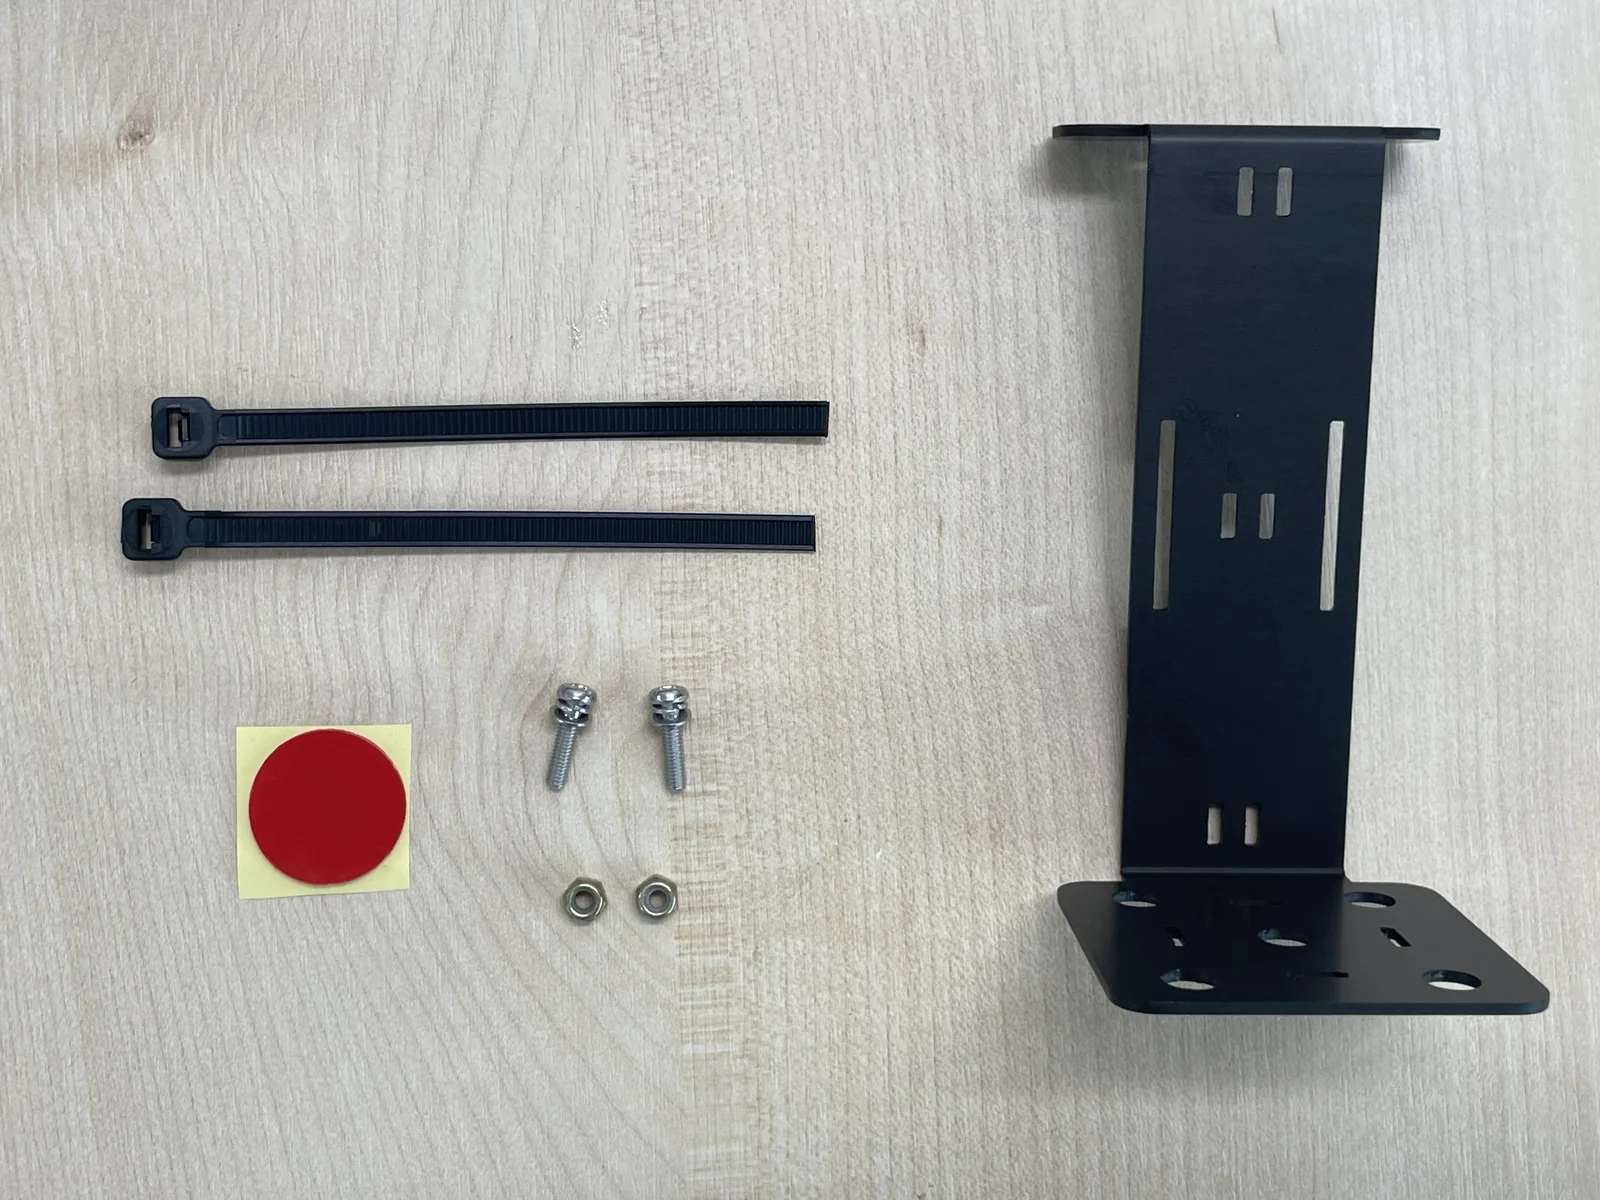
1. Contents
- 1 bracket
- 2 sets of bolts & nuts
- 1 double-sided tape
- 2 cable ties
※ Depending on your installation method, you may only need some of these components.
2. Installation Steps
- Secure the anchor
- Mount the anchor onto the bracket, then secure it firmly using bolts & nuts or cable ties.
Attach the double-sided tape
* Apply the included double-sided tape to the back of the bracket to mount it to the wall.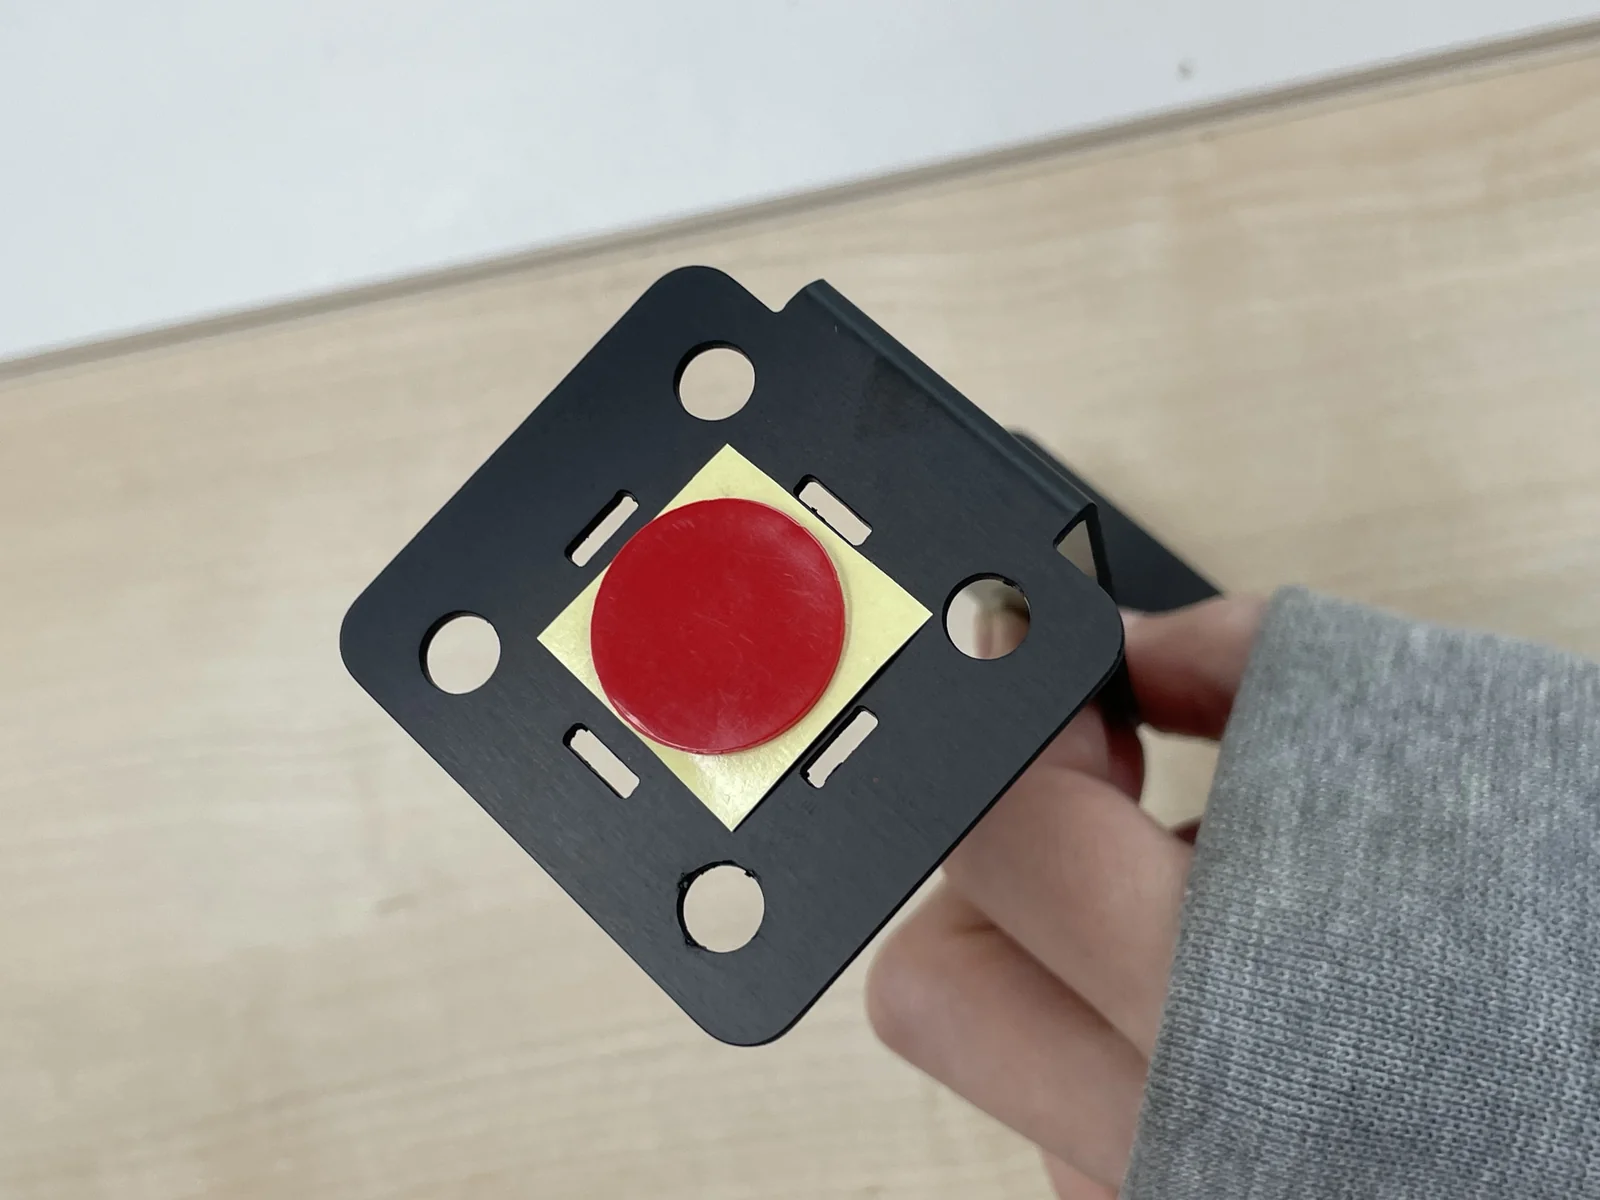
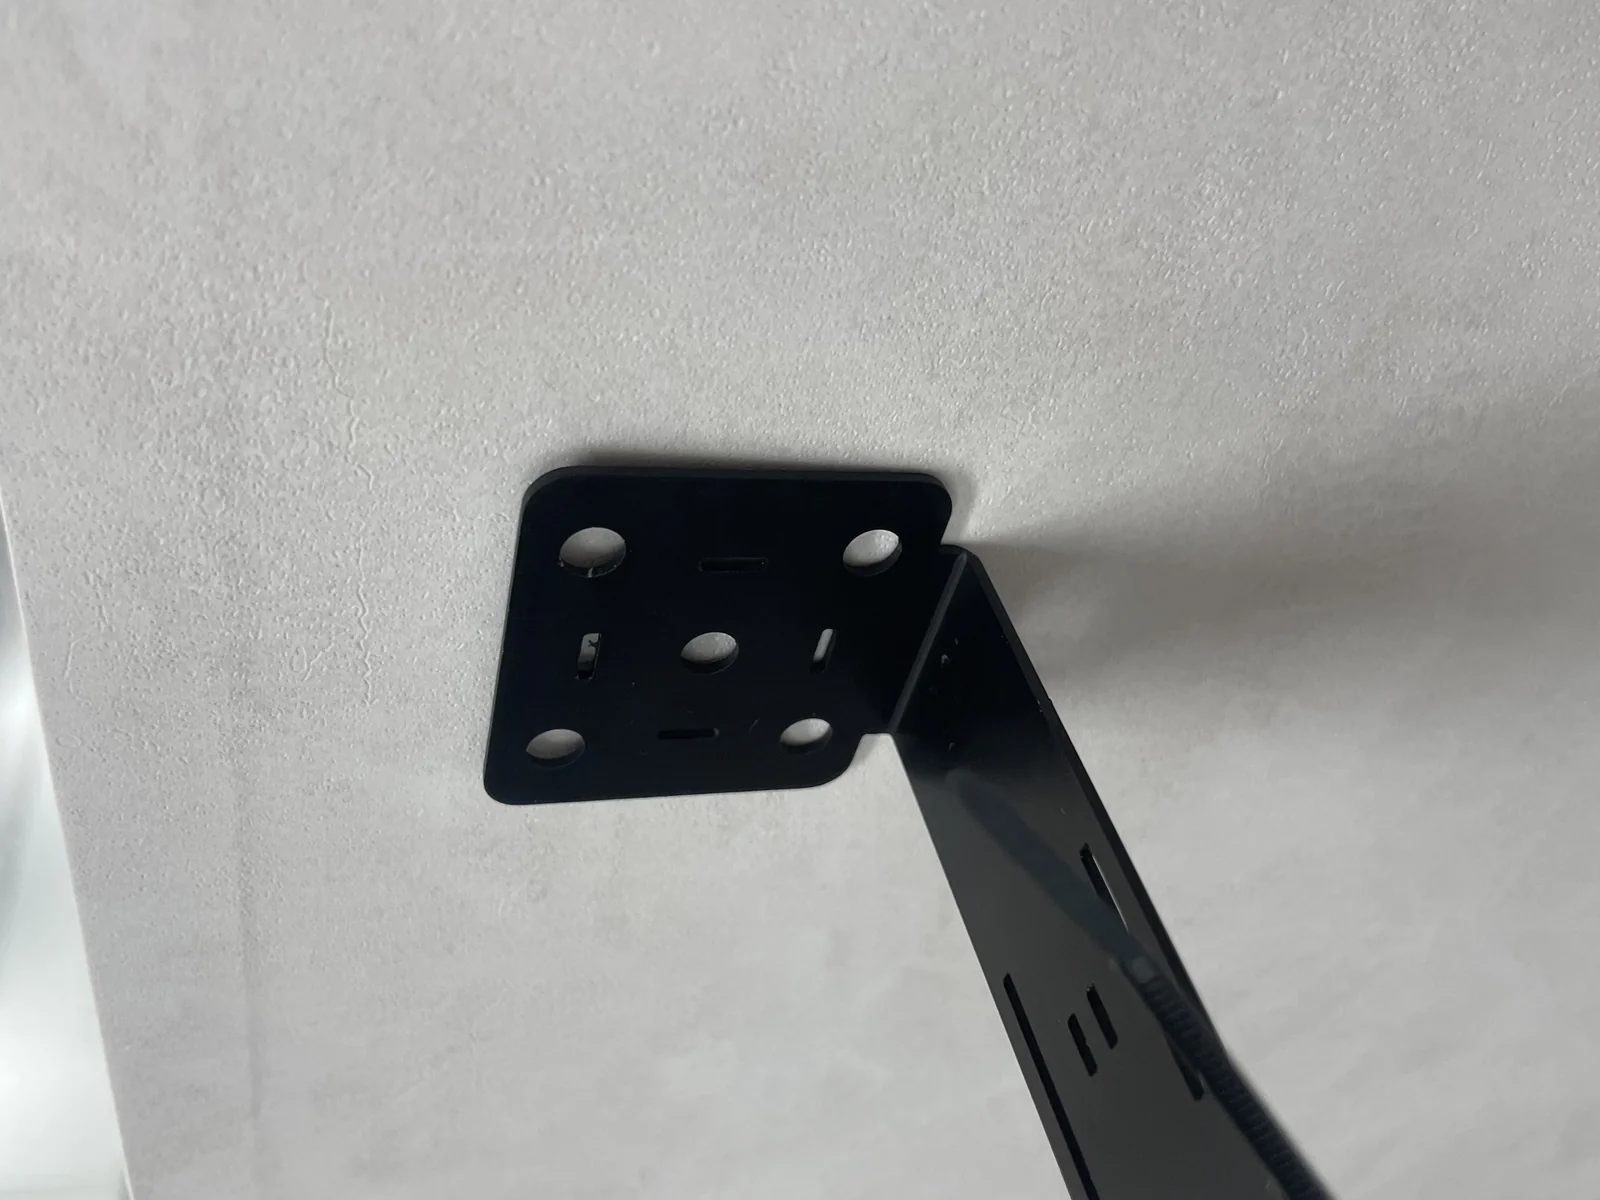
Fix the installation position
- Attach the bracket at your chosen location and adjust it so the anchor stays level.
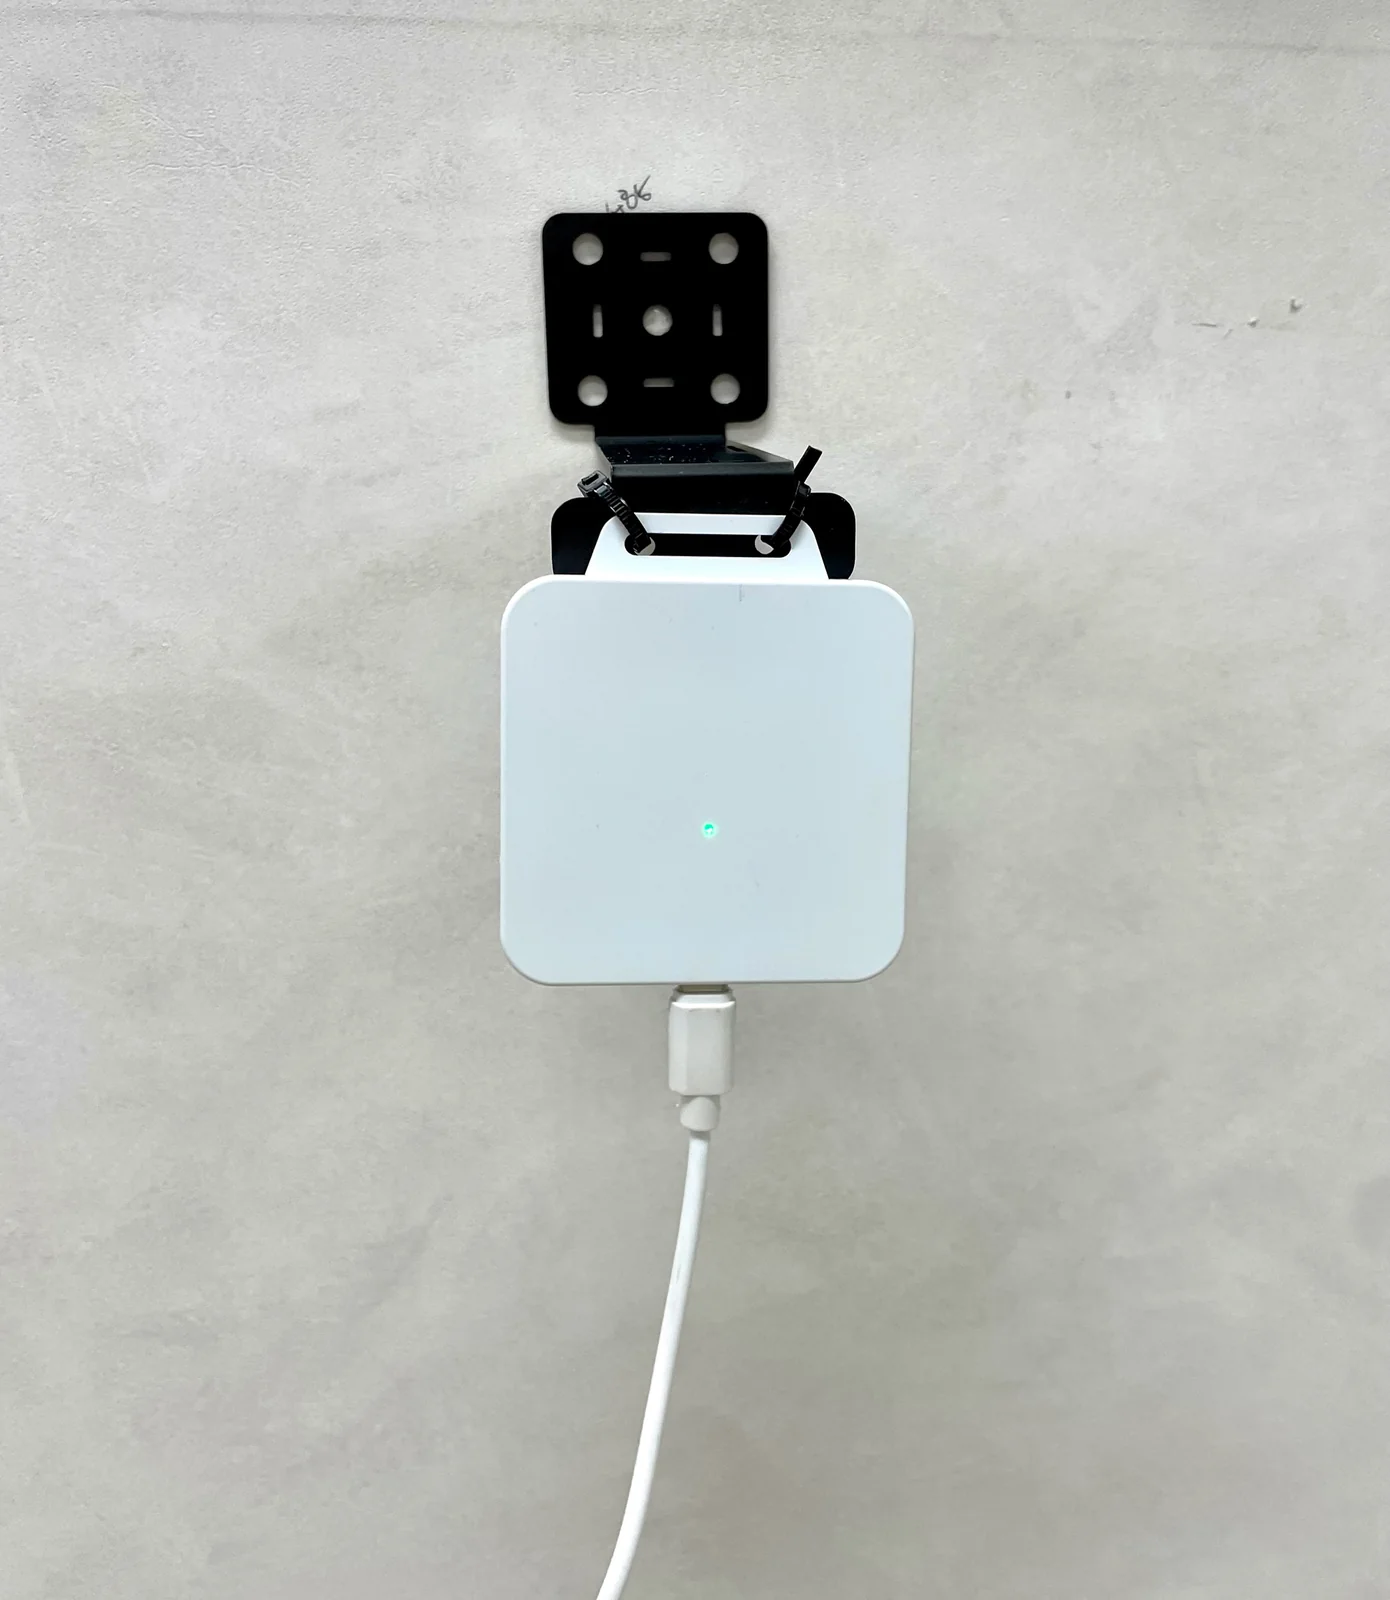
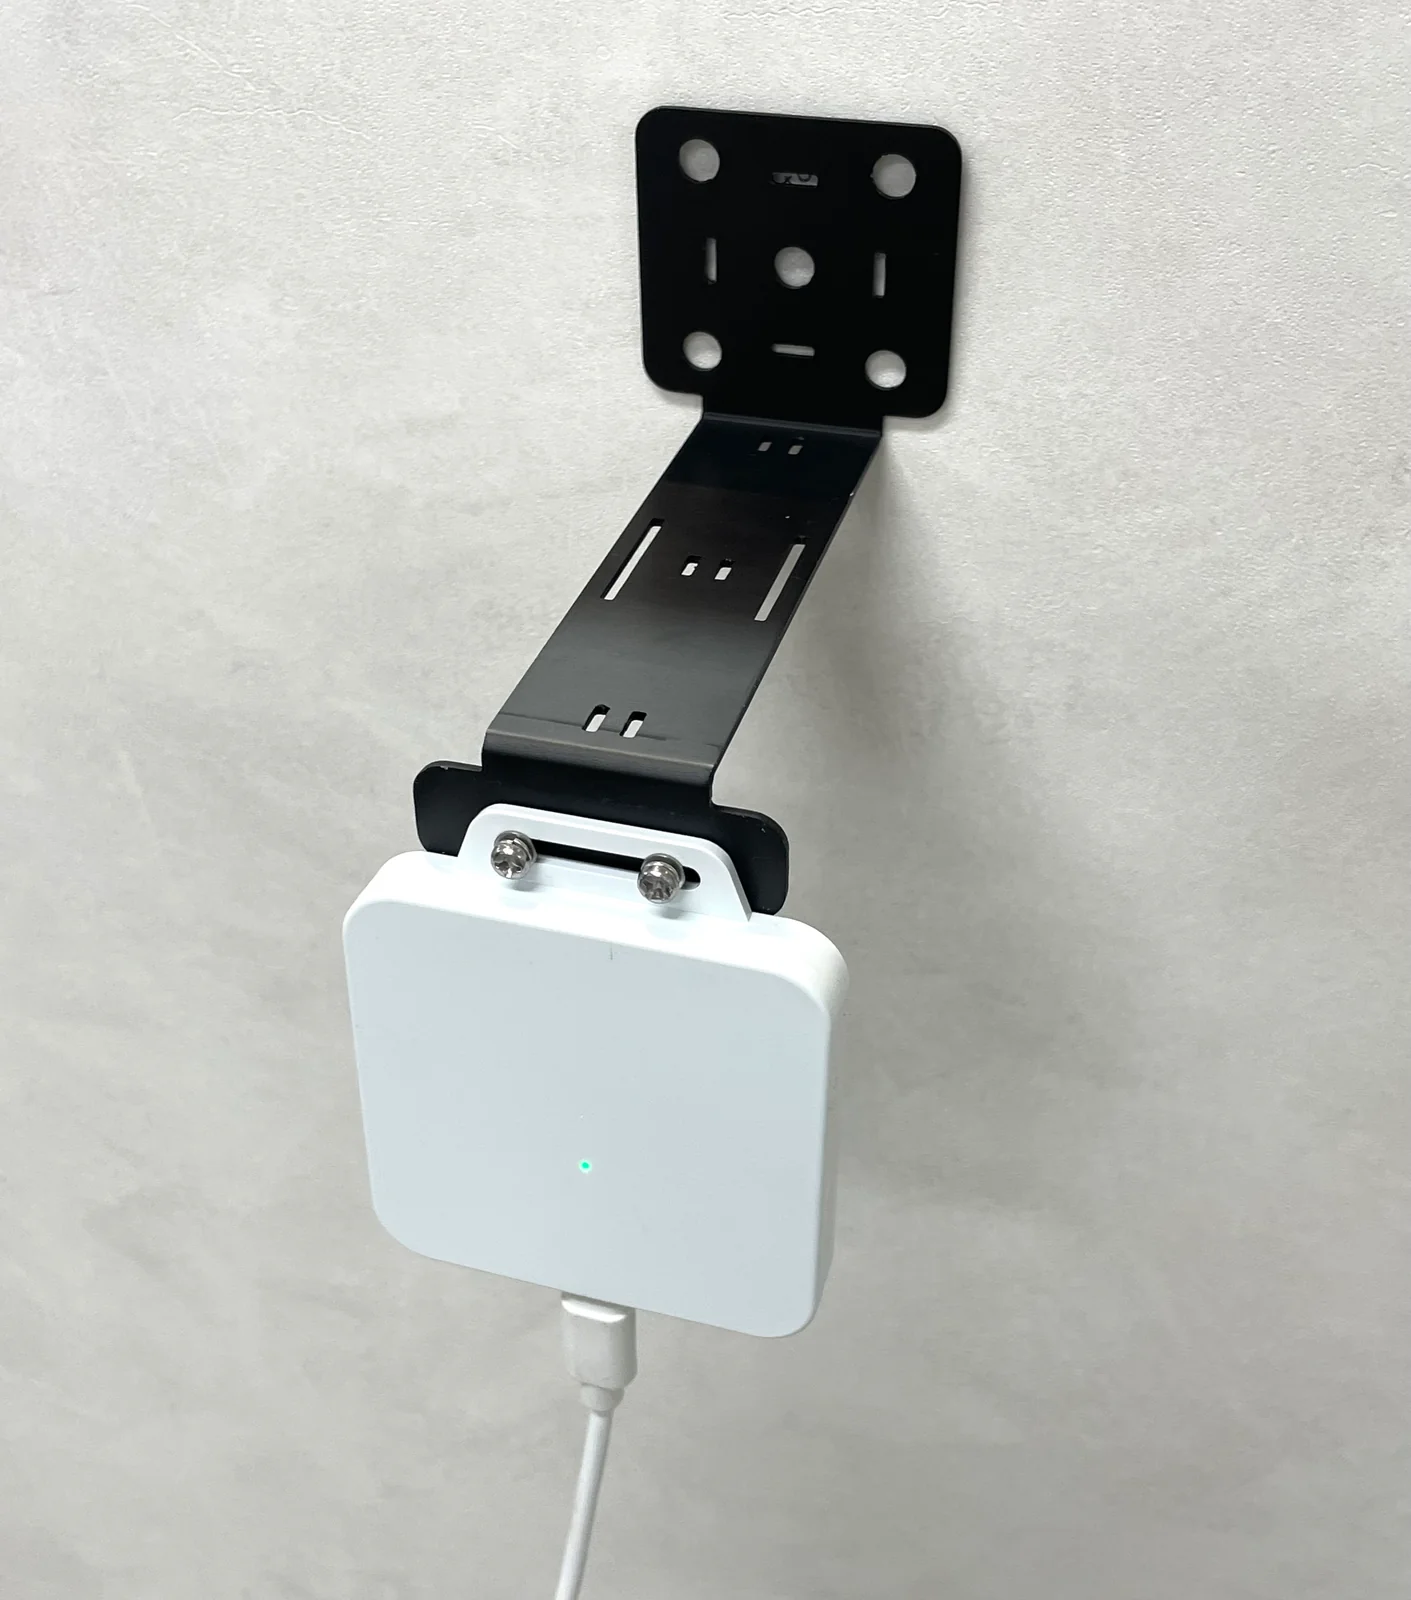
3. Installation Precautions
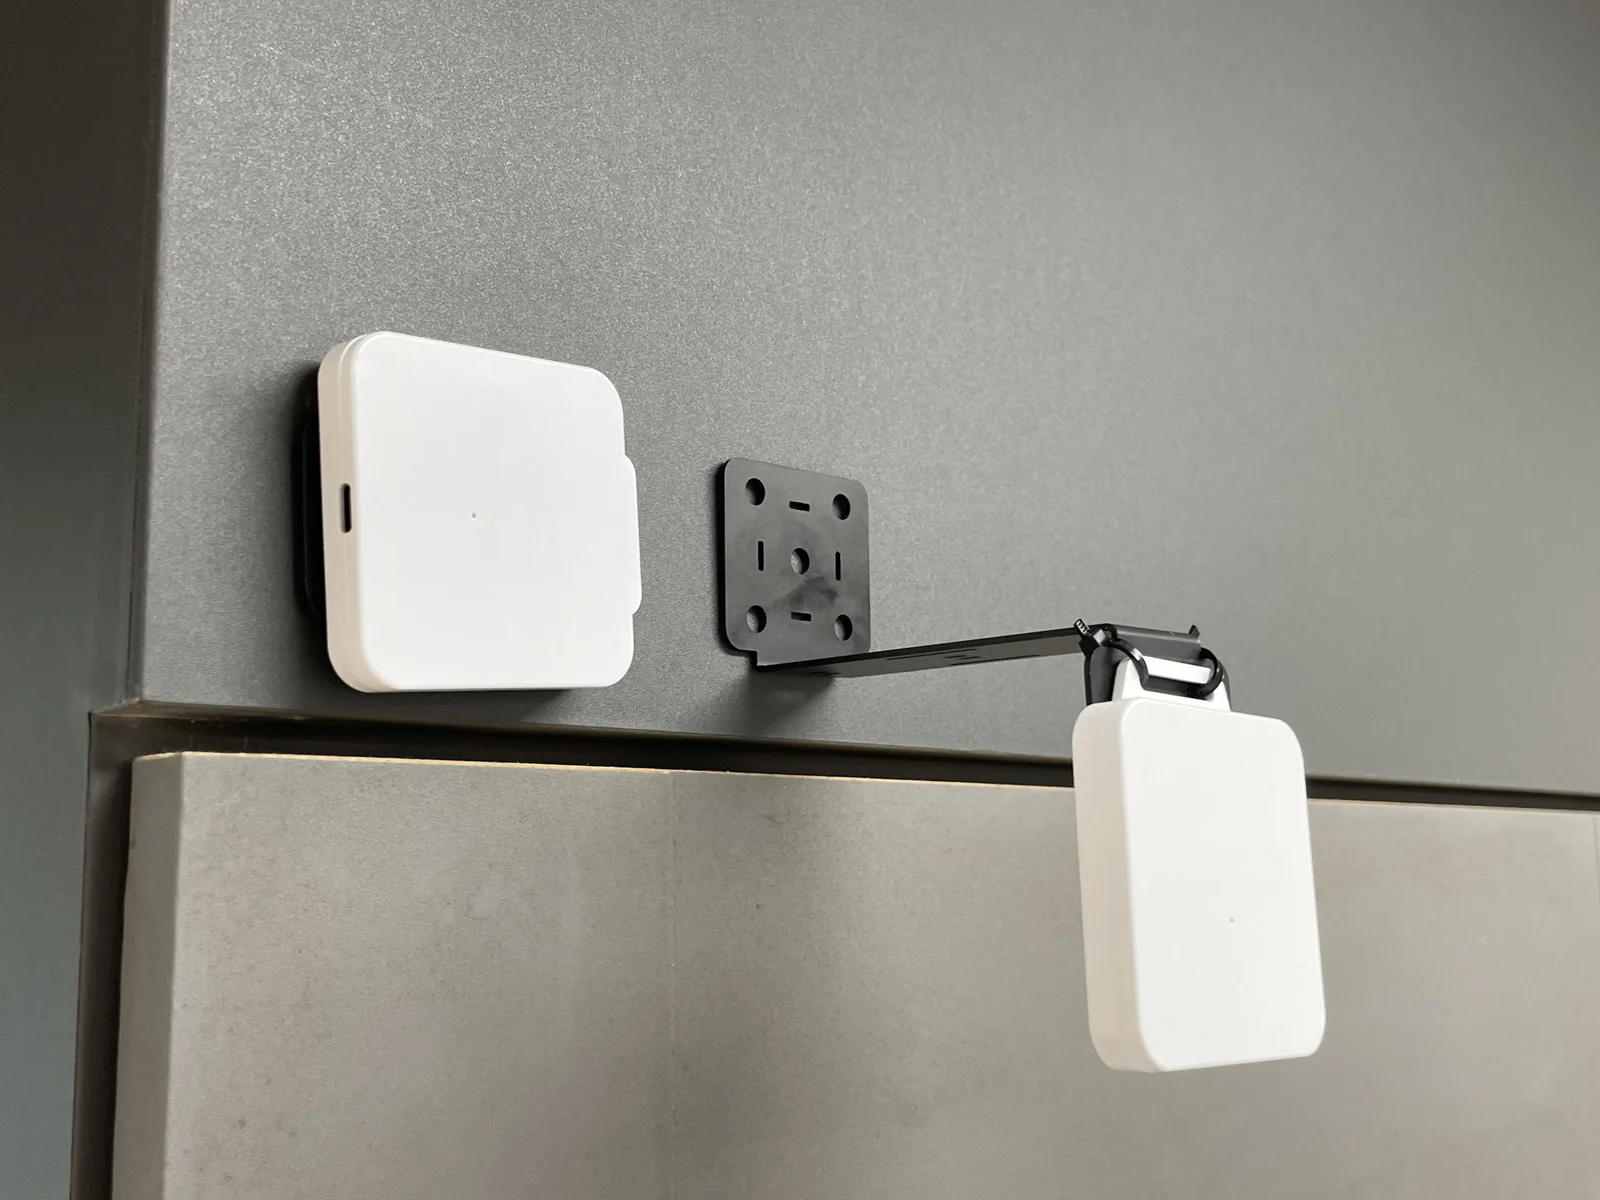
- Maintain clearance between the wall and the anchor
Keep about 10 cm (100 mm) of clearance between the front of the anchor and the wall.
→ This reduces the UWB signal being absorbed or reflected by the wall, ensuring the best possible transmission and reception. - Ensure a secure mount
Using cable ties alone can leave some looseness, so we recommend combining bolts & nuts with double-sided tape where possible.
※ Signal quality can vary depending on your installation environment (wall material, nearby interference, etc.), so be sure to test before finalizing the position.