This guide describes how to connect a GrowSpace UWB Developer Tag to an Arduino ESP32 board, send lec and lep commands, and receive and parse real-time location data.
Unlike the UNO, the ESP32 supports multiple hardware serial ports and is highly scalable with a compact footprint—making it ideal for lightweight test environments.
Required Components
To begin serial communication, you’ll need the following:
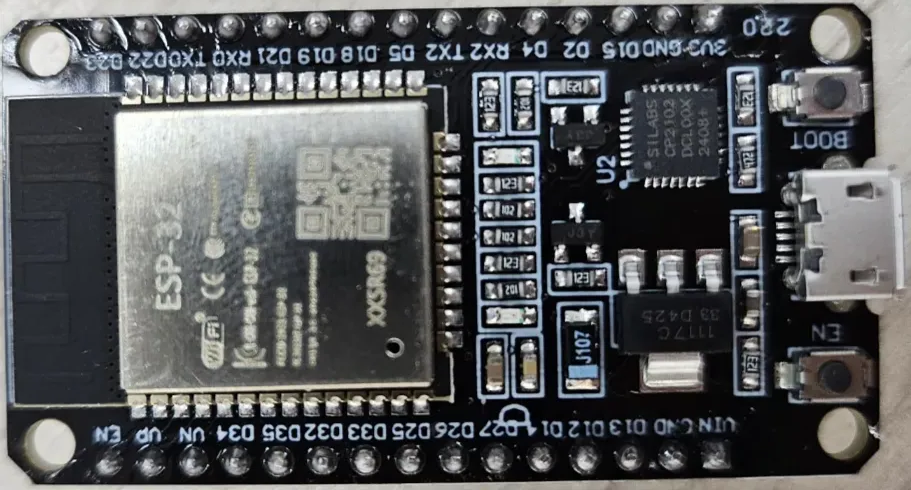
- Arduino ESP32 board (e.g., DevKitC)
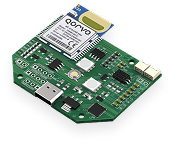
- GrowSpace Developer Tag
- Arduino IDE
- Jumper wires (TX, RX, GND, 3.3V)
Installing Arduino IDE & ESP32 Board Support
- Install Arduino IDE
Download the appropriate installer for your OS from the official Arduino website.
※ This guide assumes Windows (MSI Installer) - Add ESP32 Board to Arduino IDE
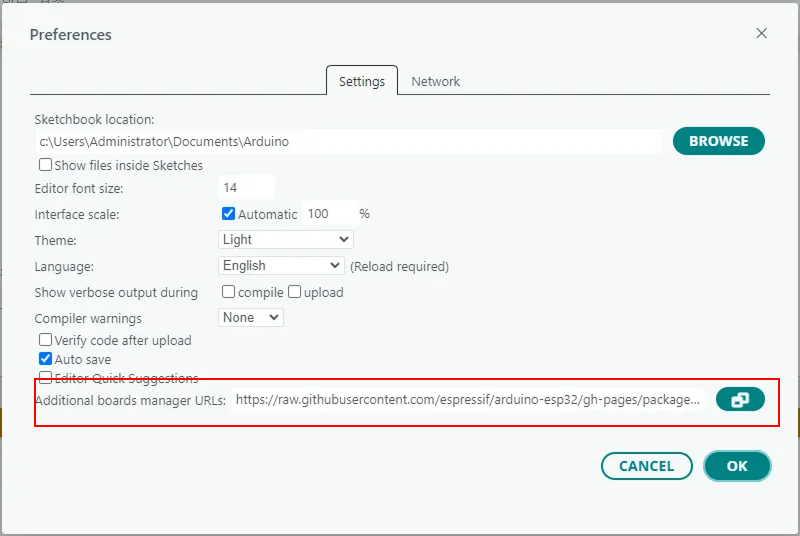
- Launch Arduino IDE → Go to
File > Preferences
- In Additional Board Manager URLs, add:
https://raw.githubusercontent.com/espressif/arduino-esp32/gh-pages/package_esp32_index.json
- Navigate to
Tools > Board > Board Manager, search forESP32, and install the package from Espressif Systems

- Set your board to
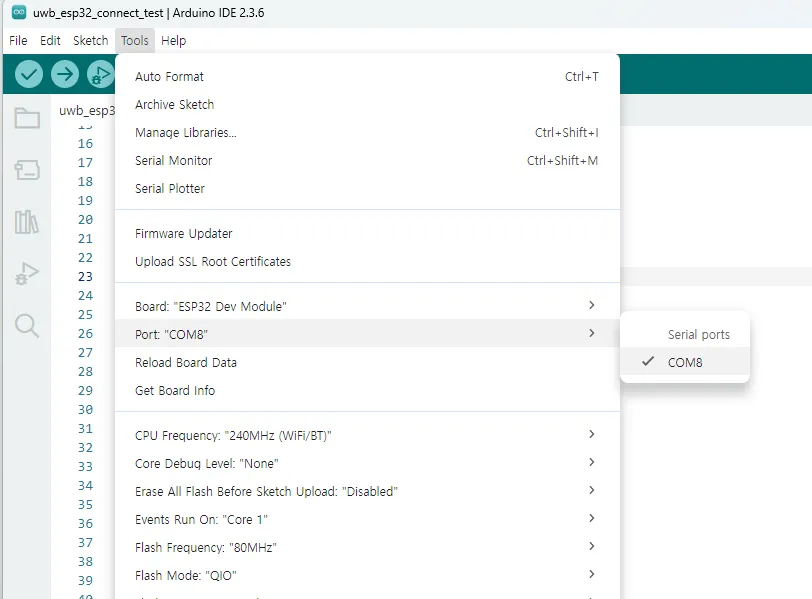
ESP32 Dev ModuleviaTools > Board - Select the correct port from
Tools > Port
Wiring Configuration
GrowSpace Developer Tags have connectors on both sides.
In this tutorial, we’ll use the left-side connector, which operates at 3.3V.
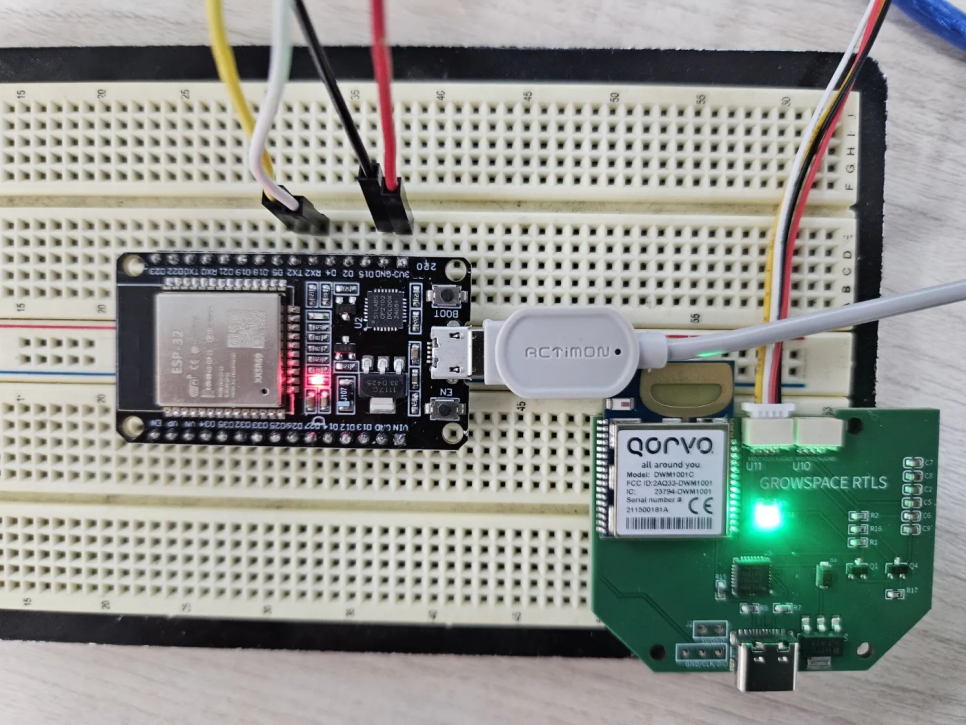
| Developer Tag Pin | ESP32 Pin |
|---|---|
| TX | GPIO 16 (RX2) |
| RX | GPIO 17 (TX2) |
| 3.3V | 3.3V |
| GND | GND |
주의: TX ↔ RX must be cross-connected
Tag TX → ESP32 RX / Tag RX → ESP32 TX
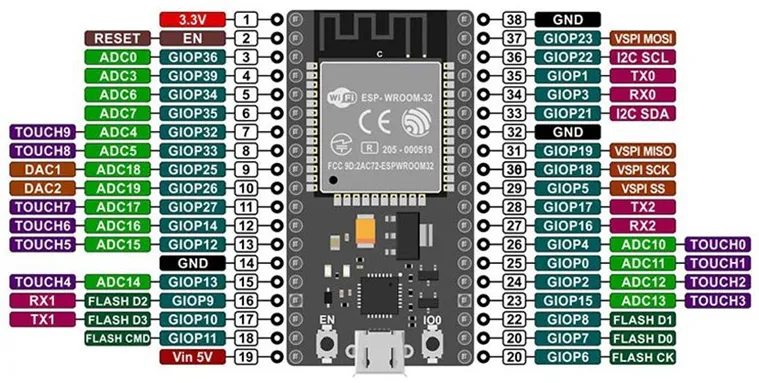
Refer to your ESP32 DevKit pinout to confirm TX2 and RX2 positions.
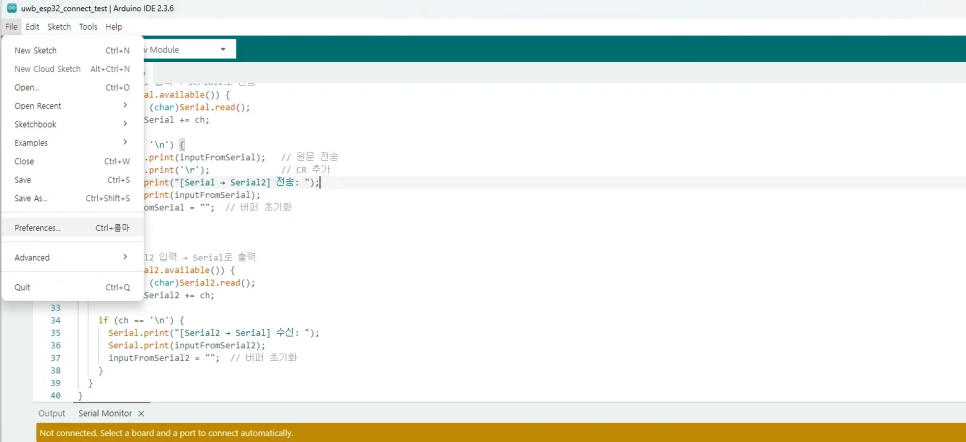
Serial Relay Example Code
Upload the following code to verify communication between USB (PC) and Developer Tag (Serial2):
#define SERIAL2_RX 16  // GPIO16
#define SERIAL2_TX 17  // GPIO17

String inputFromSerial = "";
String inputFromSerial2 = "";

void setup() {
  Serial.begin(115200);  // USB Serial
  Serial2.begin(115200, SERIAL_8N1, SERIAL2_RX, SERIAL2_TX);  // Tag connection
  Serial.println("ESP32 Serial <-> Serial2 relay started");
}

void loop() {
  while (Serial.available()) {
    char ch = (char)Serial.read();
    if (ch != '\n') inputFromSerial += ch;

    if (ch == '\n') {
      Serial2.print(inputFromSerial);
      Serial2.print('\r');
      inputFromSerial = "";
    }
  }

  while (Serial2.available()) {
    char ch = (char)Serial2.read();
    inputFromSerial2 += ch;

    if (ch == '\n') {
      Serial.print("[Serial2 Response] ");
      Serial.print(inputFromSerial2);
      inputFromSerial2 = "";
    }
  }
}
Serial Monitor Settings
- Baud rate:
115200 - Newline option:
Enabled
Try sending the command si to receive system info from the tag.
If the response appears, the setup is successful.

Parsing Location Data (lec / lep)
We now go beyond simple echo checks and parse real location data:
lep: Outputs position only
lec: Outputs anchor distances + position
LEP Parsing – Tag Position (X, Y, Z)
void parseLEP(String line) {
  Serial.println("[LEP Position Result]");
  int idx = 0;
  String parts[5];
  while (line.length() > 0 && idx < 5) {
    int comma = line.indexOf(',');
    if (comma == -1) {
      parts[idx++] = line;
      break;
    } else {
      parts[idx++] = line.substring(0, comma);
      line = line.substring(comma + 1);
    }
  }

  Serial.print("X: "); Serial.println(parts[1]);
  Serial.print("Y: "); Serial.println(parts[2]);
  Serial.print("Z: "); Serial.println(parts[3]);
  Serial.print("Quality (QF): "); Serial.println(parts[4]);
  Serial.println();
}
- Example Output

LEC Parsing – Anchor Distances + Tag Position
void parseLEC(String line) {
  Serial.println("[LEC Distance + Position Result]");

  int posIndex = line.indexOf("POS,");
  if (posIndex == -1) {
    Serial.println("→ POS data missing");
    return;
  }

  String distPart = line.substring(0, posIndex - 1);
  String posPart = line.substring(posIndex);

  int anchorIdx = 0;
  int anStart = 0;
  while ((anStart = distPart.indexOf("AN", anStart)) != -1) {
    int idStart = anStart + 2;
    int idEnd = distPart.indexOf(",", idStart);
    String id = distPart.substring(idStart, idEnd);

    int valStart = idEnd + 1;
    float x = distPart.substring(valStart, distPart.indexOf(",", valStart)).toFloat();
    valStart = distPart.indexOf(",", valStart) + 1;
    float y = distPart.substring(valStart, distPart.indexOf(",", valStart)).toFloat();
    valStart = distPart.indexOf(",", valStart) + 1;
    float z = distPart.substring(valStart, distPart.indexOf(",", valStart)).toFloat();
    valStart = distPart.indexOf(",", valStart) + 1;
    float d = distPart.substring(valStart, distPart.indexOf(",", valStart)).toFloat();

    Serial.print("AN"); Serial.print(anchorIdx++); Serial.print(" (ID "); Serial.print(id); Serial.print("): ");
    Serial.print("x="); Serial.print(x); Serial.print(", y="); Serial.print(y); Serial.print(", z="); Serial.print(z);
    Serial.print(" → Distance: "); Serial.print(d); Serial.println("m");

    anStart = valStart;
  }

  Serial.println("▶ Tag Position:");
  parseLEP(posPart);
}
- Example Output

Conclusion
With this guide, you’ve learned how to:
- Connect the GrowSpace UWB Developer Tag to an ESP32 board
- Send
lec/lepcommands - Parse and display real-time 3D location data via Arduino
Thanks to the ESP32’s flexibility and hardware serial ports, you can quickly build a testbed and verify UWB-based indoor positioning.