
Here’s how to register seminar/event schedules displayed on the expo home screen. Registered schedules are displayed as cards containing a title, location, date, and time, as shown below.
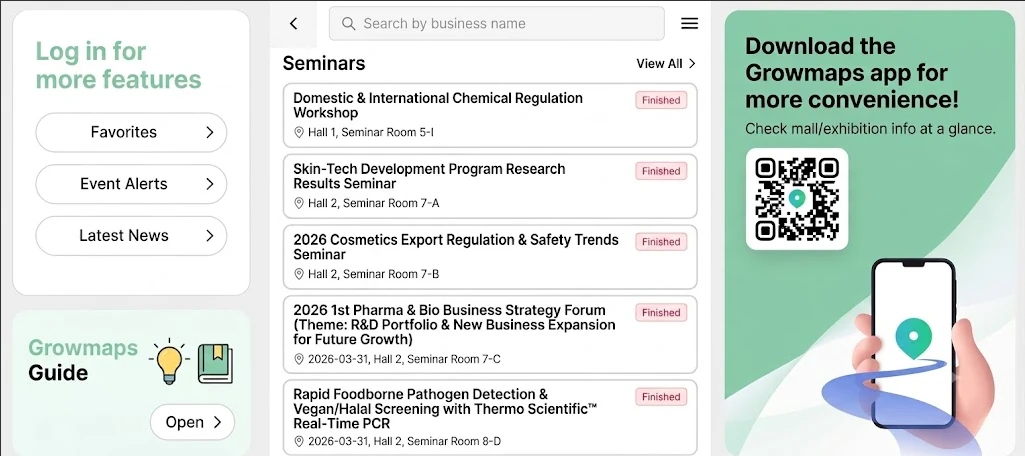
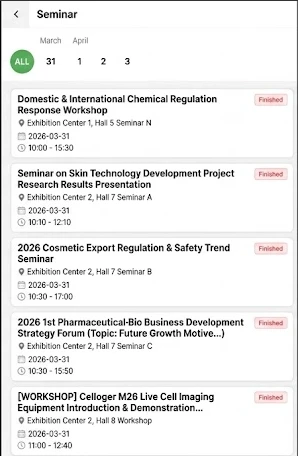
Adding Schedule Content in Home Screen Setting
- Click [Home Screen Setting] in the top menu.
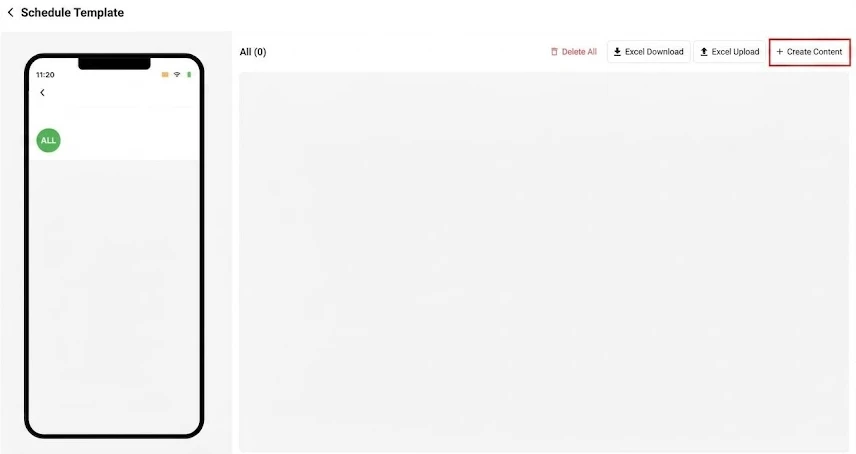
- Click the [+ Create Content] button in the top right.
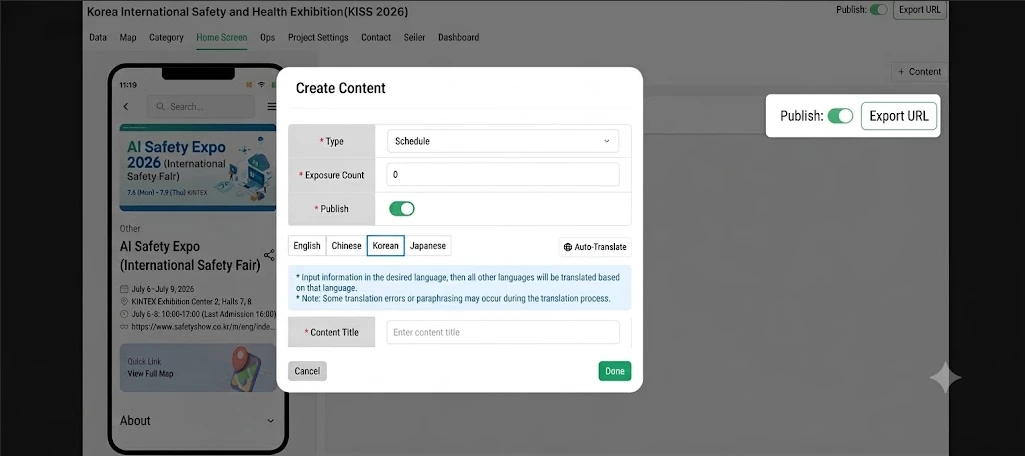
In the Create Content popup, configure the following fields. (
*indicates required)*Type: Select Schedule from the list.
- *Number of Displays: Enter the number of schedule items to show on the home screen.
*Public: Turn on the toggle to display it on screen.
Select a language tab (English, Chinese, Korean, Japanese) and enter the content.
Click [Auto Translate] to automatically translate the remaining languages based on the language you entered.
- *Content Title: Enter the name of the schedule item.
- Click [Complete] to finish registering the schedule.
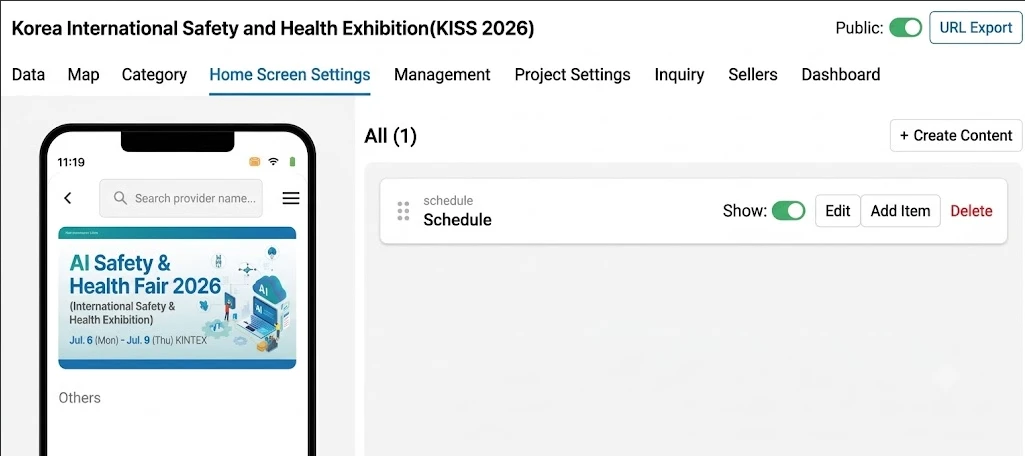
There are two ways to create a schedule.
- Method 1. Register via the Excel template (COMMON sheet) — convenient for uploading many at once
- Method 2. Add directly in Home Screen Setting — when Excel is inconvenient
Method 1. Registering a Schedule via Excel
First, download and fill out the Excel template. (Please contact the person in charge for the template file.)
To register a single schedule, you need to fill in both the COMMON sheet and the language sheet (Korean). Since the same row (order) in both sheets is linked to the same schedule item, enter both sheets in the same order.
- COMMON sheet → schedule/connection info (booth/URL, date, time)
- Language sheet (Korean, etc.) → content displayed on screen (title, location, etc.)
① COMMON Sheet — Schedule/Connection Info

| Column | Field | Description | Required |
|---|---|---|---|
| A | Booth number | Booth number | 🔴 Either A or B required |
| B | URL | Link address | 🔴 Either A or B required |
| C | Year | Year | 🟡 Required |
| D | Month | Month | 🟡 Required |
| E | Day | Day | 🟡 Required |
| F | Start Time (Hour, 0–23) | Start hour (24-hour format) | 🟡 Required |
| G | Start Time (Minute) | Start minute | 🟡 Required |
| H | End Time (Hour, 0–23) | End hour (24-hour format) | 🟡 Required |
| I | End Time (Minute) | End minute | 🟡 Required |
⚠️ Be sure to follow these rules
- For the fields grouped under the Excel’s red header
One of the two is required— Booth number (A) and URL (B) — you must enter at least one of the two. If both are left blank, the schedule will not be registered.- Fields under the yellow header
Required(C–I: year, month, day, start/end time) are all required. None of them can be left blank.- Enter time in 24-hour format. Example: 3:30 PM → Hour
15, Minute30
② Language Sheet (Korean) — Display Content

The title, location, and other details shown on the home screen card are entered in the language sheet.
| Field | Description | Required |
|---|---|---|
| Title | Seminar title | 🟡 Required |
| Speaker | Speaker / organizing body | Optional |
| Location | Location (e.g., Hall 1, Seminar Room H in Hall 5) | 🟡 Required |
| Content | Detailed content | Optional |
| Image URL | Featured image address | Optional |
⚠️ Be sure to follow these rules
- In the language sheet (Korean, etc.) as well, the fields under the yellow header
Required— Title and Location — must be entered.- Location is not filled in automatically, so it must be entered manually.
Once finished, save the file and upload it to register the schedule. (For upload instructions, see the “Bulk Upload via Excel Template” document.)
Method 2. Adding Directly in Home Screen Setting
If working with Excel is inconvenient, you can add seminar items directly from the admin screen.
- Click [Home Screen Setting] in the top menu.
- Click the [+ Create Content] button in the top right.
- Enter the schedule information (title, booth or URL, date, start/end time).
💡 Be sure to complete the translation step When creating content, enter it in Korean first, then click [Auto Translate]. This translates it into English, Chinese, and Japanese so it displays correctly in all languages. This step must be completed. (Note that the translation process may produce some mistranslations or paraphrasing, so we recommend checking it after registration.)
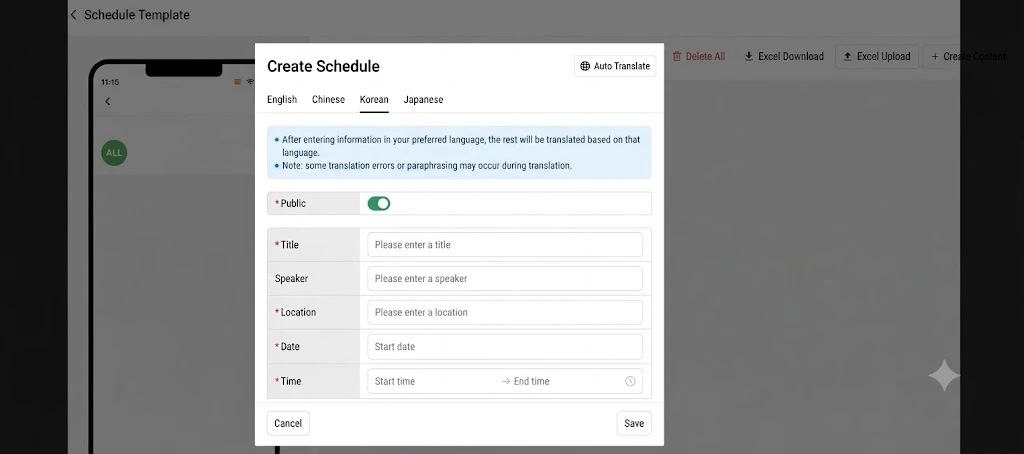
- Once saved, the schedule card will be added to the home screen.
💡 The added schedule can be checked right away in the phone preview on the left side of the screen.