
In This Article
This article explains how to connect a GrowSpace developer tag to an Arduino ESP32 board and receive and parse real-time location data using the lec and lep commands. Even if you’re connecting an ESP32 and tag for the first time, we’ll walk you through it step by step.
Unlike the UNO, the ESP32 supports multiple hardware serial ports and is well suited for building a compact test setup.
What You’ll Need
| Item | Purpose |
|---|---|
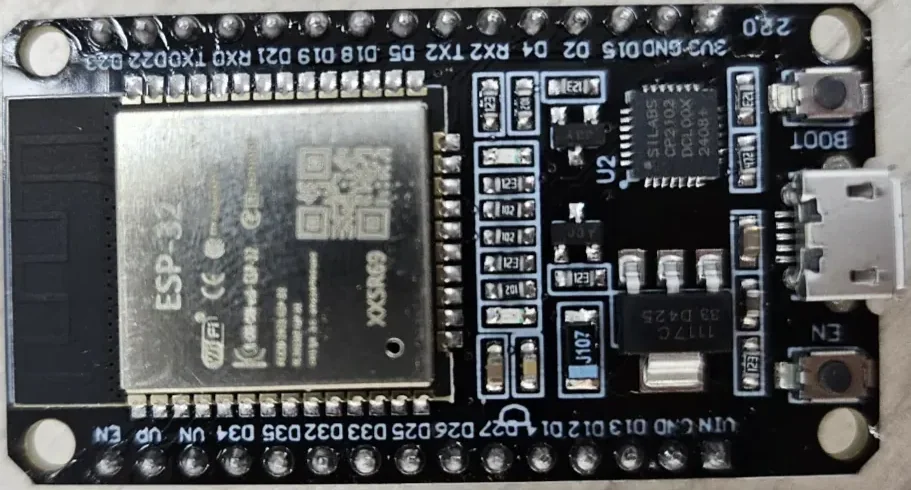
ESP32 board (e.g., DevKitC)
| Serial reception and parsing |
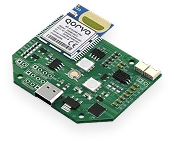
GrowSpace developer tag
| Location data transmitting device |
| Arduino IDE | Writing and uploading code |
| Jumper cables (4-pin) | For connecting TX, RX, GND, 3.3V |
Arduino IDE Setup
Installation
- Download the installer from the official Arduino IDE page
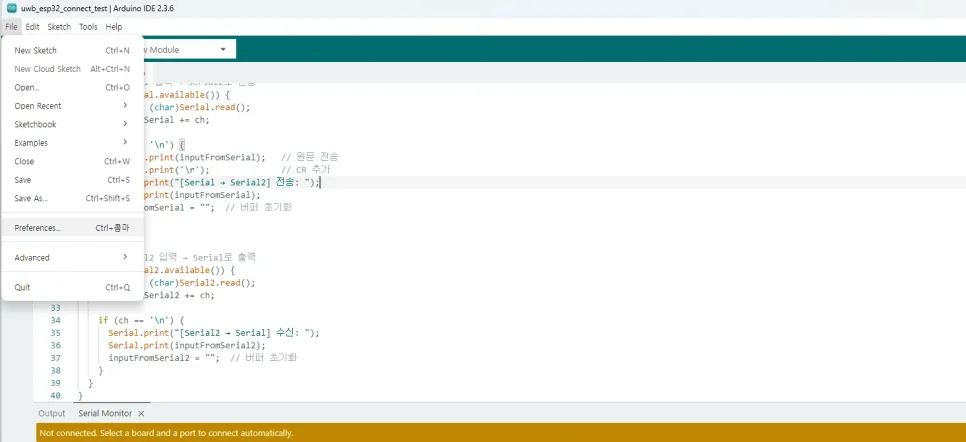
- Arduino IDE launch →
File > Preferences
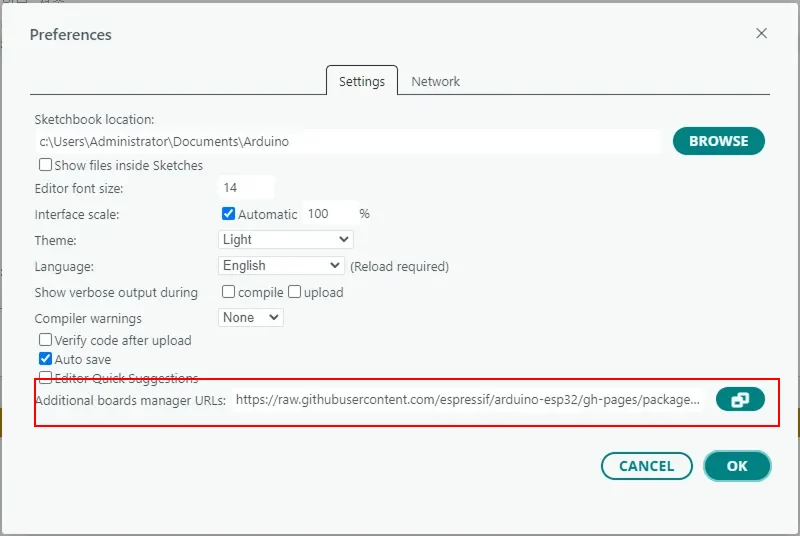
- Enter the address below into Additional Board Manager URLs:
https://raw.githubusercontent.com/espressif/arduino-esp32/gh-pages/package_esp32_index.json
Tools > Board > Board Manager→ install ESP32
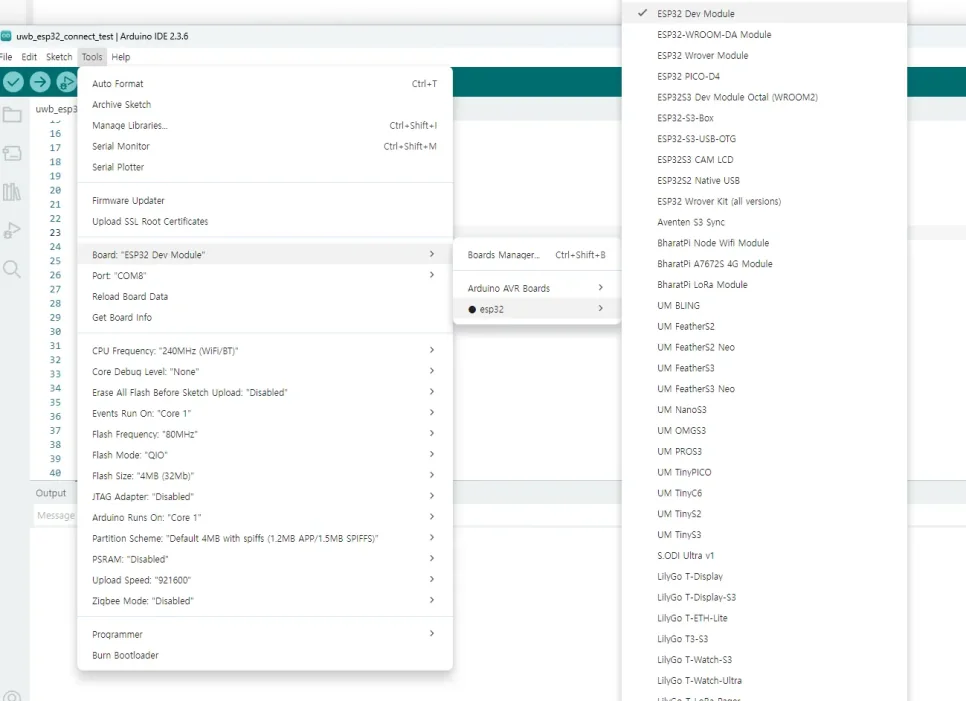
- After installing, select
Tools > Board > ESP32 Dev Module - Select the automatically detected port under
Tools > Port
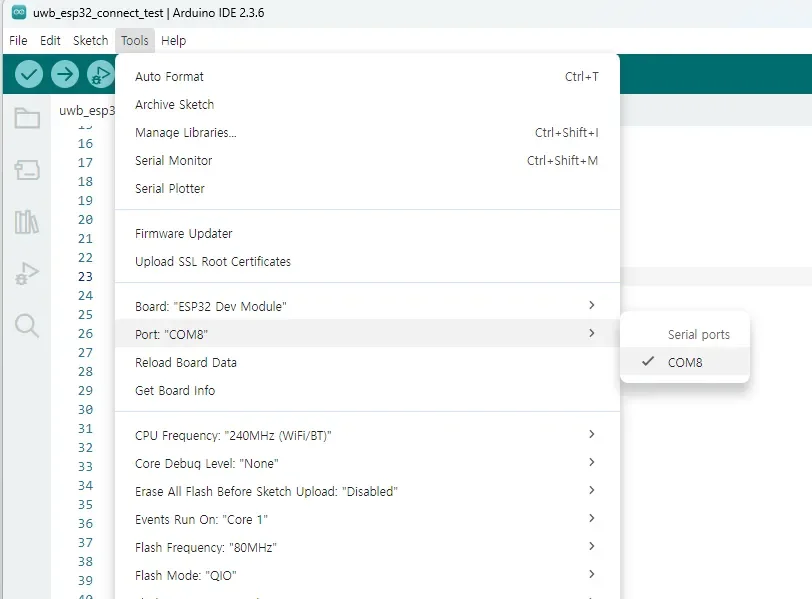
Serial Connection Setup
The left connector of the GrowSpace developer tag supports 3.3V serial.
Connect it to the ESP32 board’s TX2/RX2 pins as follows:
| Developer Tag | ESP32 Board |
|---|---|
| TX | GPIO 16 (RX2) |
| RX | GPIO 17 (TX2) |
| GND | GND |
| 3.3V | 3.3V |
⚠️ TX and RX must be cross-connected.
E.g.: Tag TX → ESP32 RX, Tag RX → ESP32 TX
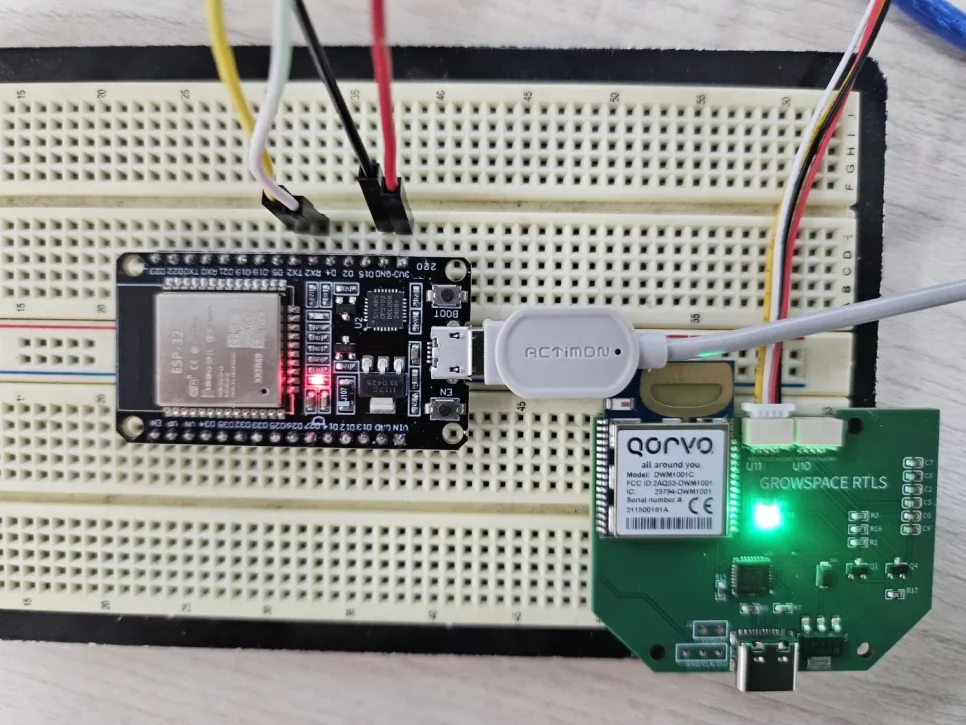
Below is the pinout for the ESP32 DevKit. Check the location of TX2/RX2 and connect them precisely:

Serial Relay Example Code
This code has the ESP32 relay serial data between the PC and the tag.
#define SERIAL2_RX 16  // GPIO16
#define SERIAL2_TX 17  // GPIO17

String inputFromSerial = "";
String inputFromSerial2 = "";

void setup() {
  Serial.begin(115200);
  Serial2.begin(115200, SERIAL_8N1, SERIAL2_RX, SERIAL2_TX);
  Serial.println("ESP32 Serial <-> Serial2 relay (split on \n, add \r, parse lep/lec)");
}

void loop() {
  // Serial input -> send to Serial2
  while (Serial.available()) {
    char ch = (char)Serial.read();
    if (ch != '\n') {
      inputFromSerial += ch;
    }

    if (ch == '\n') {
      Serial2.print(inputFromSerial);
      Serial2.print('\r');  // add CR
      inputFromSerial = "";
    }
  }

  // Serial2 input -> parse and print
  while (Serial2.available()) {
    char ch = (char)Serial2.read();
    inputFromSerial2 += ch;

    if (ch == '\n') {
      inputFromSerial2.trim();

      if (inputFromSerial2.startsWith("POS,")) {
        parseLEP(inputFromSerial2);
      } else if (inputFromSerial2.startsWith("DIST,")) {
        parseLEC(inputFromSerial2);
      } else {
        Serial.print("[Serial2 -> Serial] received: ");
        Serial.println(inputFromSerial2);
      }

      inputFromSerial2 = "";
    }
  }
}
- Serial monitor settings: 115200bps, set line ending to
Newline - If entering the
sicommand prints device info, the connection succeeded.
Location Data Parsing Example (lep / lec commands)
The developer tag returns its current location info via the lep or lec command. The code below parses that response and prints it in a readable format.
#define SERIAL2_RX 16  // GPIO16
#define SERIAL2_TX 17  // GPIO17

String inputFromSerial = "";
String inputFromSerial2 = "";

void setup() {
  Serial.begin(115200);
  Serial2.begin(115200, SERIAL_8N1, SERIAL2_RX, SERIAL2_TX);
  Serial.println("ESP32 Serial <-> Serial2 relay (split on \n, add \r, parse lep/lec)");
}

void loop() {
  // Serial input -> send to Serial2
  while (Serial.available()) {
    char ch = (char)Serial.read();
    if (ch != '\n') {
      inputFromSerial += ch;
    }

    if (ch == '\n') {
      Serial2.print(inputFromSerial);
      Serial2.print('\r');  // add CR
      inputFromSerial = "";
    }
  }

  // Serial2 input -> parse and print
  while (Serial2.available()) {
    char ch = (char)Serial2.read();
    inputFromSerial2 += ch;

    if (ch == '\n') {
      inputFromSerial2.trim();

      if (inputFromSerial2.startsWith("POS,")) {
        parseLEP(inputFromSerial2);
      } else if (inputFromSerial2.startsWith("DIST,")) {
        parseLEC(inputFromSerial2);
      } else {
        Serial.print("[Serial2 -> Serial] received: ");
        Serial.println(inputFromSerial2);
      }

      inputFromSerial2 = "";
    }
  }
}

// LEP result parser: POS,x,y,z,qf
void parseLEP(String line) {
  Serial.println("[LEP location result]");
  int idx = 0;
  String parts[5];

  while (line.length() > 0 && idx < 5) {
    int comma = line.indexOf(',');
    if (comma == -1) {
      parts[idx++] = line;
      break;
    } else {
      parts[idx++] = line.substring(0, comma);
      line = line.substring(comma + 1);
    }
  }

  Serial.print("X: "); Serial.println(parts[1]);
  Serial.print("Y: "); Serial.println(parts[2]);
  Serial.print("Z: "); Serial.println(parts[3]);
  Serial.print("Quality (QF): "); Serial.println(parts[4]);
  Serial.println();
}
// Simple safe split utility
static void splitByComma(const String& s, std::vector<String>& out) {
  out.clear();
  int start = 0;
  while (start <= s.length()) {
    int comma = s.indexOf(',', start);
    if (comma == -1) {
      out.push_back(s.substring(start));
      break;
    } else {
      out.push_back(s.substring(start, comma));
      start = comma + 1;
    }
  }
}

// LEC result parser (safe token parsing): DIST, n, (ANk, id, x, y, z, d)*, POS, x, y, z, qf
void parseLEC(String line) {
  Serial.println("[LEC distance + location result]");

  line.trim();
  std::vector<String> t;
  splitByComma(line, t);
  if (t.size() < 2 || t[0] != "DIST") {
    Serial.println("-> Format error: no DIST header");
    return;
  }

  int i = 1;
  int anchorCount = t[i++].toInt(); // e.g. 4
  int parsedAnchors = 0;

  // Parse anchor group: ANk, id, x, y, z, d
  while (i + 5 < (int)t.size() && t[i].startsWith("AN")) {
    String anLabel = t[i++];      // AN0, AN1, ...
    String anId    = t[i++];      // 3364, 35BE, ...
    float x = t[i++].toFloat();   // -1.00
    float y = t[i++].toFloat();   // 11.48
    float z = t[i++].toFloat();   // 0.00
    float d = t[i++].toFloat();   // 2.80

    Serial.print(anLabel); Serial.print(" (ID ");
    Serial.print(anId); Serial.print("): ");
    Serial.print("x="); Serial.print(x);
    Serial.print(", y="); Serial.print(y);
    Serial.print(", z="); Serial.print(z);
    Serial.print(" -> distance: "); Serial.print(d); Serial.println("m");

    parsedAnchors++;
  }

  if (parsedAnchors != anchorCount) {
    Serial.print("-> Warning: anchor count in DIST (");
    Serial.print(anchorCount);
    Serial.print(") does not match parsed count (");
    Serial.print(parsedAnchors);
    Serial.println(")");
  }

  // POS, x, y, z, qf
  if (i < (int)t.size() && t[i] == "POS") {
    // parseLEP expects the full "POS,..." string, so rebuild it as-is and pass it in
    String posLine = "POS";
    for (int k = i + 1; k < (int)t.size(); ++k) {
      posLine += ",";
      posLine += t[k];
    }
    Serial.println(">> Tag location:");
    parseLEP(posLine);
  } else {
    Serial.println("-> No POS info");
  }
}
- lep run result

- lec run result

Test Procedure Summary
- After uploading the code above, open the Arduino IDE Serial Monitor
- Enter the
leporleccommand - Check that the location info is printed correctly (XYZ coordinates, distance, etc.)
Wrap-Up
This manual walked through the full process of connecting a GrowSpace developer tag to an ESP32, sending location commands over serial, and receiving/parsing the data.
Through this process, you can track a single tag's location in real time, and it can be extended further into BLE transmission, Wi-Fi integration, MQTT integration, and other experiments.
If you run into a connection issue or no response during the exercise, please double check whether TX/RX are cross-connected and that your serial port settings are correct!