
This guide covers a gateway-based configuration.
If you’re using the Creator Kit Q1 with a listener-based test setup instead,
please also see the Listener Configuration guide.
In This Guide
This guide walks through the full process of using a GrowSpace UWB gateway to collect tag and anchor data and connect it to a server or the cloud via MQTT.
If you need to send real-time position data externally, you can build your system around a gateway.
What Is a Gateway?
A gateway collects distance data between UWB devices (tags/anchors) and sends it to a server over the MQTT protocol.
It performs a similar role to a GrowSpace listener, but supports LAN or Wi-Fi transmission, making it more reliable for larger spaces.
For large spaces, cloud integration, or mobile app connectivity, we recommend using a gateway instead of a listener.
Understanding Gateway Status from the LEDs
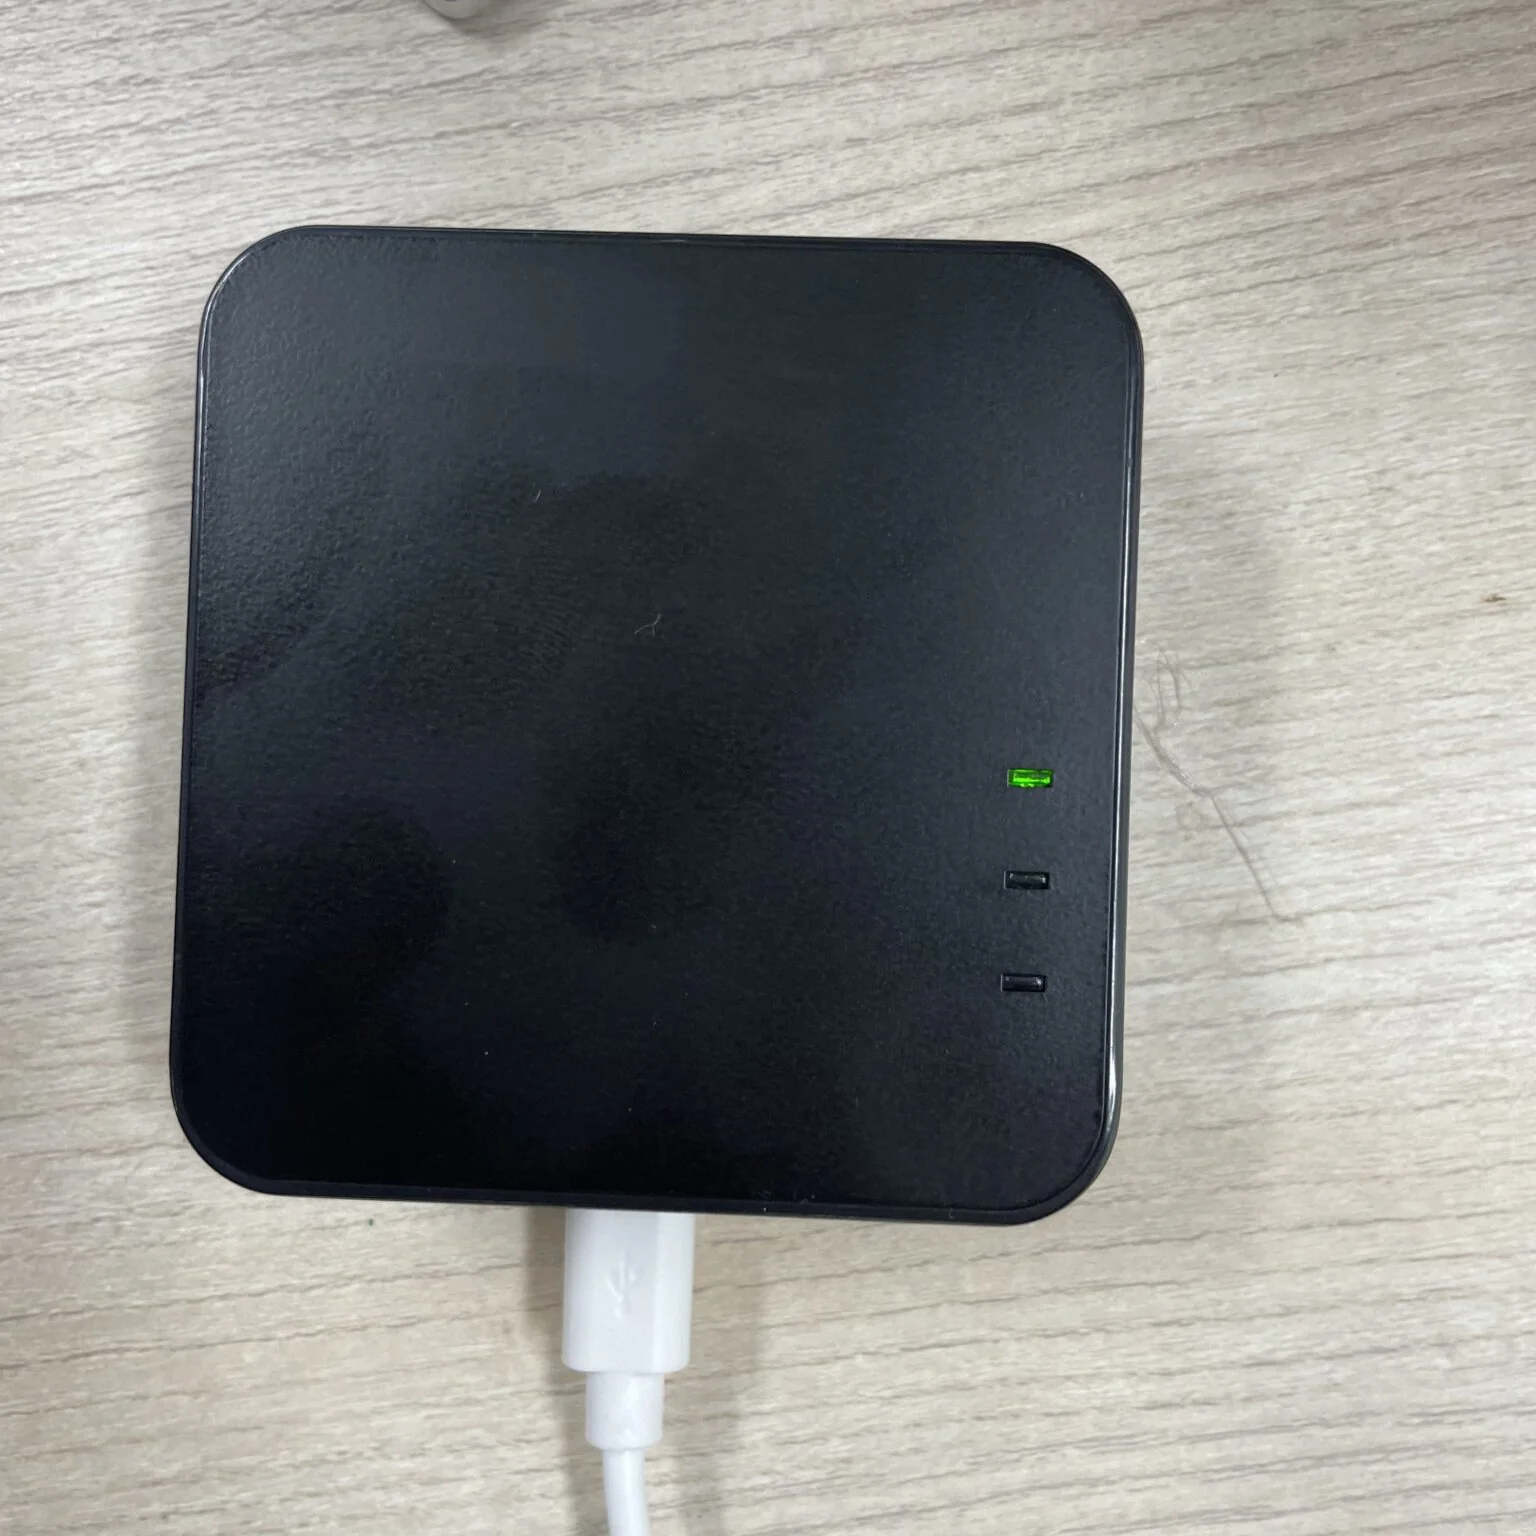
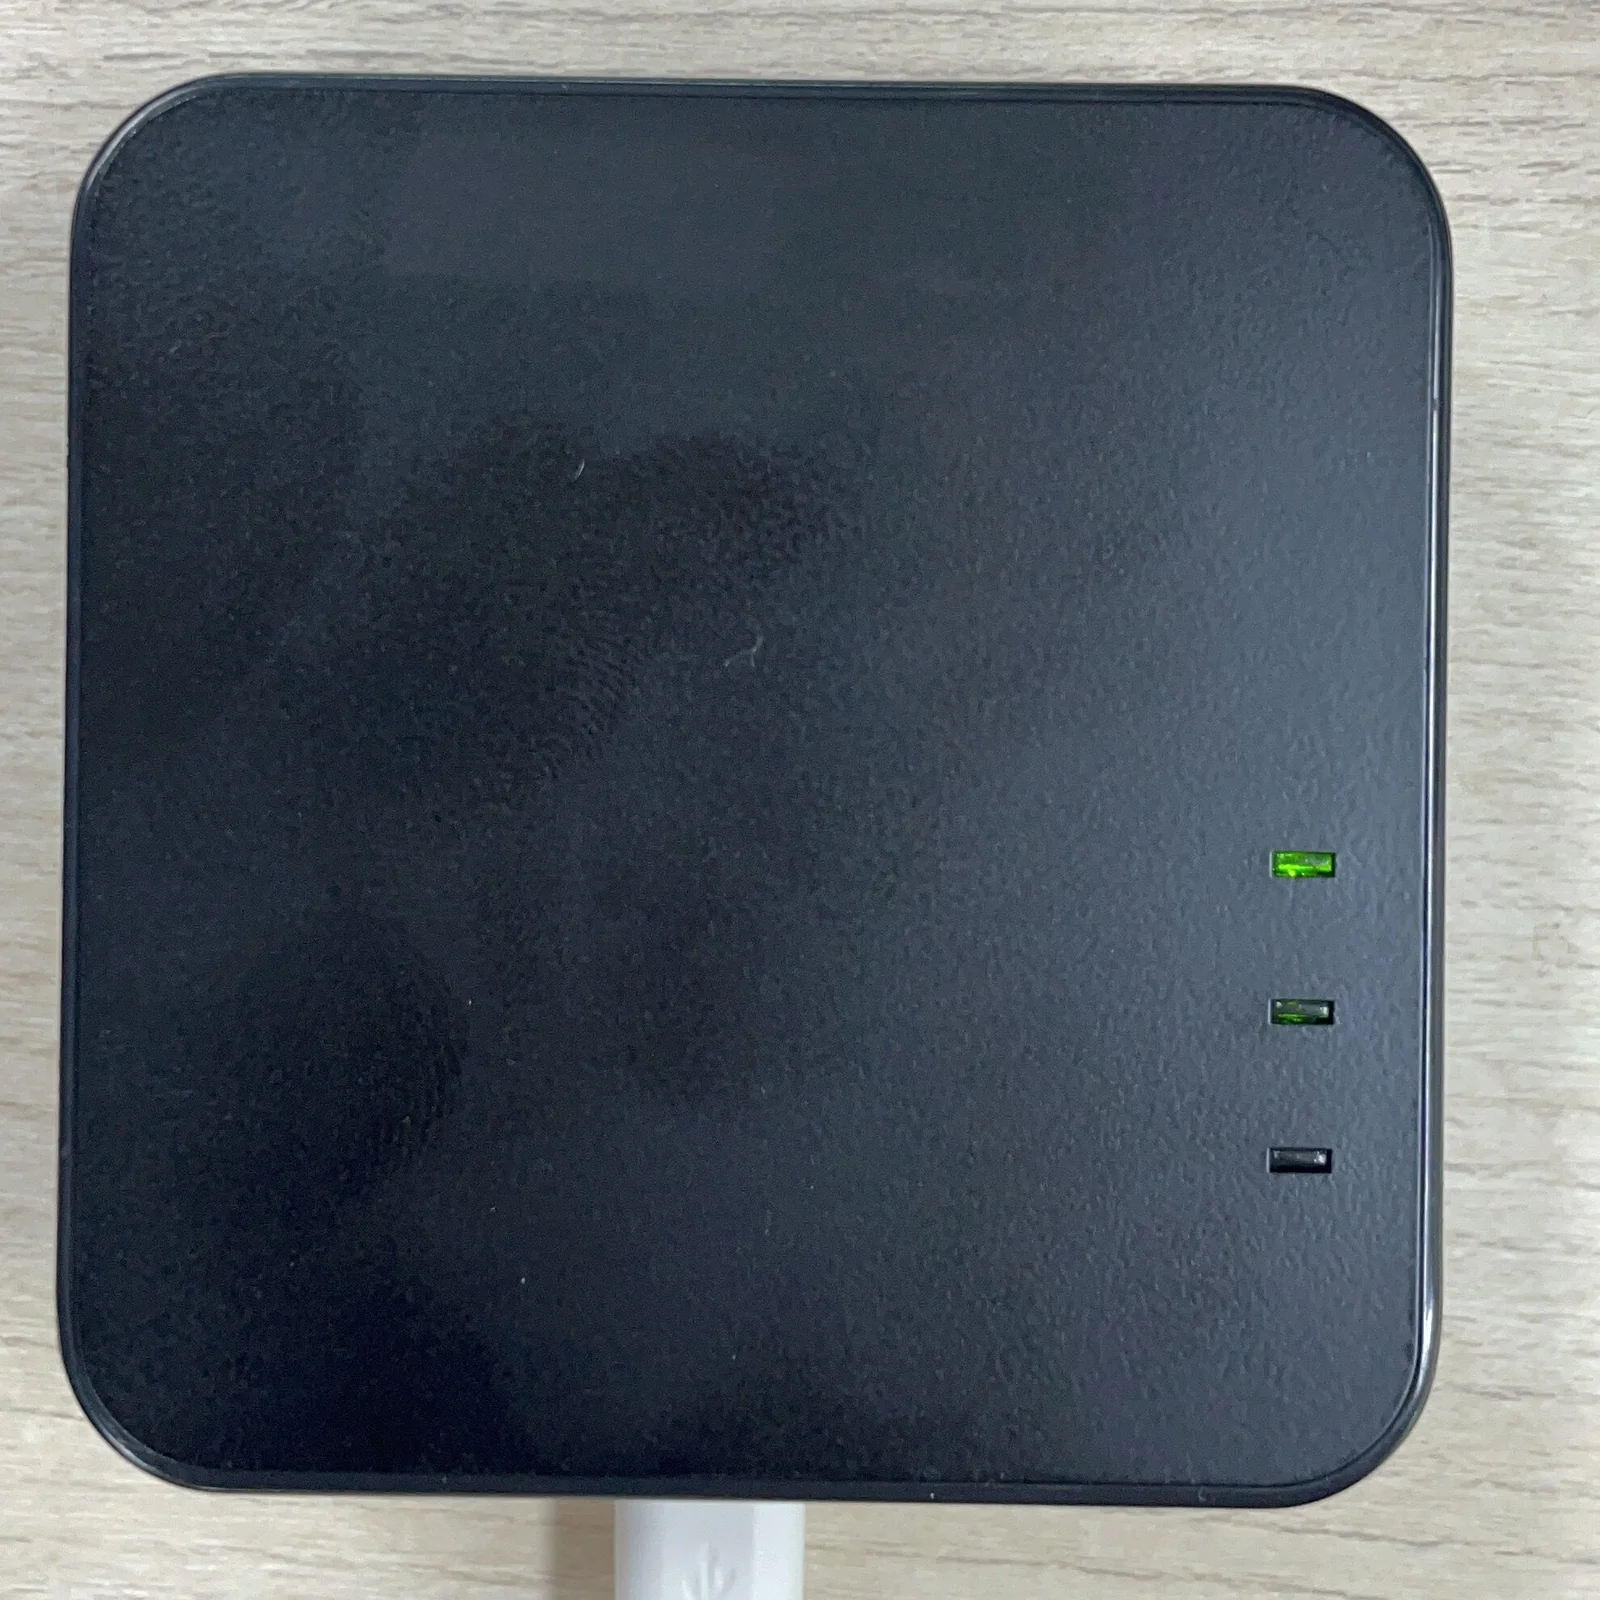
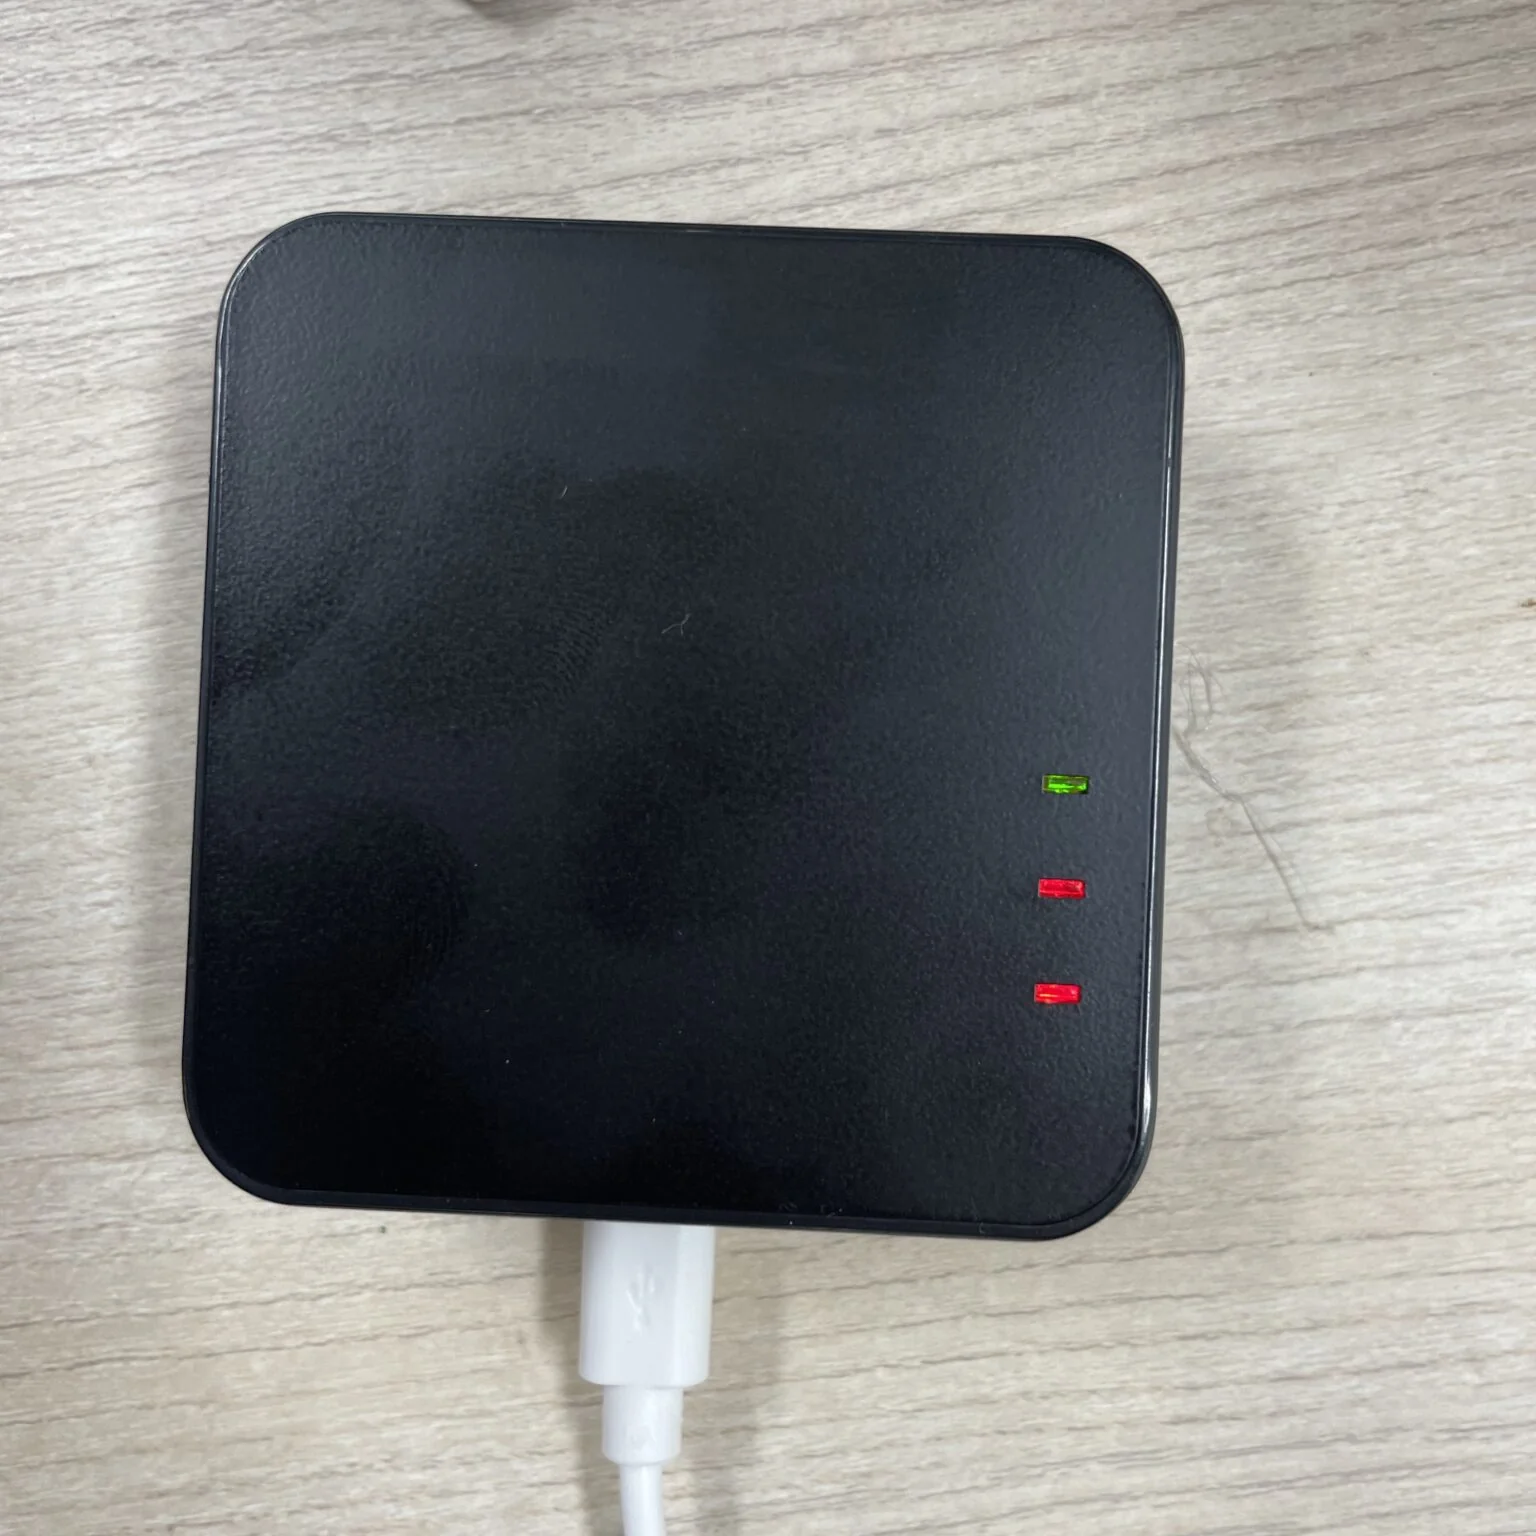
| LED | Color | Function | Status |
|---|---|---|---|
| LED1 | Green | Power status | Always on |
| LED2 | Green | Data transmission status | Blinks while sending data |
| LED3 | Red | Error status | Blinks on missing configuration or a network error |
If LED3 keeps blinking → check whether your MQTT or Wi-Fi information is missing.
Opening the Web Console
A gateway is designed to be configured entirely from a web browser, with no separate program to install.
Configuration is done through GrowSpace’s dedicated Web Console.
How to Connect
- Launch the Google Chrome browser.
⚠️ You must use Chrome. Other browsers (Edge, Safari, Firefox, etc.) may not detect the serial device correctly.
- Go to the Web Console.
- Click “Gateway Setup Program” on the right.
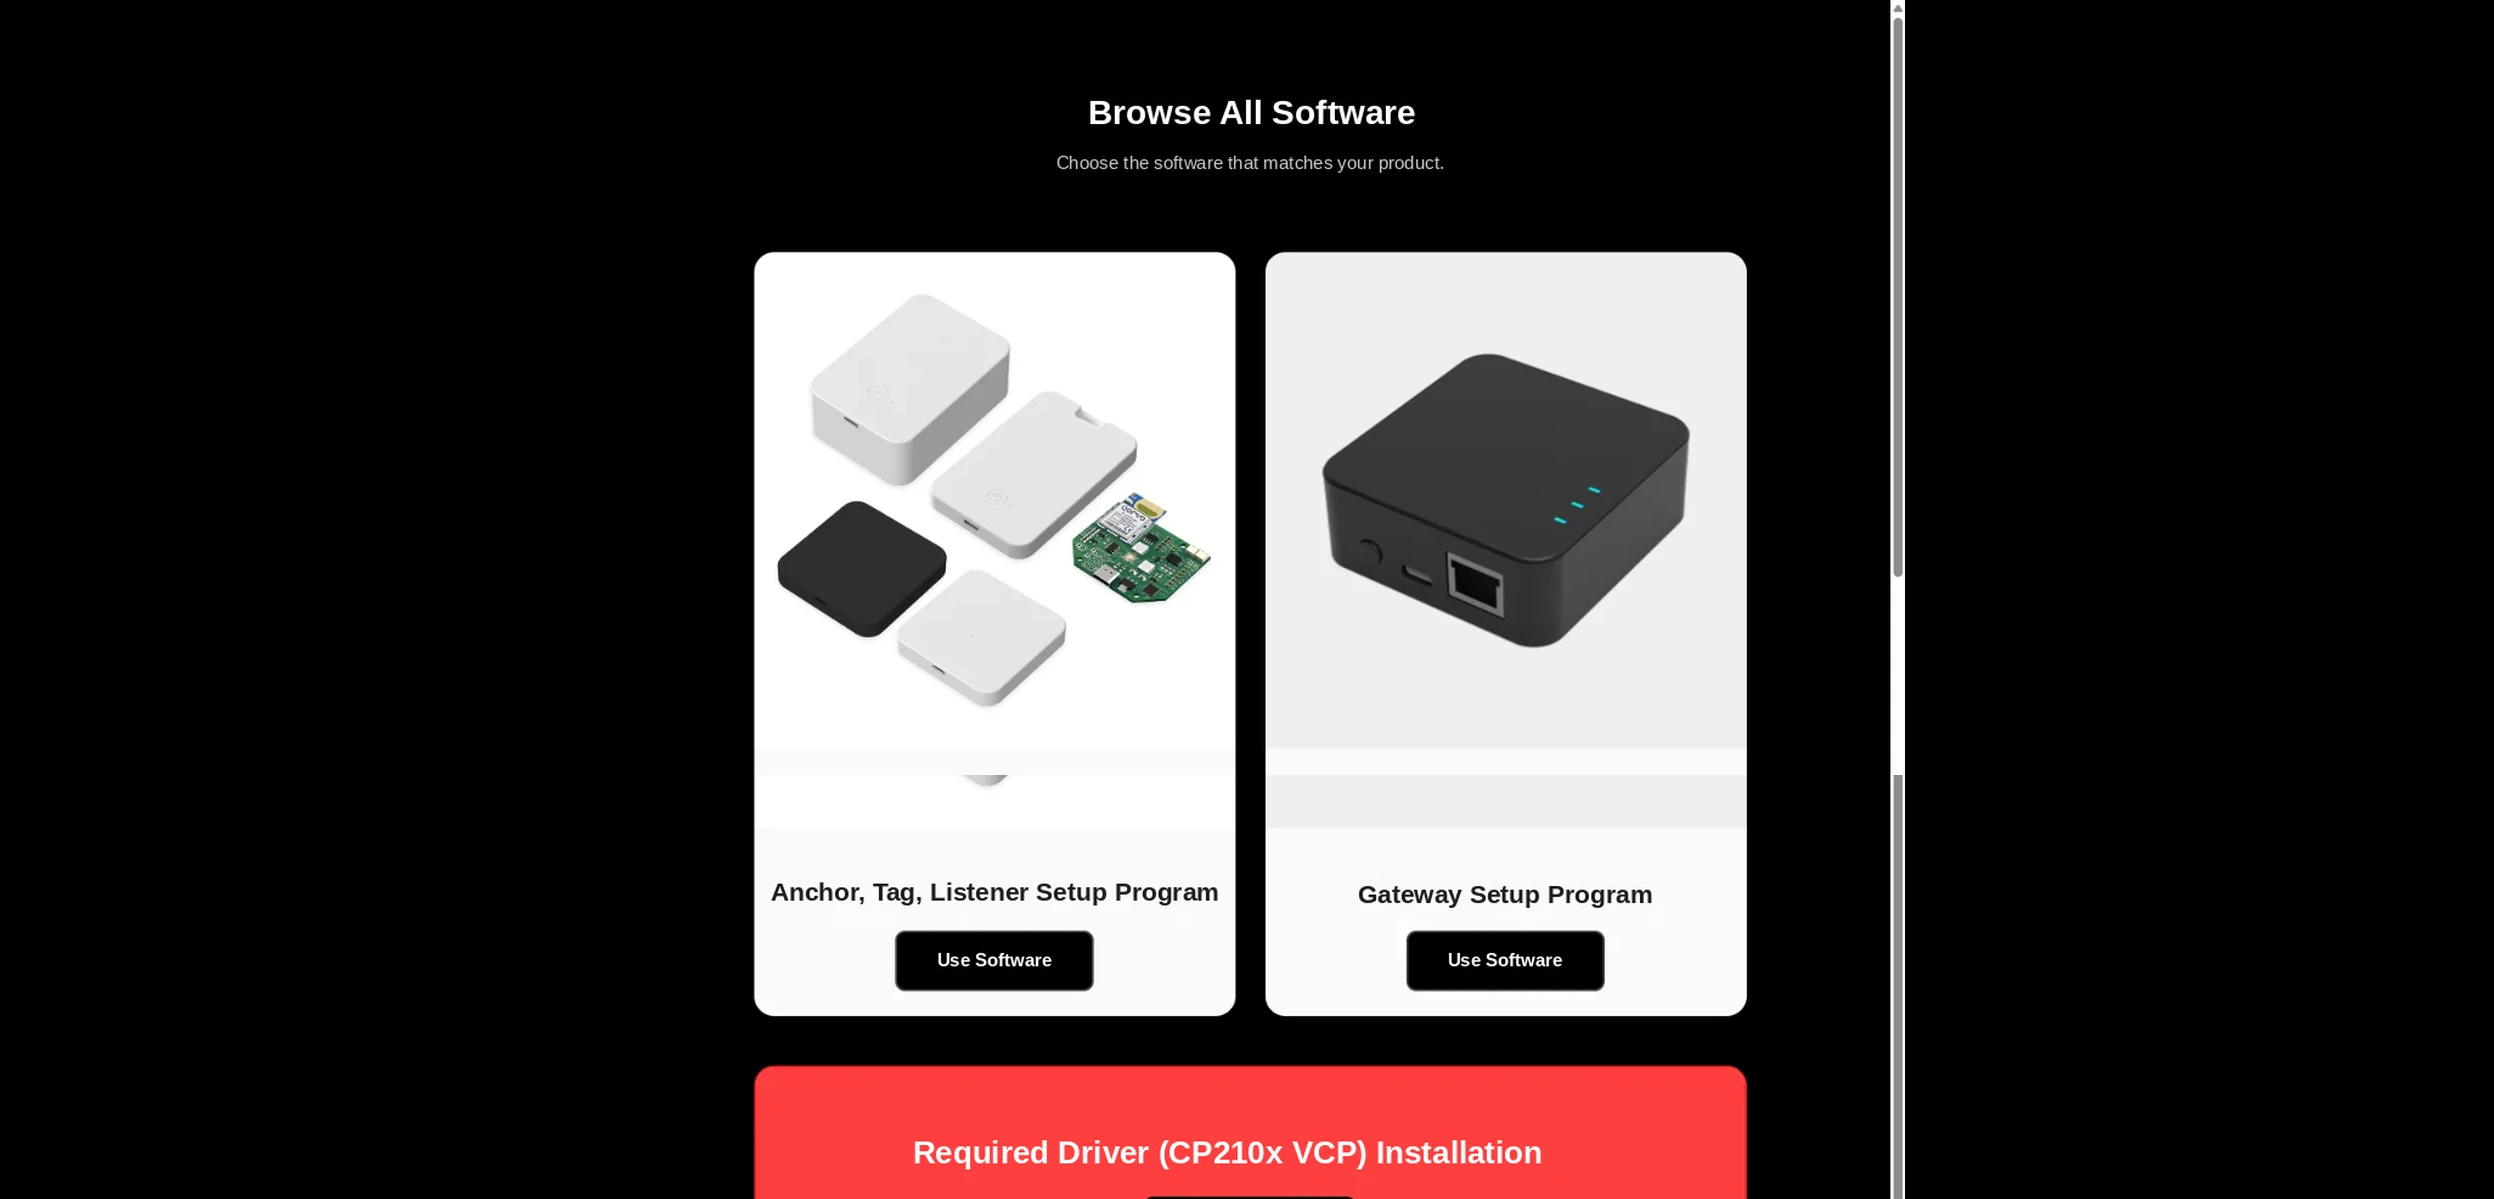
- The following setup screen appears, where you’ll generate an API key or enter one you already have.
- If this is your first time, click [Generate API Key] to issue a new one.
- If you already have a key, paste it into the field and continue.
The API key is used to authenticate the device and store its settings, so keep it from being exposed externally.
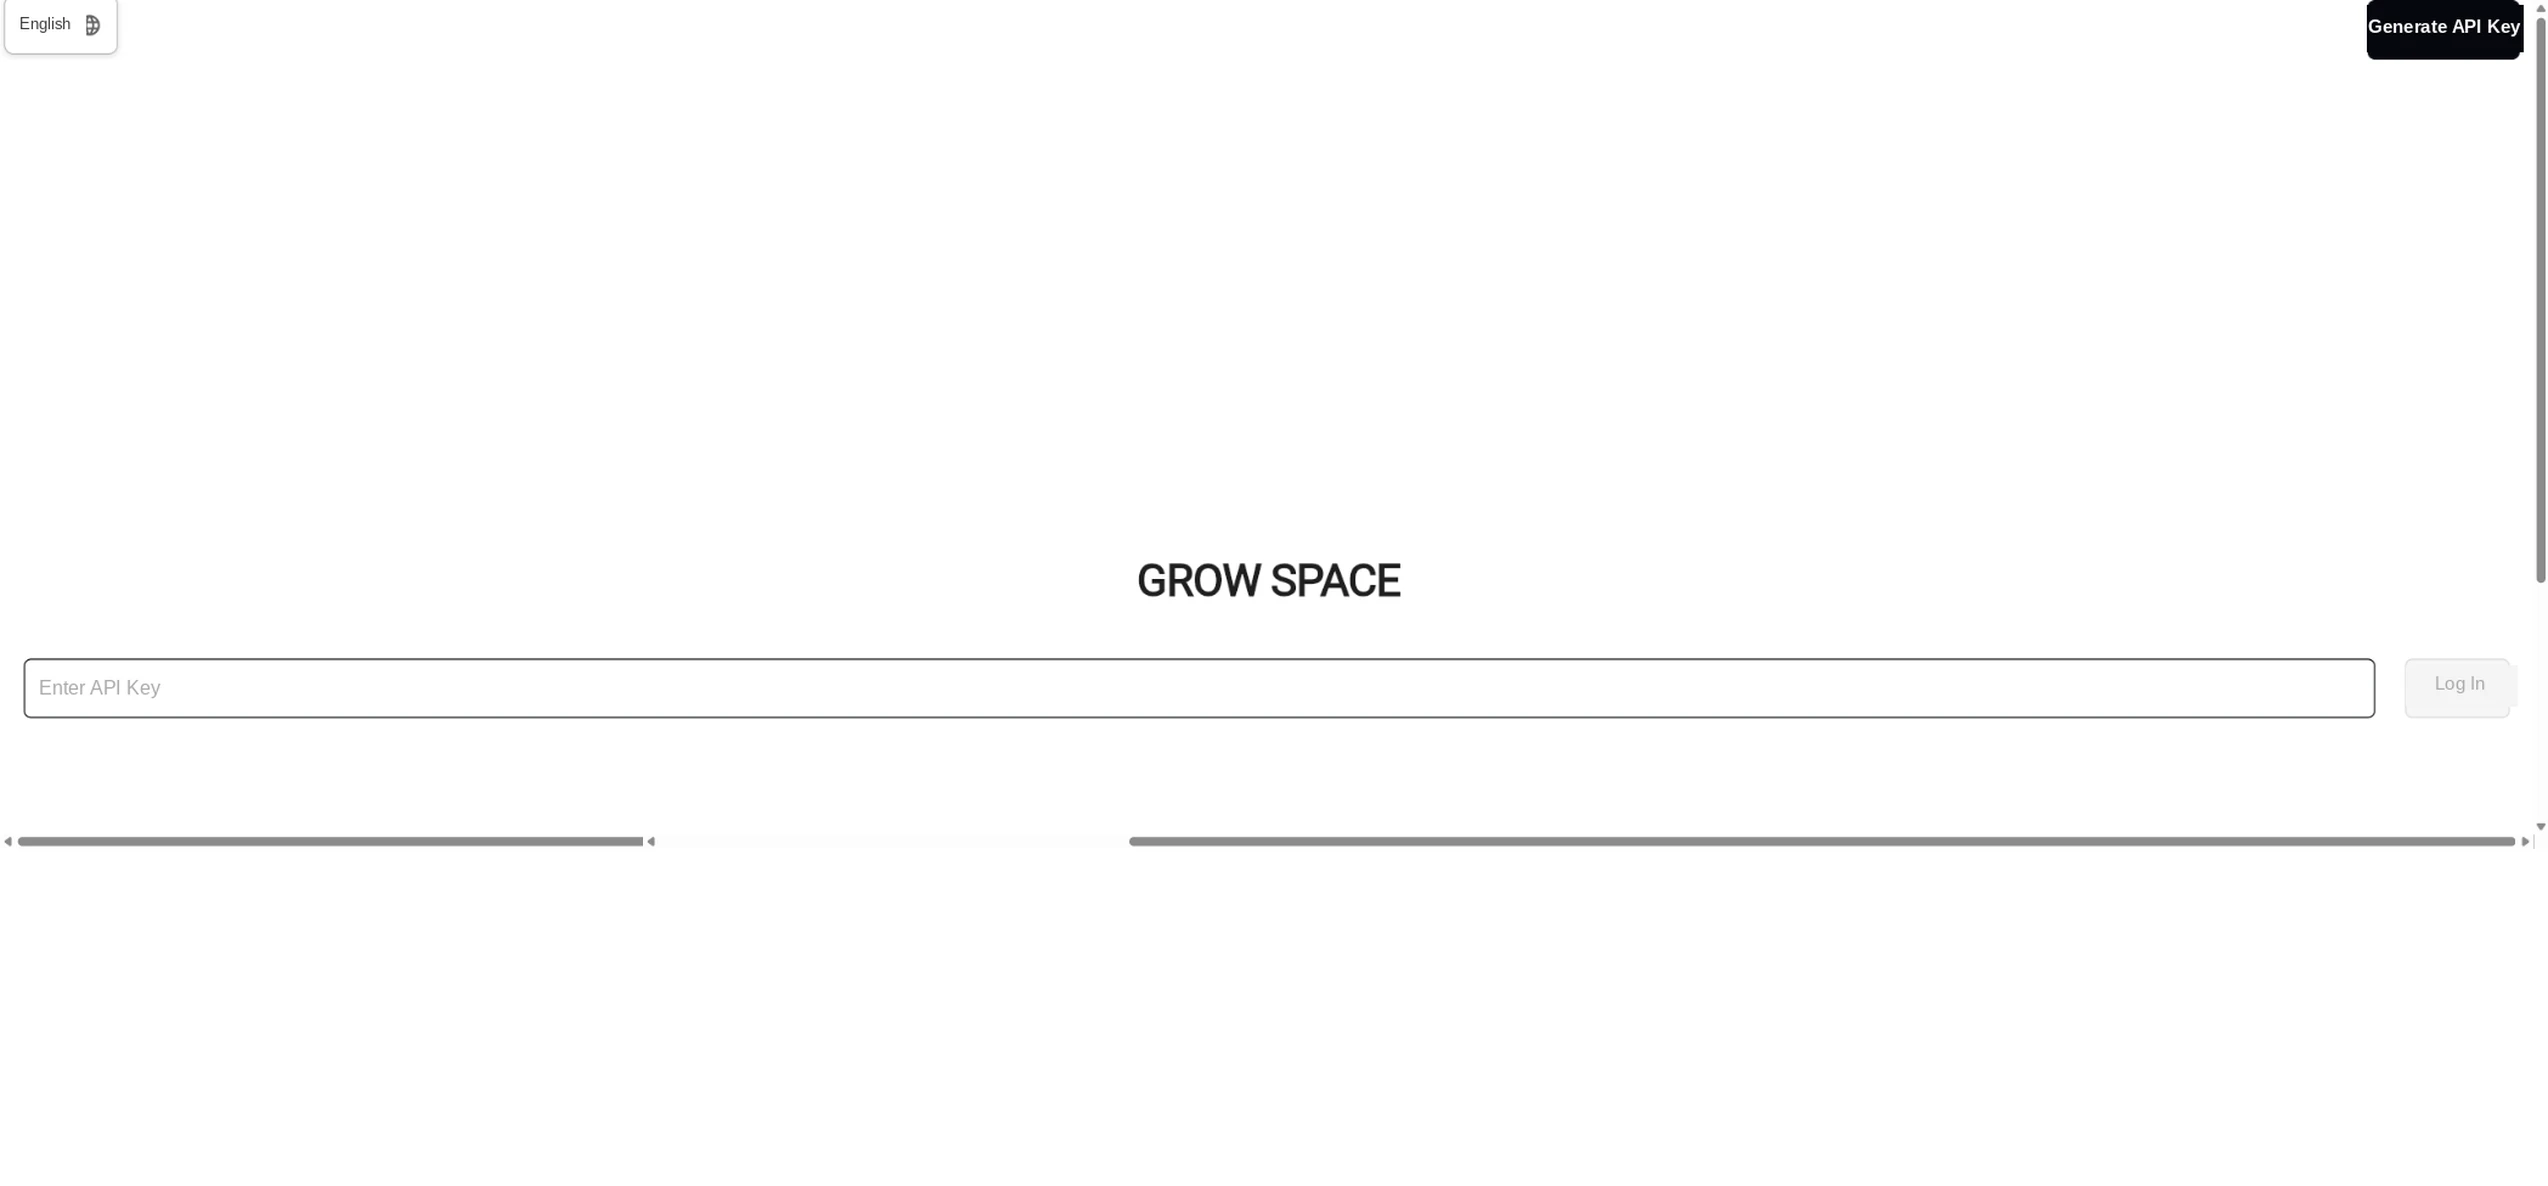
Generating an API Key
An API key is required for MQTT integration with your gateway.
Here’s how to generate one:
- Click [Generate API Key] in the top menu or on the first screen.
- Enter a company or project name.
This name is just for identifying the key and can be anything you like.
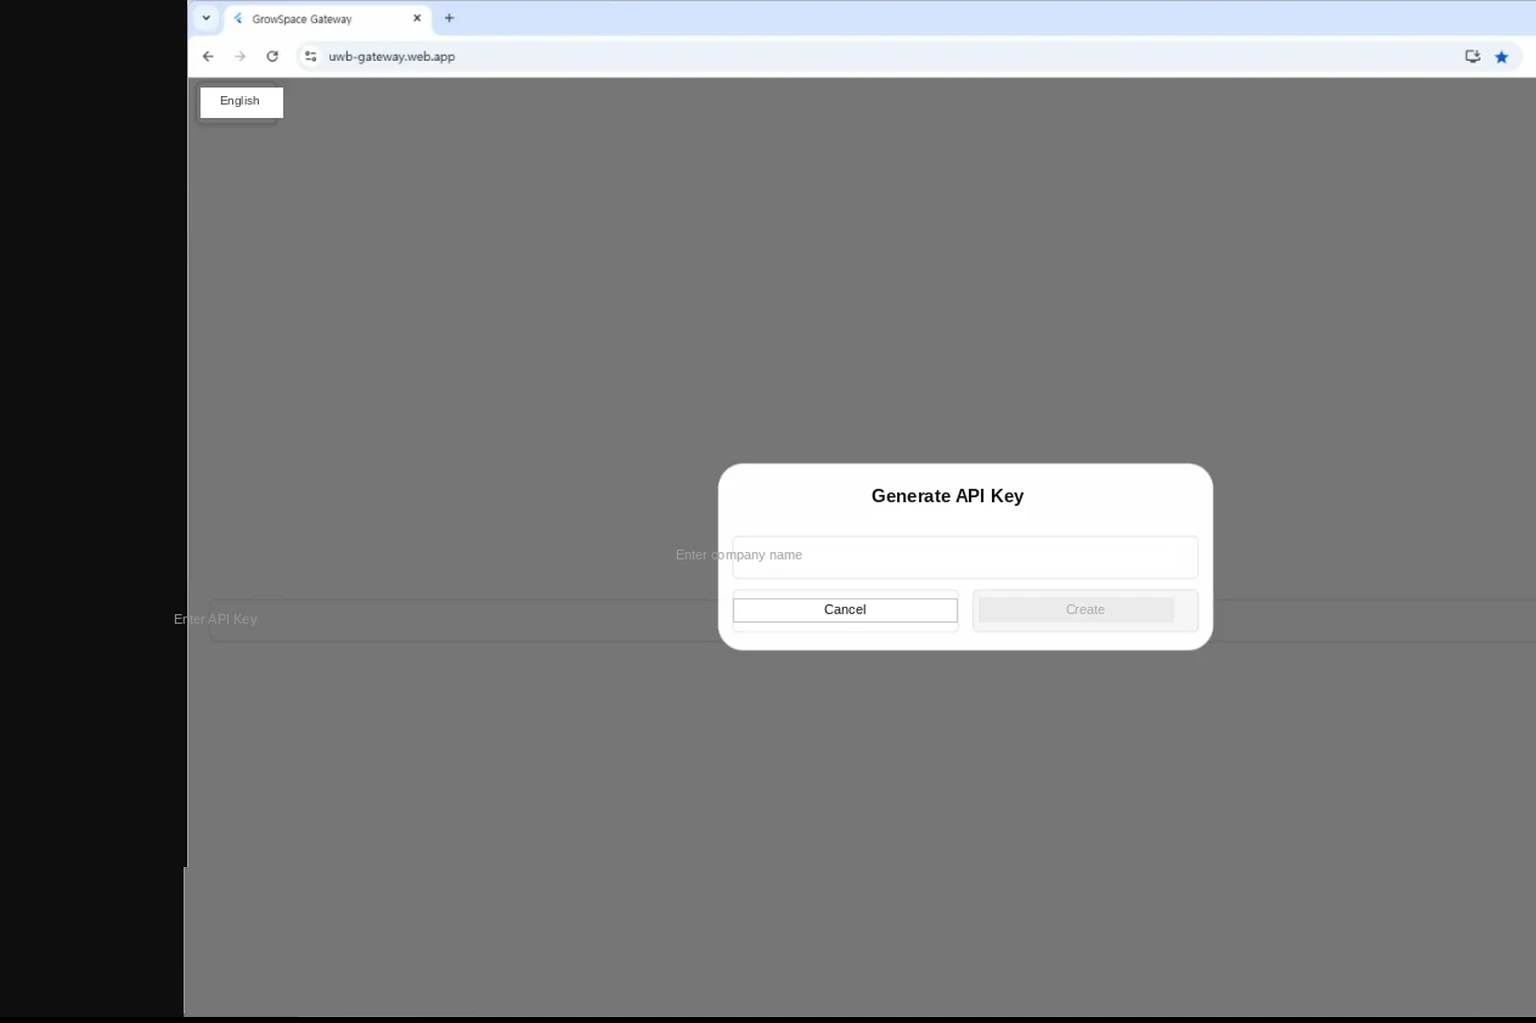
- An automatically generated API key appears on screen.
- Be sure to copy this key and store it somewhere safe.
Important! For security reasons, once you close this window you cannot view the key again.
It cannot be recovered, so be sure to save it in a note or password manager.
Settings Screen Overview
After logging in with your API key, you can configure the following:
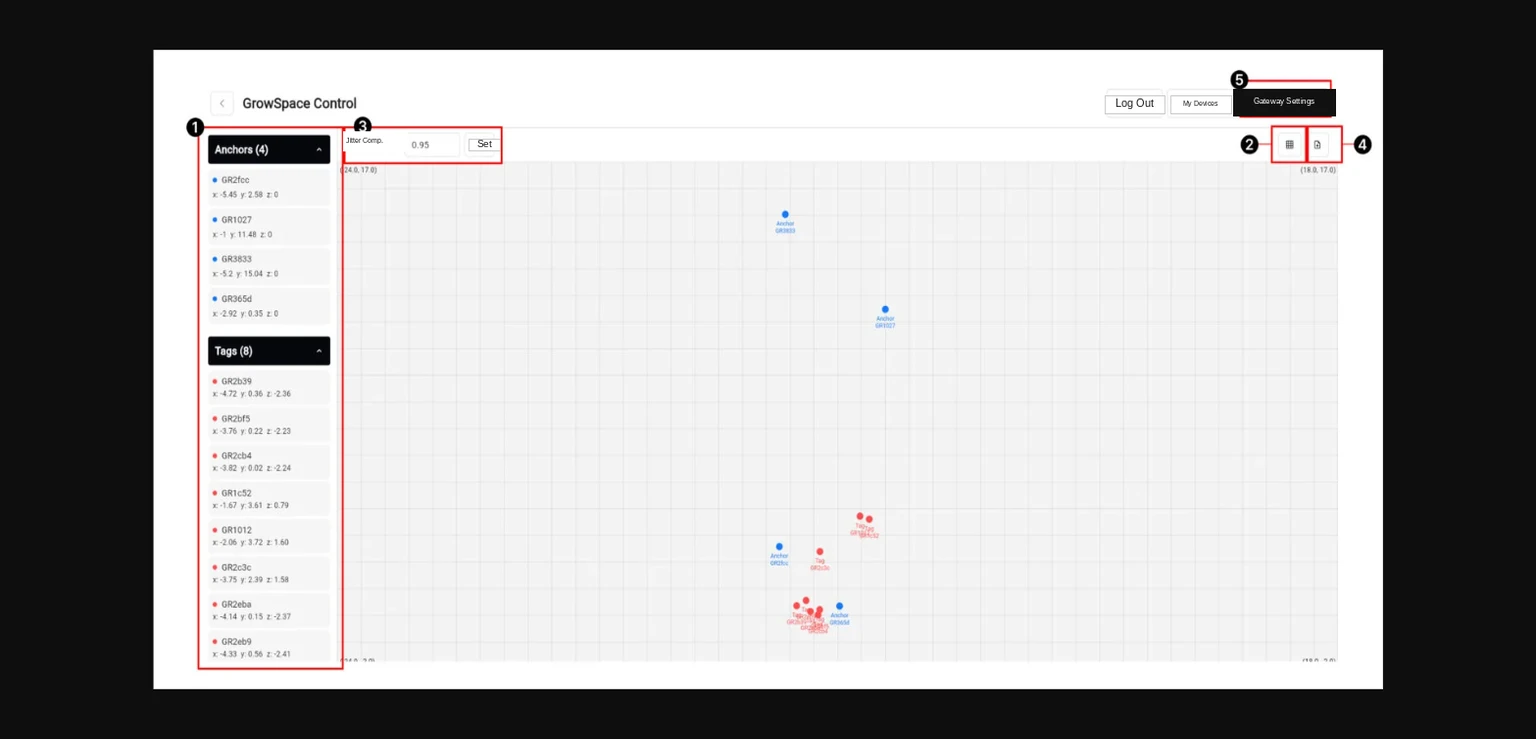
| Item | Description |
|---|---|
| List of connected tags and anchors |
| Check real-time device position layout |
| Adjust the filter strength for tag movement (Very Strong > Strong > Moderate > Soft > No filter) |
| Upload a floor plan → enables tag position visualization |
| Enter and save MQTT server info, port, and Wi-Fi SSID/password |
Configuring the Gateway
After generating your API key, you’ll need to enter MQTT and network settings on the gateway.
This prepares the gateway to communicate with the server and transmit position data.
Setup Steps
- In the Web Console, click [Gateway Settings] in the top menu.
- With the gateway connected to your PC via USB, select it from the list of COM ports and click [Connect].
- Fill in every field described in the [Gateway Settings Screen Overview] section below, accurately.
- Once everything is entered, click [Save].
- After saving, the gateway automatically restarts and applies the new settings.
Notes on Configuration
- If any entered value is wrong, the connection will fail and the gateway’s LED3 (red) will keep blinking.
- In that case, see “If Gateway LED3 (Red) Keeps Blinking” to check the log.
- Double-check every field before saving.
- After configuration, we recommend confirming data is being received correctly in the Web Console or your server logs.
Gateway Settings Screen Overview
The gateway settings screen is where you enter the information needed for MQTT integration and network access,
configuring the gateway as a real-time data transmission device.
1. API Key
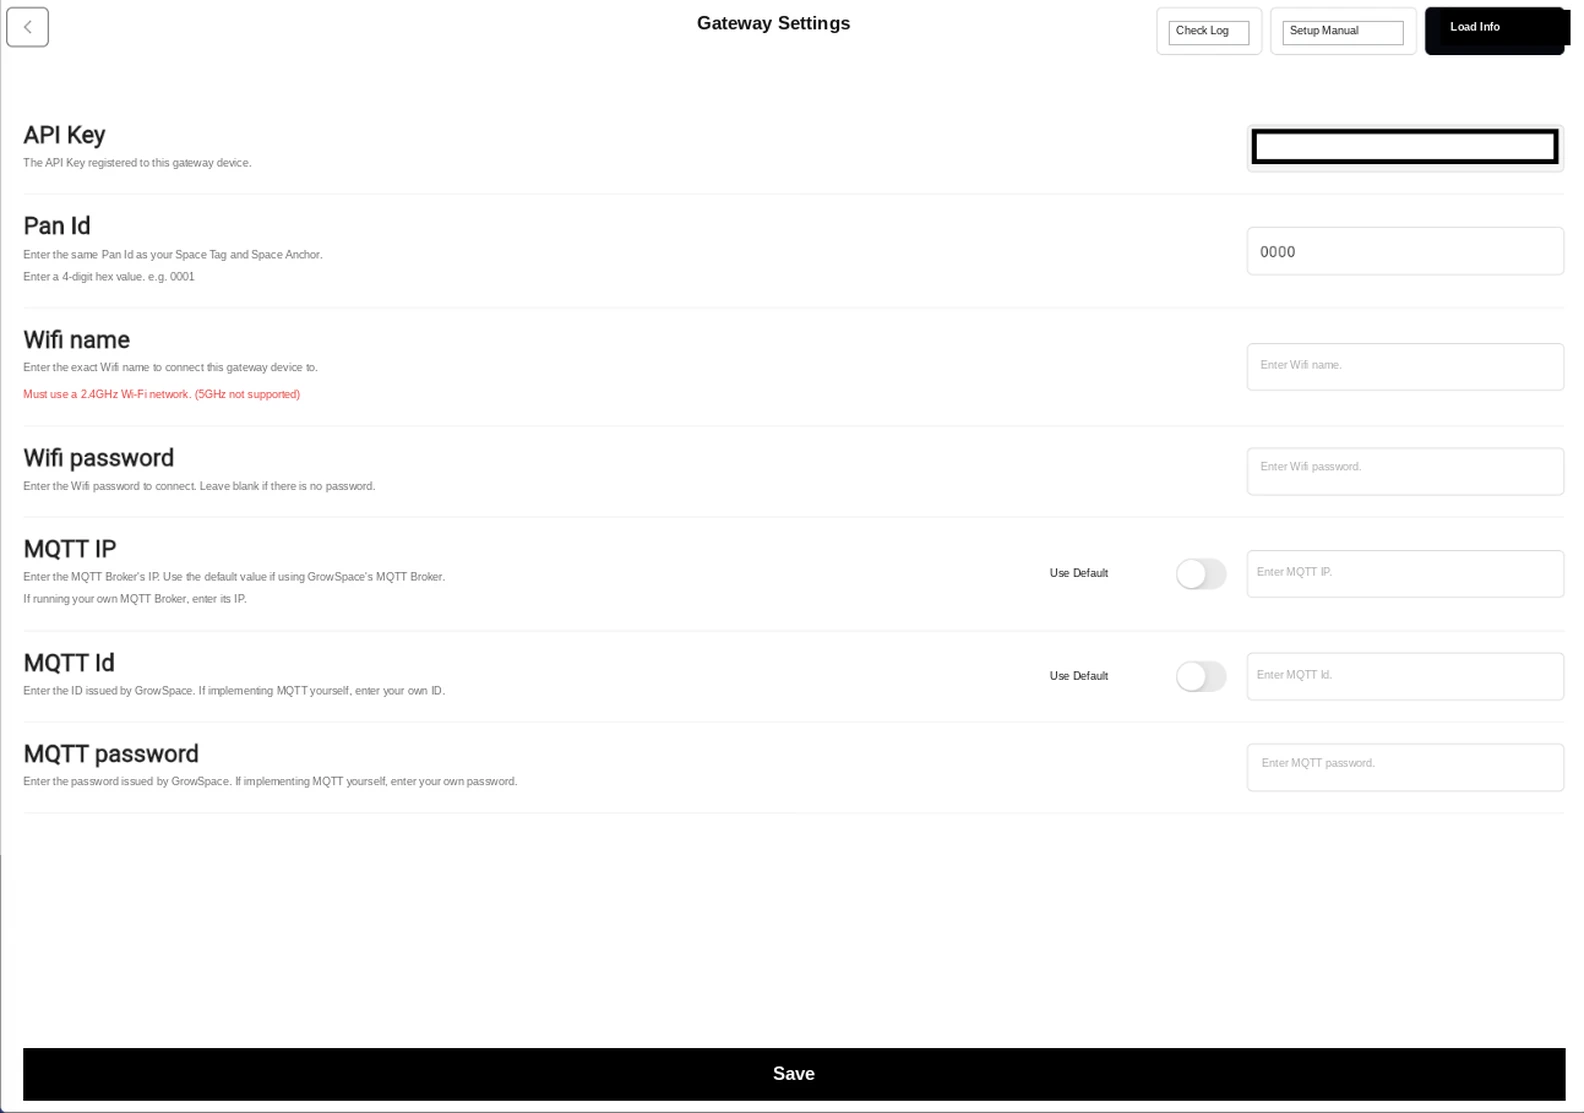
- A unique key used to identify and authenticate this gateway.
- Automatically loaded from the API key issued on the GrowSpace settings page; it cannot be edited.
Important: without an API key, no data will be transmitted.
2. Pan Id
- The network group identifier used for communication between tags, anchors, and the gateway.
- Every device must use the same Pan ID to connect correctly.
- Enter it as a 4-digit hexadecimal value (e.g.,
0000,00A1).
When using an Ethernet connection: leave fields 3 and 4 blank and go straight to field 5 (MQTT IP).
3. Wifi name (SSID)
- Enter the name of the Wi-Fi network the gateway should connect to.
- You must use a 2.4GHz Wi-Fi network. (5GHz is not supported.)
4. Wifi password
- Enter the password for the Wi-Fi network above.
- If the password is wrong, the Wi-Fi connection will fail and LED3 (red) will keep blinking.
5. MQTT IP
- Enter the IP address or domain of your MQTT server.
- If you’re using the GrowSpace default broker, selecting “Use default” configures it automatically with no input needed.
- If you run your own MQTT broker, enter its IP address or domain manually.
6. MQTT Id
- The login ID for your MQTT broker.
- Configured automatically when using the GrowSpace broker; if using an external broker, enter the user ID you created for it.
7. MQTT password
- The login password for your MQTT broker.
- This must be entered together with the MQTT Id to complete authentication; an incorrect entry will prevent the connection.
If Gateway LED3 (Red) Keeps Blinking
Click the Check Log button in the gateway settings to check the error details.
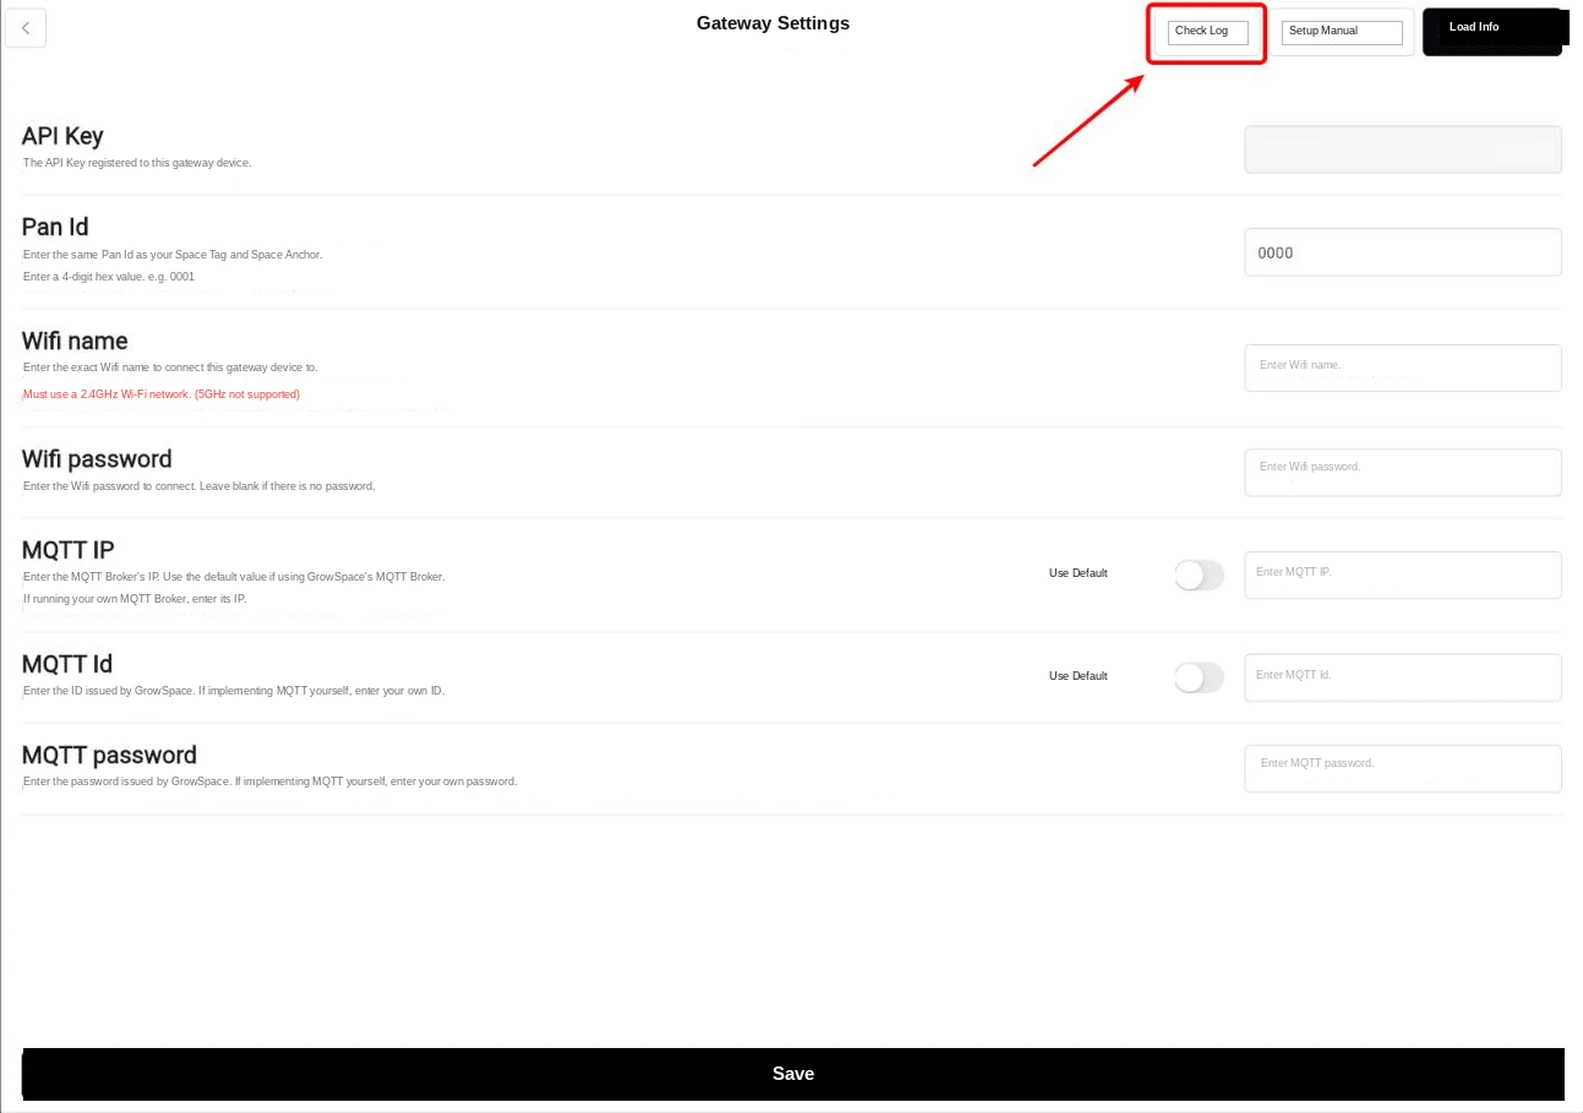
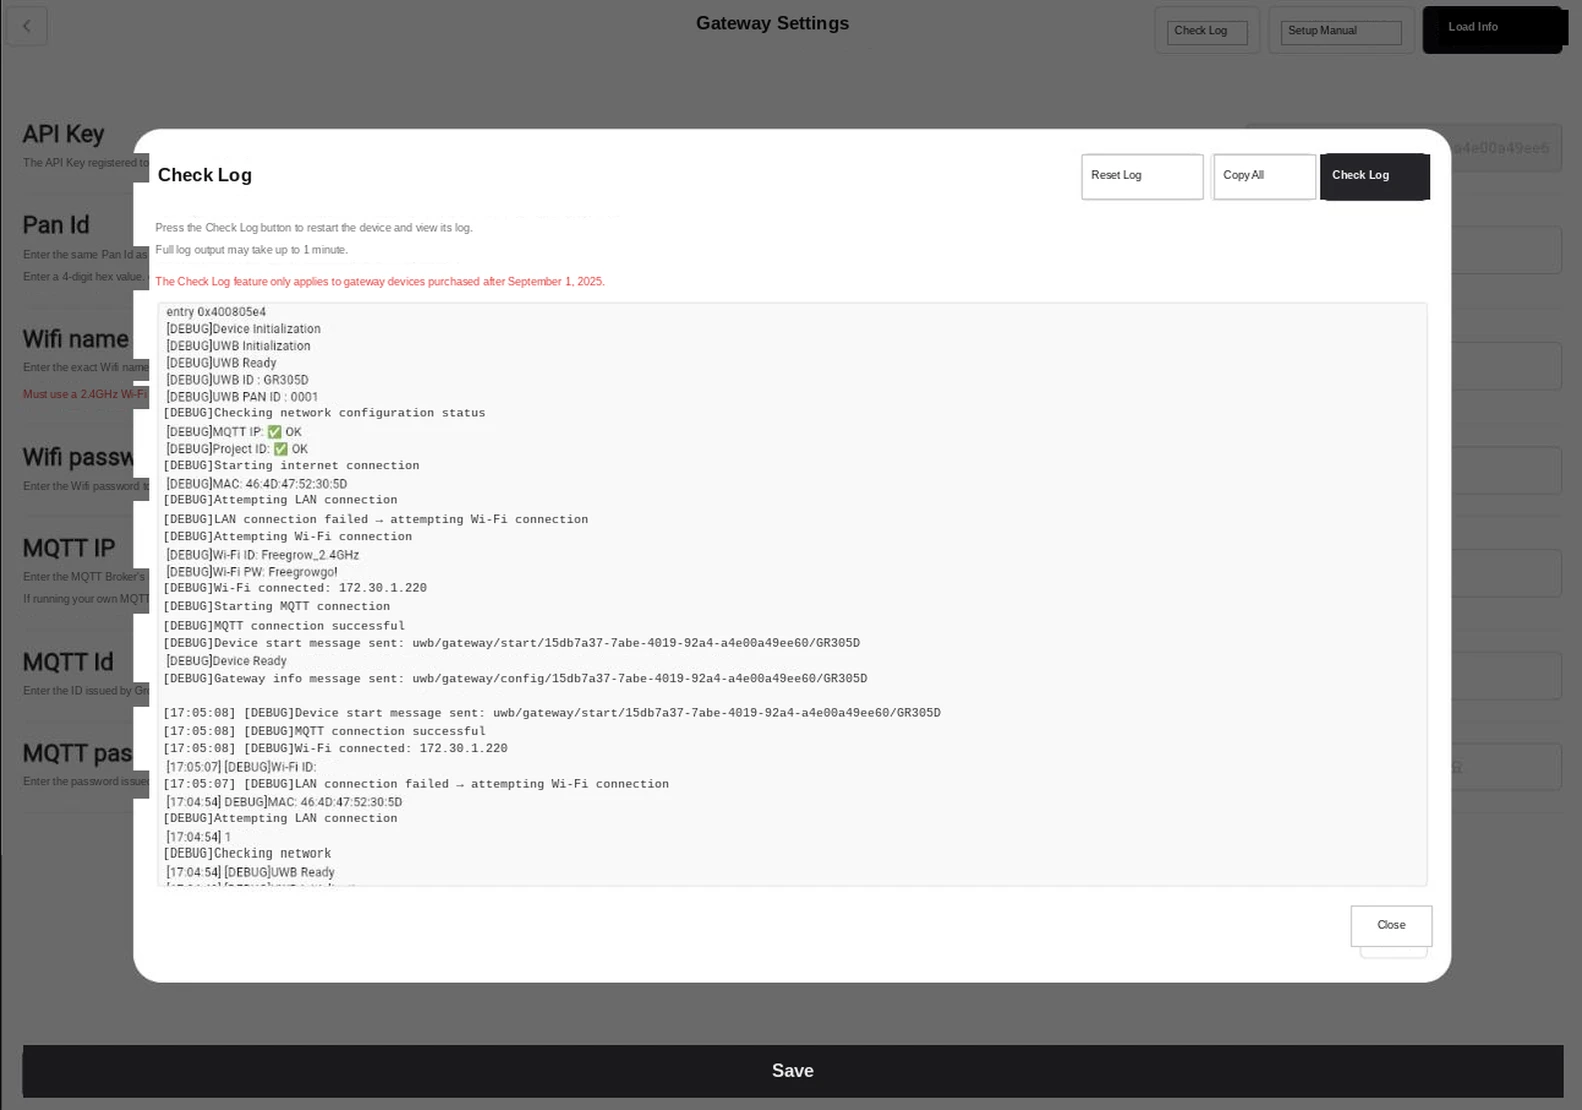
The log check feature only applies to gateway units purchased on or after September 1, 2025.
Example Installation Scenario
A gateway operates most efficiently when installed according to the following guidelines:
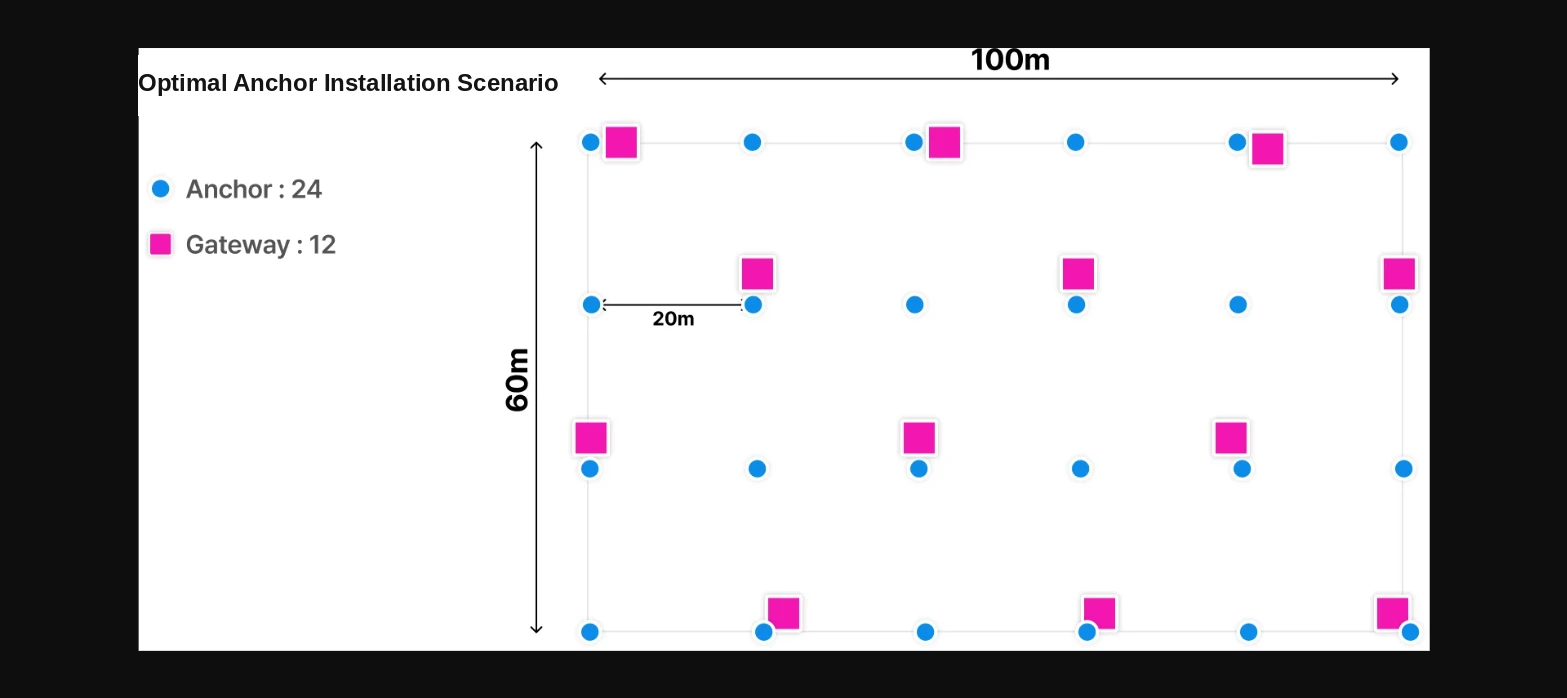
- Space size: example – 100m × 60m
- Anchor placement: mounted evenly along the walls at 15–20m intervals
- Gateway location:
- Close to network equipment
- Along a wall, where a power connection is easy to make
Basic Operating Sequence
Once powered on, the gateway operates in the following sequence.
1. Power on → boot starts
When you connect the gateway to power, it boots automatically. LED2 (green) and LED3 (red) will blink in sequence, confirming normal operation.
If the LEDs don’t light up or nothing happens, check the power adapter and cable.
2. Automatic connection to nearby devices
If tags and anchors have already been configured, the gateway automatically detects them as soon as it powers on and immediately begins collecting distance data. There’s no need to manually connect or configure devices separately.
3. Attempting a network connection
The gateway first attempts a LAN (wired) connection; if LAN isn’t connected, it automatically falls back to Wi-Fi (wireless).
Only 2.4GHz Wi-Fi is supported; 5GHz networks cannot be used.
4. Sending data to the server (MQTT broker)
If you’ve already entered your MQTT server information, the gateway begins sending the connected tags’ and anchors’ position data to the server in real time.
If MQTT settings are missing or the Wi-Fi connection fails, LED3 (red) keeps blinking to indicate an error state.
If this happens, go back to the Web Console and check and correct your network information and MQTT settings.
Setup Verification Checklist
After configuring the gateway, go through the items below one by one.
This is the final check to confirm data is being received correctly.
- [ ] Confirm LED1 (green) lights up normally after powering on
- [ ] If LED3 (red) is blinking, recheck your MQTT settings or Wi-Fi connection
- [ ] Confirm the connection to the MQTT server was established successfully
- [ ] Confirm tag position data is being sent to the server correctly
- [ ] Verify real-time data in the Web Console or your server logs