
1. Click the “+ Create Project” Button
- Click the “Create Project” button in the top right of the project list screen.

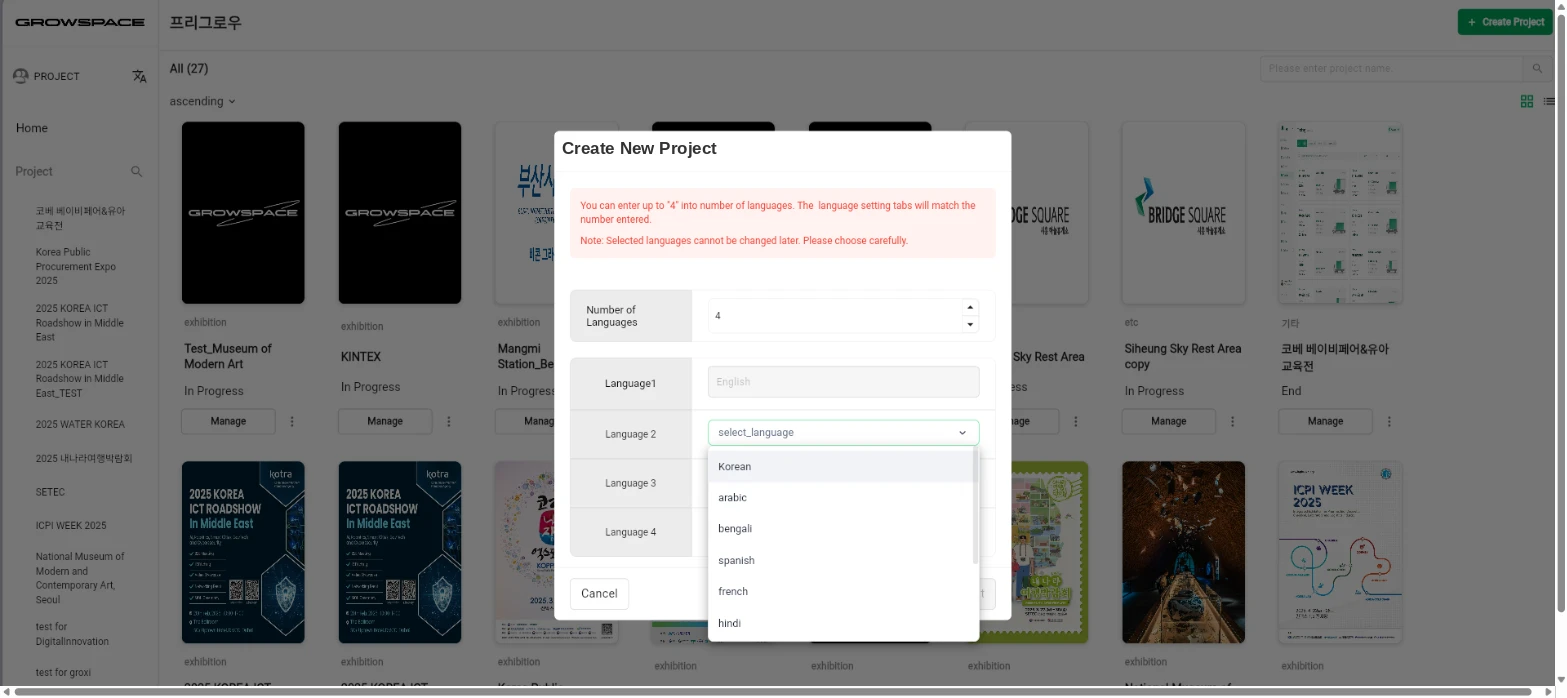
2. Configure Supported Languages
- Click the up/down arrows in the Number of Languages field to set how many languages to use.
- Select the language you want for each added language tab.
- Up to 4 languages are supported, and English is fixed as the default language and cannot be changed or removed.
- Once you select supported languages, they cannot be changed later, so please set them carefully.
- When finished, click the “Next” button to proceed to the next step.
3. Enter Project Information
- Select one language tab to enter the project information.
- After entering information in the fields of that language tab, click the “Auto Translate” button in the top right of the screen. (Required)
- Based on the selected language, the other supported language tabs will be automatically filled with translated content.
- Auto-translated content may be inaccurate or awkward, so we recommend reviewing it and editing it directly if necessary.
- When finished, click the “Next” button to proceed to the next step.

4. Configure Place Data Fields
- Select the place data to use in this project.
- Place name, Category, and UID are required fields, while Place description, Image, and Search tags are optional.
- As with supported languages, once data fields are set, they cannot be changed later.
- When finished, click the “Complete” button to finish creating the project.

5. Go to Project Settings
- The created project can be found in the Project List.
- Click the “Manage” button to go to the project settings screen.
