GPS falls apart the moment you push a robot through a warehouse door. Satellite signals don’t get through roofing and steel, so the coordinate that looked solid in the parking lot starts drifting the second you go inside.
Wi-Fi and BLE trilateration will hand you something, but it wanders by three to five meters. Fine for “which room.” Useless for “which pallet.”
UWB positioning is a radio method that measures how long a short pulse takes to travel between a tag and several fixed reference points, then solves for a coordinate from those distances.
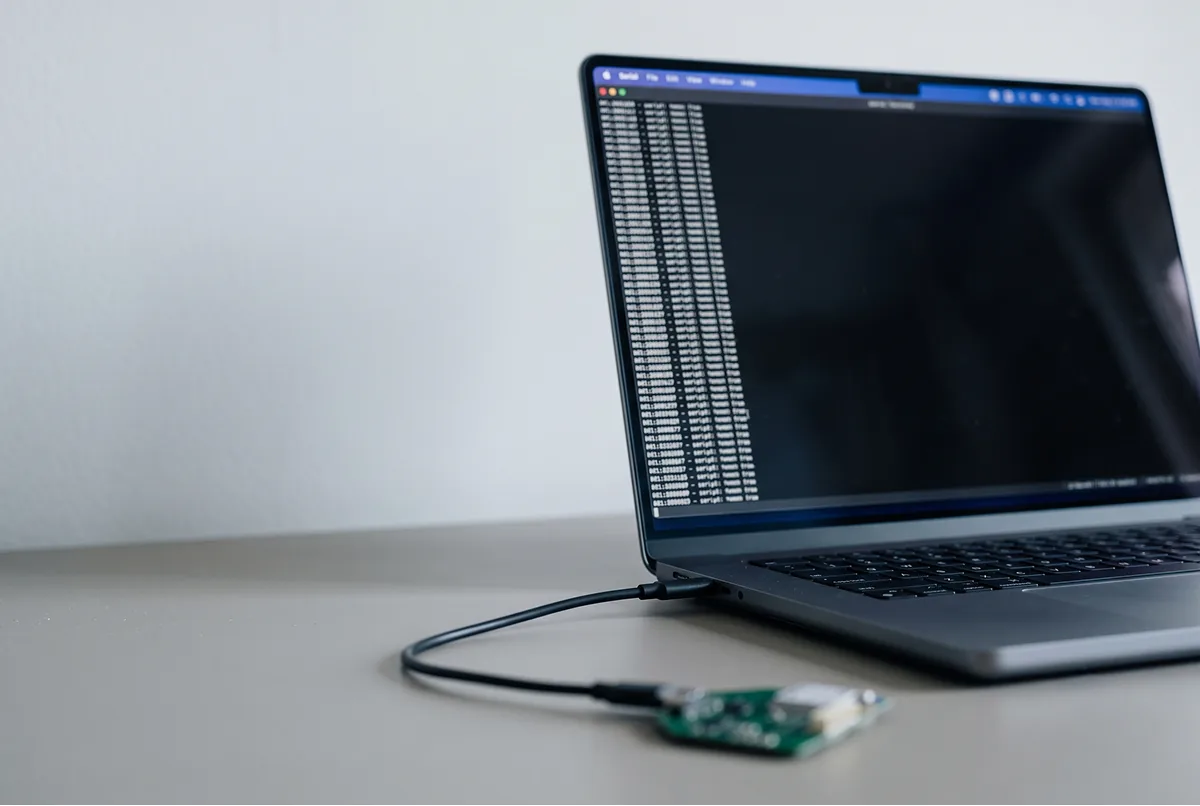
On a Raspberry Pi it takes four jumper wires and about fifteen lines of Python. No SDK, no vendor library, no build step, because the tag speaks plain CSV over a serial line at 115200 baud.
Stand up three anchors, tell them where they sit, and X, Y and a quality score drop straight into your loop. Height takes a fourth.
What you need before you start
A UWB anchor is a fixed radio unit with a known coordinate that the tag ranges against. One anchor gives you distance and nothing else. Three or more gives you a flat X and Y. Four or more gives you height as well.
Placing your anchors
Anchor placement decides your accuracy long before your code does, and the mistake almost everyone makes on a first build is bolting every anchor to the ceiling at one height, which leaves the system unable to tell up from down and pins Z near zero however clean the ranging looks.
Split the heights instead: two on the ceiling and two low, or spread across columns and walls. Both want four anchors, so that’s the Expansion Kit or one added to the three in the box.
Keep 2m between any pair, keep the tag inside the area they surround, and favor drywall or concrete over metal and glass, because those surfaces bounce the pulse back and widen your error. The kit brackets hold each anchor 10cm off the surface for the same reason.
That gap is the point of them, not the screws.
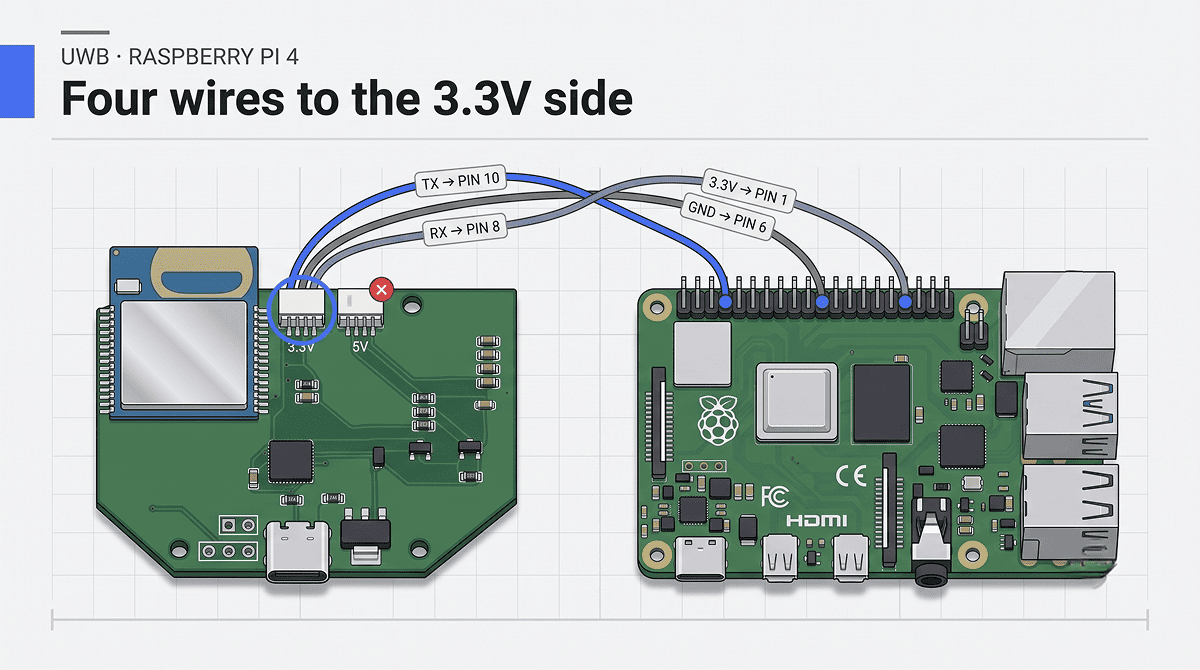
Anchor coordinates go in over serial with `aps x y z`, and `apg` reads them back. Watch the unit. Input is millimeters, so 2.5m becomes 2500, and Z can’t be left out.
The GrowSpace UWB development kit here is the Creator Kit: three anchors, one developer tag, one listener, three brackets.
How do you wire a UWB tag to a Raspberry Pi?
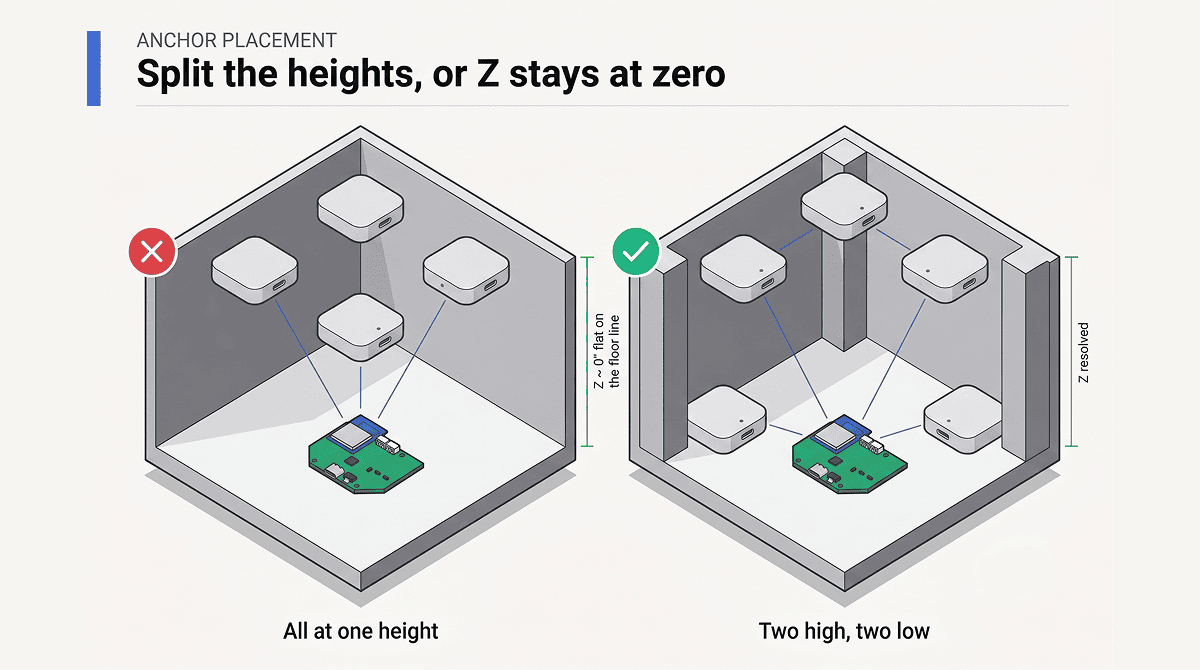
Read this before you touch a jumper wire. The developer tag has two connectors and they run at different voltages. Left is 3.3V, for a Raspberry Pi or an ESP32. Right is 5V, for an Arduino. Pi GPIO takes 3.3V only. Hook the tag’s 5V side to it and you damage the board.
Left connector. Every time.
On a Raspberry Pi 4, the four wires go like this:
- Tag TX to pin 10 (GPIO15)
- Tag RX to pin 8 (GPIO14)
- Tag 3.3V to pin 1
- Tag GND to pin 6
Cross TX and RX. Transmit on one side goes to receive on the other, and wiring them straight through gives you a dead port with no error message telling you why. Working from an ESP32 or an Arduino instead? The voltage rule changes with the board.
Enabling the serial port on the Pi
Run `raspi-config`, turn on the hardware serial port, and while you’re in that menu turn the login shell over serial off as well, because that shell grabs the same UART and will happily eat every line of position data you came for. Then reboot.
Port settings: 115200 baud, 8 data bits, no parity, one stop bit, no flow control.
One detail trips up nearly everyone on the first attempt. Every command needs a carriage return after it, and if you send `si` without the trailing `\r` the tag sits there in total silence, which reads exactly like a wiring fault or a dead board.
That is even though the four wires you just soldered are perfectly fine. Send `si\r` and a block of system information comes back, followed by a command prompt. That response is your handshake. Get it before you write a single line of parsing code.
Reading coordinates with Python
Install pyserial, open the port, and ask the tag for positions with `lep`. Twenty lines, give or take.
# pip install pyserial
import serial
port = serial.Serial("/dev/serial0", 115200, timeout=1)
port.write(b"si\r")               # si returns several lines; first one is enough
print(port.readline().decode(errors="ignore").strip())
port.write(b"lep\r")              # stream position only
while True:
    line = port.readline().decode(errors="ignore").strip()
    if not line.startswith("POS,"):
        continue
    parts = line.split(",")
    x, y, z = (float(v) for v in parts[1:4])
    qf = int(parts[4])
    if qf < 60:                   # drop low confidence fixes
        continue
    print(f"x={x:.2f} y={y:.2f} z={z:.2f} qf={qf}")
That’s the whole reader. The `qf < 60` line does more work than it looks like it does, and more on that next.
Running the three anchors from the kit? `z` still prints, but it sits near zero, because solving for height needs a fourth anchor mounted at a different elevation from the other three.
What the data actually looks like
A tag running `lep` emits one line per fix. It looks like this:
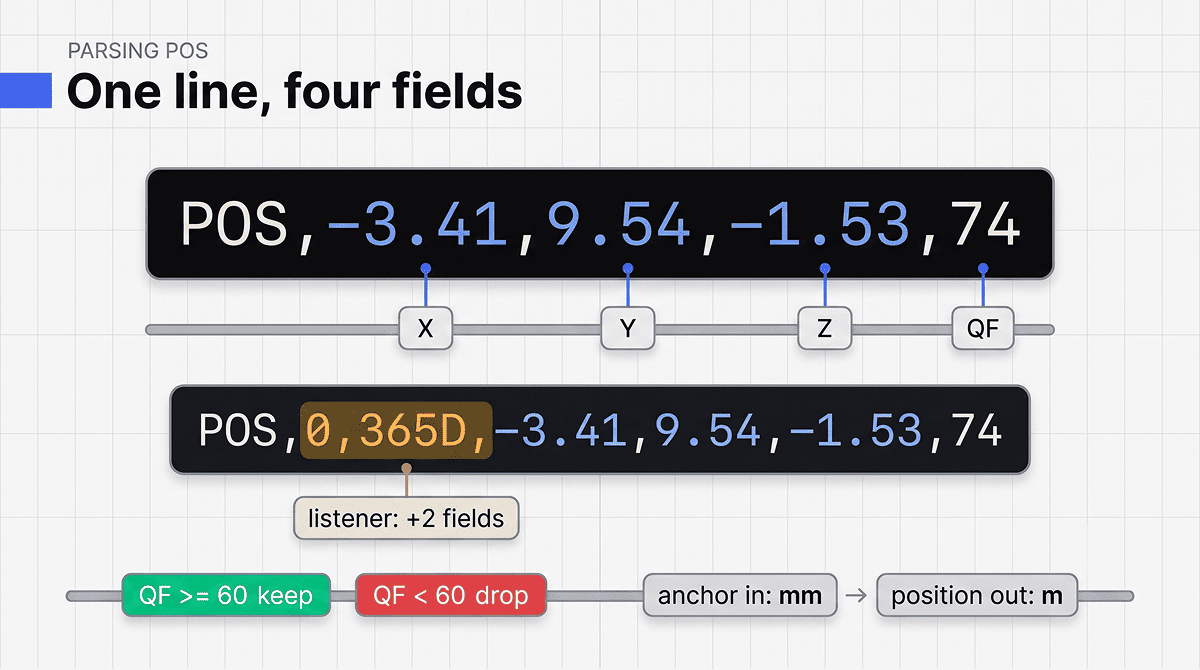
`POS,-3.41,9.54,-1.53,74`
X, Y, Z, then the quality factor. A listener puts two identifier fields in front of the coordinate, so a line reads `POS,0,365D,-3.41,9.54,-1.53,74`. The second one is the tag ID. Reading from a listener rather than a tag? Shift the slice in the parser by two.
Output is in meters. Anchor input was in millimeters. The units don’t match, and that asymmetry has produced more “why is my robot 1000 meters away” bug reports than any other single thing in this stack.
QF is the quality factor, a 0 to 100 confidence score on the fix. Above 60 to 80 the position holds steady. Below that you’re looking at a reflection, and averaging it into your path only spreads the error. Throw those lines away.
Known limits
One limit to know now: the solver stays fixed. What comes out is a computed X, Y and Z, not raw ranges for you to run your own algorithm on.
Run `lec` instead of `lep` and you get the ranging behind the fix: a `DIST,4,` header, one `ANx,ID,x,y,z,distance` row per anchor, then the computed `POS` line at the end. Reach for it when a position looks wrong. It shows you which anchor is arguing.
Serial or MQTT: which one?
Two ways off the system.
| Listener or tag direct (Serial) | Gateway (MQTT) | |
|---|---|---|
| Connection | USB direct, no gateway | Wi-Fi 2.4GHz only (no 5GHz) or LAN |
| Data | One CSV line at a time | JSON on `uwb/gateway/devices/#` |
| Best for | Early development, single machine | Server integration, many tags |
| Kit | Creator Kit | Expansion Kit |
The gateway publishes on `start/#` once at boot, `config/#` as a heartbeat every 10 seconds, and `devices/#` for anchors and tags. Subscribe with `paho-mqtt` and the same coordinates arrive with no wiring at all.
The kit ships no SDK for either path, which sounds like a gap until you realize what it buys you: CSV over serial and JSON over MQTT are formats every runtime already parses, so the language choice stays yours instead of arriving inside a vendor library.
Python, Node, Go, Rust, whatever your stack runs on. Feeding a server over MQTT works the same from a Pi as from anything else.
When it doesn’t work
Nothing comes back at all. Check the TX/RX crossing first, then baud at 115200, then the carriage return.
Distances appear but no position. Three anchors need to be online, each with its coordinate loaded. Read them back with `apg` rather than trusting that `aps` took.
The position jumps around. Too few anchors, a typo in an anchor coordinate, or something metal in the path. Check the coordinates before you blame the radio.
MQTT stays silent. Port 1883 through the firewall, 2.4GHz Wi-Fi rather than 5GHz, the right `mqttIP`, then `restart` on the gateway.
FAQ
The kit specification is 10 to 30cm, worst case, at up to 10Hz for 15 tags (150 at 1Hz). Tag-to-anchor range is 20-25m in the open. Anchor-to-anchor stays inside 15m indoors.
Depends what sits between tag and anchors. Keep anchors clear of metal and glass, which reflect the pulse and add error. GrowSpace’s industrial sites use an in-house CIR algorithm to reject reflections, reaching 23cm even in dense steel environments. Test in your real space, not on a clean desk.
No. The Creator Kit is the Q1 line for development and research, while the Starter Kit is Q2, the production line for live sites, and parts don’t carry over between the two.
The kit has no waterproofing, so keep it indoors. Covered outdoor spaces under a canopy are workable. Open-sky precision is GPS-RTK territory, not UWB’s.
Where to go after the first fix
Three anchors on a desk, a tag on a Pi, coordinates in a terminal. One afternoon.
That setup answers the first question worth answering, which is whether cm-level indoor position actually solves the problem you have, and UWB sits in the 3.1 to 10.6GHz band precisely so it can resolve distance an order of magnitude tighter than Wi-Fi or BLE manage.
Going to production later means new hardware, because the Creator Kit and the production line don’t share parts. Your code survives the move. Coordinates arrive as CSV or MQTT JSON either way, so the parser you write this afternoon keeps working.
Tell us your space and tag count and we’ll size a kit for it: [email protected]
PLANNING A DEPLOYMENT?
Which setup fits your site?
GrowSpace designs real-time location tracking (RTLS) around the conditions of your factory, warehouse or construction site — installation, integration with existing systems and ongoing operation handled by one team.