You want centimeter-level indoor position, and you’ve hit the fork every maker hits.
Buy a finished UWB dev kit, or wire up a few cheap modules and build your own?
The parts for a DIY rig cost almost nothing, and that single fact, more than any spec sheet
or shootout you’ll read on a forum, is what pulls a lot of otherwise careful developers straight toward the solder side of the bench before they have counted the hours it will actually take.
Then the catch shows up. Not in the wiring. In the week you lose to calibration, jitter, and the coordinate math nobody warned you about.
This guide plays it straight. We’ll walk the DIY path honestly, mark exactly where it gets hard,
then show what a kit hands you instead. No trashing either one.
Quick answer: Build it yourself if parts cost is your hard limit and you have time to spend.
Buy a UWB dev kit if you need real X,Y coordinates on your desk this week and would rather skip firmware tuning. Both paths reach cm-level indoor positioning.
They cost you in different currencies: one in money, one in time.
Should I build my own UWB positioning system or buy a kit?
Build if you’re learning, your budget is tiny, and you want to control every layer.
Buy if your goal is a working proof of concept, fast.
That’s the whole decision in two sentences. Everything below is the detail behind it.
Money, or time. Pick the one you have more of.
A UWB dev kit is a boxed set of ultra-wideband anchors and tags that streams indoor coordinates
the day you unbox it, so you skip building the positioning stack from scratch. DIY is the opposite trade.
You assemble that stack yourself, part by part, and you own every bug in it.
Neither choice is wrong. They answer different questions.
One asks “how does UWB positioning actually work, down to the timing?”
The other asks “how fast can I prove my idea moves in the real world?”
What do I need to build a UWB setup from scratch?
Three things: UWB modules, a board to read them, and open-source code to glue it together.
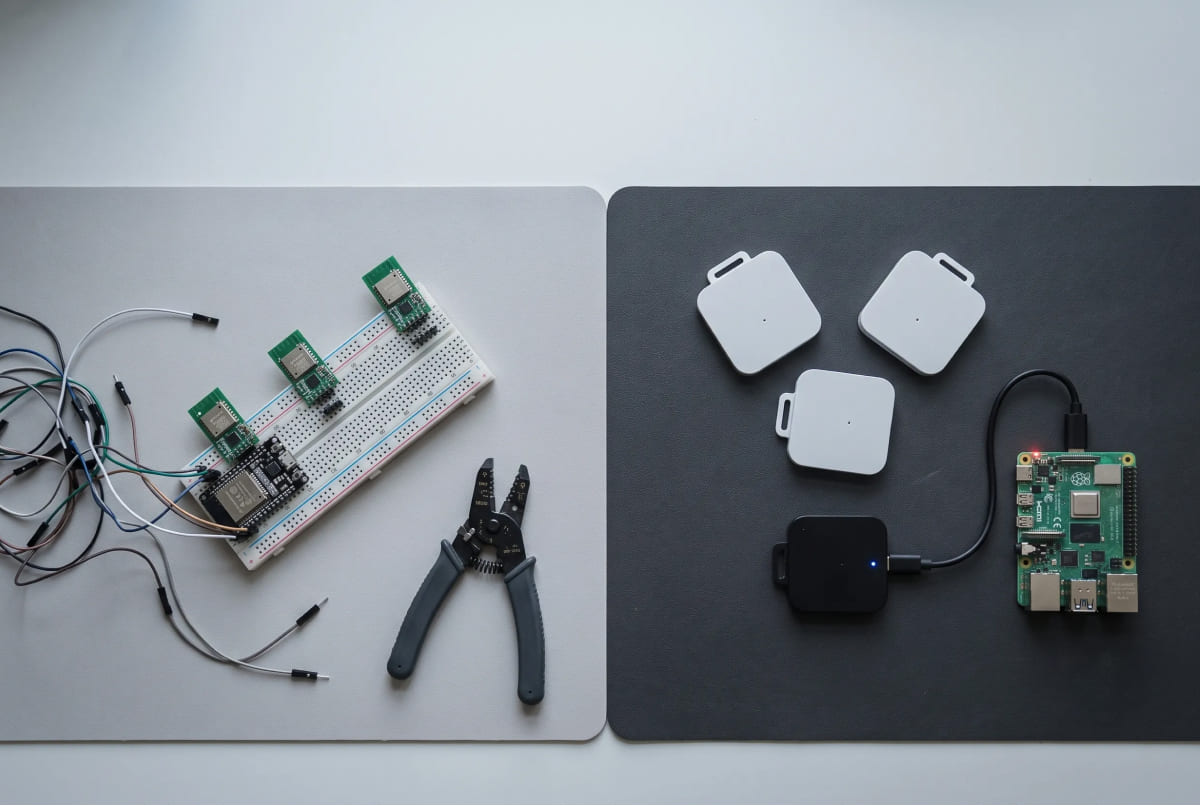
The parts list is short and cheap. You grab a handful of off-the-shelf UWB modules built on a common transceiver chip, wire each one to a microcontroller or single-board computer, and pull in an open-source library to talk to them. An ESP32 UWB node is a popular starting point. So is an Arduino or a Raspberry Pi.
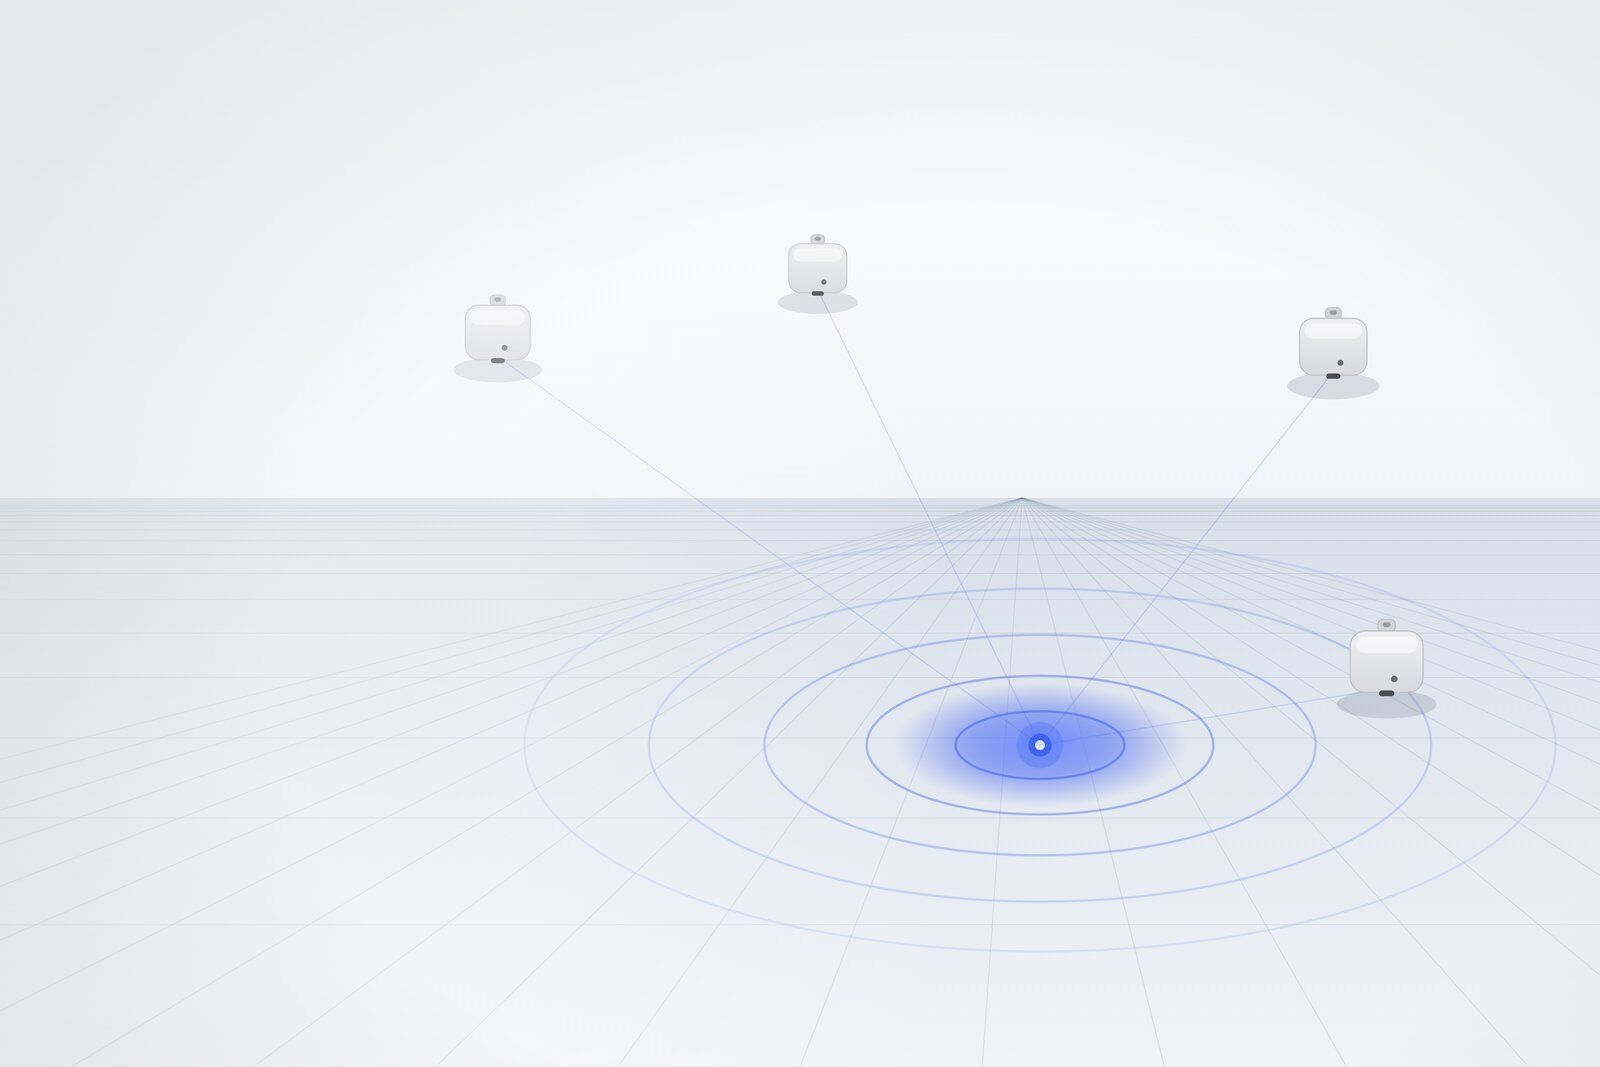
Here’s the rough flow. You flash firmware onto each module, set a few as anchors and one as a tag, and start reading range values over serial. Anchors are the fixed reference points on your walls.
The tag is the thing you want to locate. Get the ranges flowing, and you’re most of the way to a distance readout.
This path has real strengths, and they matter. It’s cheap. It’s open. You see every layer, so you learn UWB from the metal up. For a class project, a home experiment, or a team that wants full control of the firmware, diy uwb positioning is a fair and often smart call.
Then you try to turn those raw distances into an actual position on a map. That’s where the road gets steep.
Why is DIY UWB positioning harder than it looks?
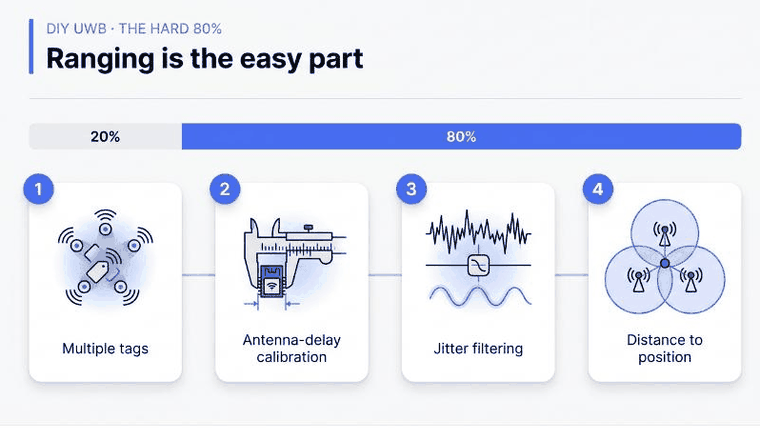
Because a distance is not a coordinate, and the gap between them is four separate engineering problems. Ranging is the easy 20%. The rest is the 80% nobody warns you about.
Here’s what waits on the DIY path, stated plainly.
Multiple tags at once. The popular open-source libraries are built as demos. They shine with one tag on a bench. Add a second and a third moving at the same time, and you learn that scheduling them without collisions, the time-division work, was never really in the box. You write that layer.
Antenna delay calibration. A raw UWB module does not read centimeters out of the gate. Each one carries an antenna delay that skews distance until you measure and correct it. Skip this step and your “cm-level” sensor is off by a wide margin. It’s tedious, per-unit, and easy to get subtly wrong.
The values jitter. Real rooms have metal, glass, and moving people. Signals bounce, and your clean distance readings start twitching by tens of centimeters. To calm them you build filtering yourself, a moving average at least, a Kalman filter if you’re serious. More code, more tuning.
Distance is not position. This is the big one. Your modules give you distances to each anchor, and that’s it. Turning three or four distances into a single X, Y, Z point means you code trilateration by hand, handle the bad geometry cases, and debug why the dot jumps through a wall. Ranges come free. Coordinates you earn.
Stack those four problems up and a pattern shows. Each one sounds small on its own, a day for calibration here, an afternoon for a filter there, and each is solvable by a decent engineer, which is exactly why the DIY route looks so easy on paper the night before you start. They don’t arrive one at a time, though. The antenna delay you fixed on Monday drifts once you add a third tag, and the filter you tuned for a quiet room falls apart the second a forklift rolls past. The hours add up quietly.
None of this makes DIY a bad choice. It makes it a real project with a real timeline. Anyone who has spent a weekend chasing a jumping coordinate knows the feeling. The parts were the cheap part.
The kit path: what a finished kit hands you
A finished kit removes those four problems by shipping them already solved. You assemble, you connect, you read coordinates.
Take GrowSpace’s Creator Kit as the concrete example. Open the box and you get three anchors, one developer tag, one listener, and three brackets. Mount the anchors, connect the listener, and position data starts flowing. No positioning server to stand up first. No firmware to flash.
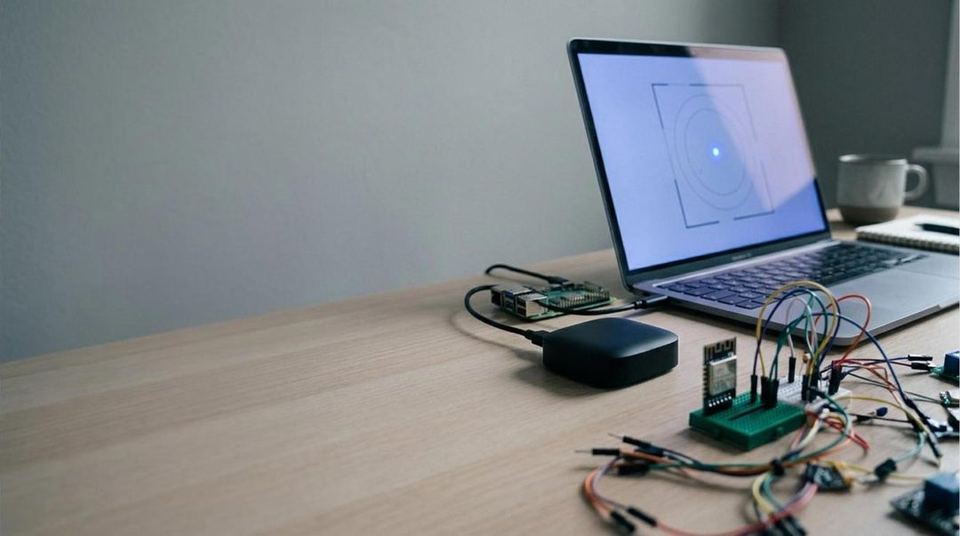
The listener is the piece that saves the most time early on. It plugs straight into your PC over USB and speaks serial, so you read live coordinates without any gateway in the middle. For desk-stage development, that’s the shortest path from box to data.
Now the part that answers the DIY pain directly. The developer tag has a command, lep, and when you send it the tag replies with a string that starts with POS, followed by the X, Y, Z coordinate and a quality figure. You read a coordinate. You do not code trilateration. The math that ate your DIY weekend already ran on the tag.
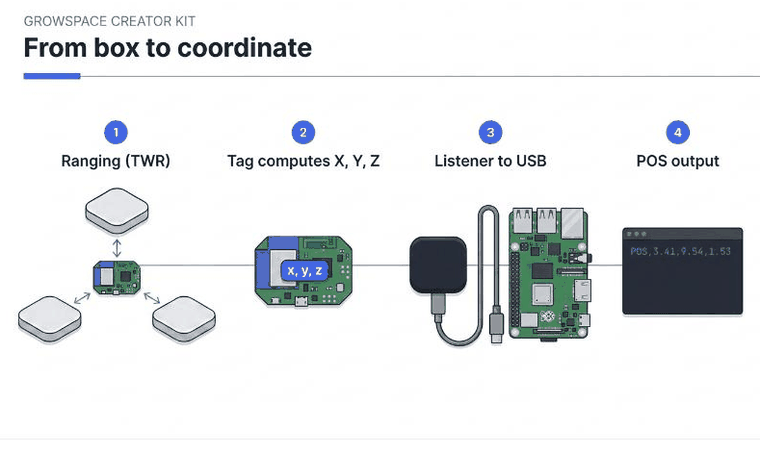
Data access stays open and language-agnostic. Read the listener over serial (UART) straight into Python, or subscribe over MQTT if you add the gateway. There’s no proprietary black box to learn: parse a comma-separated string and you’re done. GrowSpace documents the wiring and sample code for Arduino, Raspberry Pi, and ESP32, so hooking the tag to your own board is a copy-paste job, not a research project. One wiring note worth repeating from their docs: the developer tag’s left connector runs at 3.3V for the Pi and ESP32, the right at 5V for Arduino, so match the voltage before you power up.
Want to see the movement, not just numbers? The companion software, SpaceLite and SpaceLite Pro, draws the coordinates on a floor plan, replays a path, and builds a heatmap. That turns a stream of POS, strings into something you can show a stakeholder.
On accuracy, here’s the honest framing. The kit itself holds to under 30 cm, and you set it up by entering each anchor’s coordinate once, by hand. At a metal-dense automotive-logistics site, GrowSpace measured 23.05 cm in the field. That tighter number came from a sensor-fusion stack, UWB plus RTK-GPS plus IMU working together, not from the kit on its own. Worth keeping the two apart. What ties them is the positioning engine underneath, the same one running across more than 40 industrial sites, which is a decent signal that the kit you learn on scales to something real.
DIY vs a finished kit, side by side
Put the two paths next to each other and the trade stops being abstract.
| What matters | Build it yourself (DIY) | Finished UWB dev kit |
|---|---|---|
| Up-front cost | Low. Parts are cheap. | Higher, one purchase (see product page). |
| Time to first coordinate | Days to weeks: calibrate, filter, code the math. | Same day: connect, enter anchor coordinates, read POS. |
| Skills required | Firmware, signal filtering, coordinate geometry. | Basic wiring and reading a serial string. |
| Multiple tags | You build the time-division scheduling. | Up to 15 tags at 10 Hz, out of the box. |
| Coordinates out of the box | No. Ranges only; you compute X, Y, Z. | Yes. The tag streams POS,X,Y,Z. |
| Maintenance | Yours to keep alive. | Firmware ships tuned; one vendor to ask. |
| Best for | Learning UWB, tiny budgets, total control. | Shipping a working PoC fast. |
There’s no perfect choice here. Budget first, time to spare? Build it, and you’ll understand UWB better for the pain. Need results now and want your hours back? Buy the kit.
When is a UWB dev kit worth it?
When your time costs more than the kit does. That’s the line.
If you’re being paid to ship a location feature, a week lost to antenna-delay calibration and trilateration debugging is the expensive option, not the cheap one. The kit trades money you spend once for time you get back immediately. A researcher validating a hypothesis, a startup demoing to investors, a systems integrator scoping a pilot: all of them need a coordinate today, not a firmware education.
Flip it around, though. If the learning is the point, or the budget genuinely won’t stretch, DIY earns its keep. Be honest with yourself about which one you are. The kit can’t buy back a weekend you actually wanted to spend soldering.
FAQ
Not really. A finished kit runs its own tuned firmware and its own anchor and tag hardware, so plan the kit as its own setup rather than a drop-in upgrade for loose modules.
UWB is an indoor technology, and the Creator Kit has no weatherproofing, so keep it inside. Precise outdoor position is the job of GPS-RTK, which is a different tool for a different environment.
Start on your desk
Indoor positioning no longer needs a big budget or a lost month. Both roads reach the same place. If you have the time and want to learn every layer, build it, and don’t let anyone talk you out of it, because the understanding you earn from debugging your own trilateration at two in the morning is worth something no product page will ever sell you. If you’d rather stand three anchors up, plug in the listener, and read a coordinate the same afternoon, a kit is the shortcut.
Skip the calibration marathon and start from working coordinates: see the Q1 Creator Kit on the product page. Ready to wire it up? The Creator Kit setup guide walks the whole flow. shows the tag talking to a real board. New to the topic? Start with the UWB indoor positioning overview.