You mapped the space, picked your tags, and now one number is holding up the whole order: how many anchors do you actually buy. Buy too few and the position never resolves. Buy too many and the extra hardware just sits in a drawer gathering dust. This guide hands you the number, the reason behind it, and the placement that makes it hold up in a real room, using the concrete values from the GrowSpace Creator Kit (Q1) setup rather than a textbook ideal. New to UWB? Start with our intro to UWB indoor positioning.
How many anchors do I need for UWB positioning?
Here is the short answer. One anchor for distance only, three for a flat position on a plane, four for a full 3D position that includes height. Those are floors. Not targets.
Real setups use more, because a floor is the point below which nothing resolves at all, and you almost never want to build right at the edge of what barely works. An anchor is a fixed reference point that measures how far your tag sits from it, and the system takes several of those distances and turns them into a single coordinate you can act on. One distance cannot place a point on a plane. Three can. Layout permitting.
Here is the quick reference.
| Goal | Minimum | Practical start (this kit) | What you get |
|---|---|---|---|
| Range only | 1 | 1 | Distance from tag to anchor |
| 2D position (X, Y) | 3 | 3-4 | Coordinates on a plane |
| 3D position (X, Y, Z) | 4 | 4-6 | Coordinates including height |
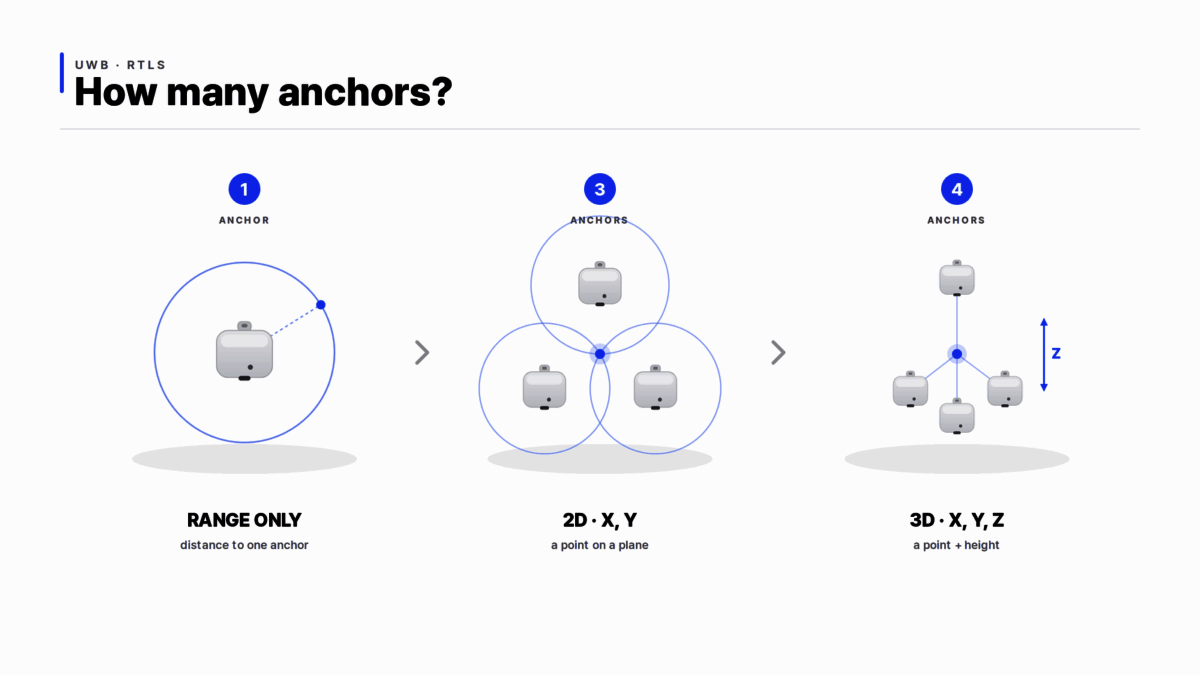
The “minimum” column is the geometry floor. Go under it and the position cannot resolve, full stop. The “practical start” column is the count that tends to hold up once a real room, with all its metal and its blind spots and its awkward corners, gets involved and starts fighting your signal. Neither number is a promise. Your true count rides on the space, the anchor geometry, and the accuracy you are actually chasing.
Why do I need at least 3 anchors for 2D positioning?
Because one distance draws a circle, not a point.
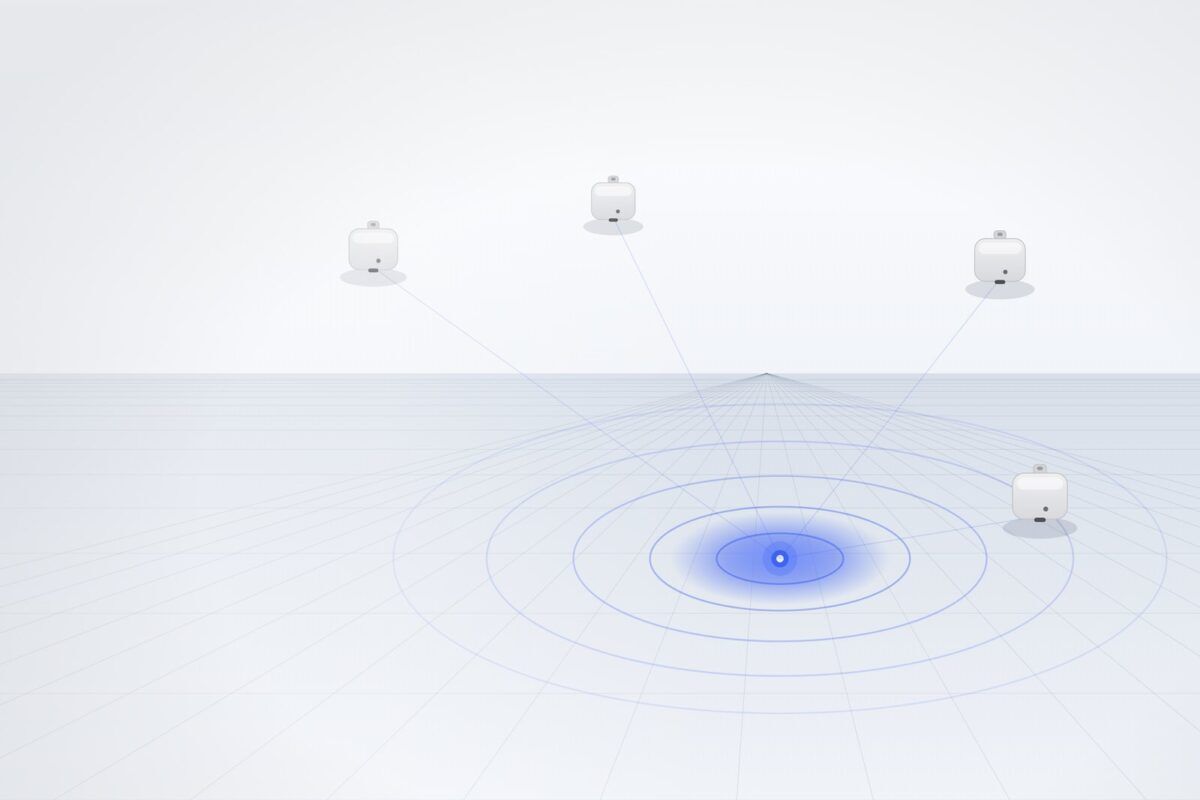
UWB measures range with two-way ranging, or TWR. The tag and the anchor trade a few precisely timed signals back and forth, and the round trip of that exchange becomes a distance you can trust to within centimeters. TWR gives you the distance. Turning a handful of those distances into an actual position is a separate step called trilateration. Follow the circles. One anchor gives you a radius, so your tag sits somewhere on a ring around it. A second anchor adds a second ring, and two rings cross at two candidate points. Add a third, and in clean geometry the three rings converge on one spot.
That tidy picture of three circles meeting at a single point is the intuition, not the messy reality you get on site. Real ranges each carry a little error. So the circles almost never cross at one exact point, and the positioning algorithm has to take those noisy, slightly disagreeing distances, estimate the single most likely position they point to, and then smooth that estimate over time so it stops twitching. Two anchors leave you with a distance and an ambiguity. Not a fixed X and Y.
Where you put the three matters every bit as much as having three at all. Bunch them into a tight cluster, or stand them up in a near-straight line, and the fix turns to mush even when the count on paper is perfectly correct. Spread them out around the area you actually care about. Same three anchors. Far tighter read. Count is only half the equation, and geometry quietly carries the other half whether you plan for it or not.
How many anchors for 3D positioning?
Four, at least. Height is the hard part. Adding the Z axis hands the solver a third unknown coordinate to pin down, and in a plain range-only setup that extra unknown usually demands a fourth anchor before it will resolve without ambiguity. Give the system four or more ranges and it solves X, Y, and Z together in one shot, which is the step most people loosely call multilateration.
Four is a floor, though. Not a guarantee. Place four anchors badly and your Z reading stays shaky even with every one of them online and reporting, which is exactly why real 3D work means planning for four, usually more, and caring about where each one goes as much as how many you bought.
There is a catch here that trips up a surprising number of first builds, and it has almost nothing to do with the count you settled on. It is about where the anchors sit.
Does 3D positioning require anchors at different heights?
Not always. It bites hardest when your tag moves at roughly the same height as the anchors themselves. Here is the exact condition.
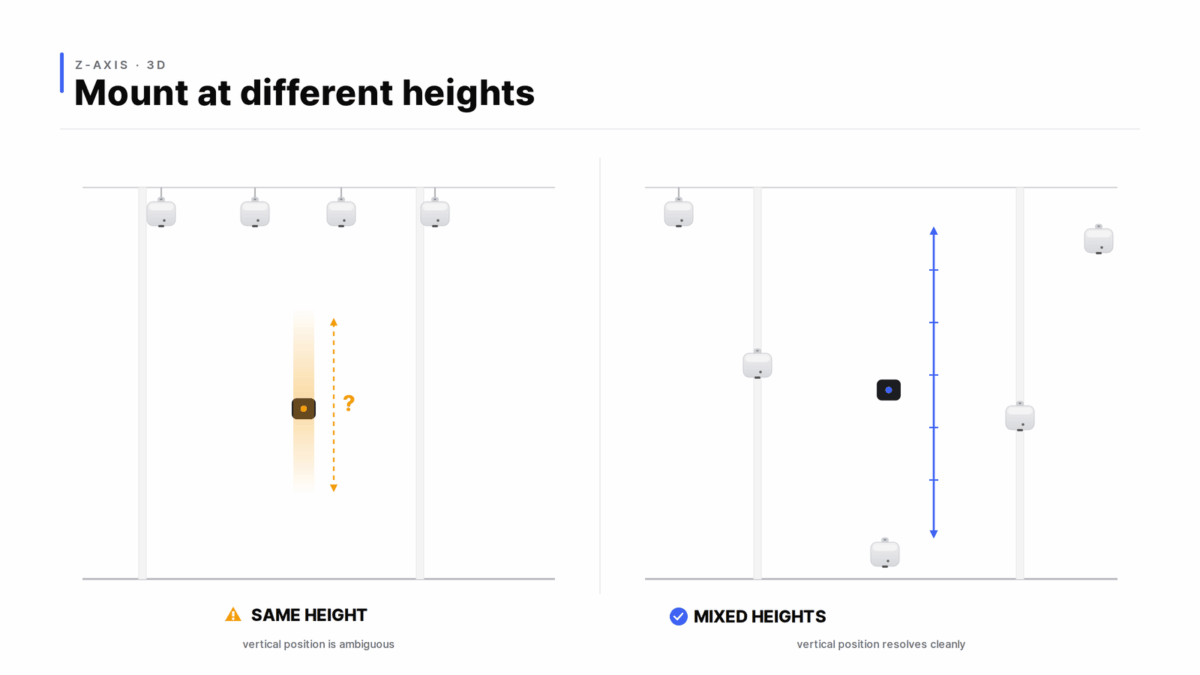
Mount every anchor at one height, say a clean line along the ceiling. Now let the tag ride near that same height. Each anchor sits at a similar vertical distance from the tag, so the ranges barely budge as the tag drifts up or down through that band, and the solver ends up poorly conditioned on the vertical axis with almost nothing to grip. Z goes noisy. Or it drifts toward one flat value and sticks there. On this kit, that softening shows up once the tag climbs within roughly a meter of the anchor plane.
One height can still work fine when the tag stays well below or well above the anchors, because the vertical geometry then has a real angle to work with. When the tag travels through a wide range of heights instead, the reliable fix is to spread the anchors across different heights on purpose: a few high, a few low, a couple mounted partway up the columns. Height diversity sharpens the vertical geometry. It is not a rule every 3D setup must obey. Our full walkthrough lives in the anchor height and Z-axis guide.
How far apart should UWB anchors be?
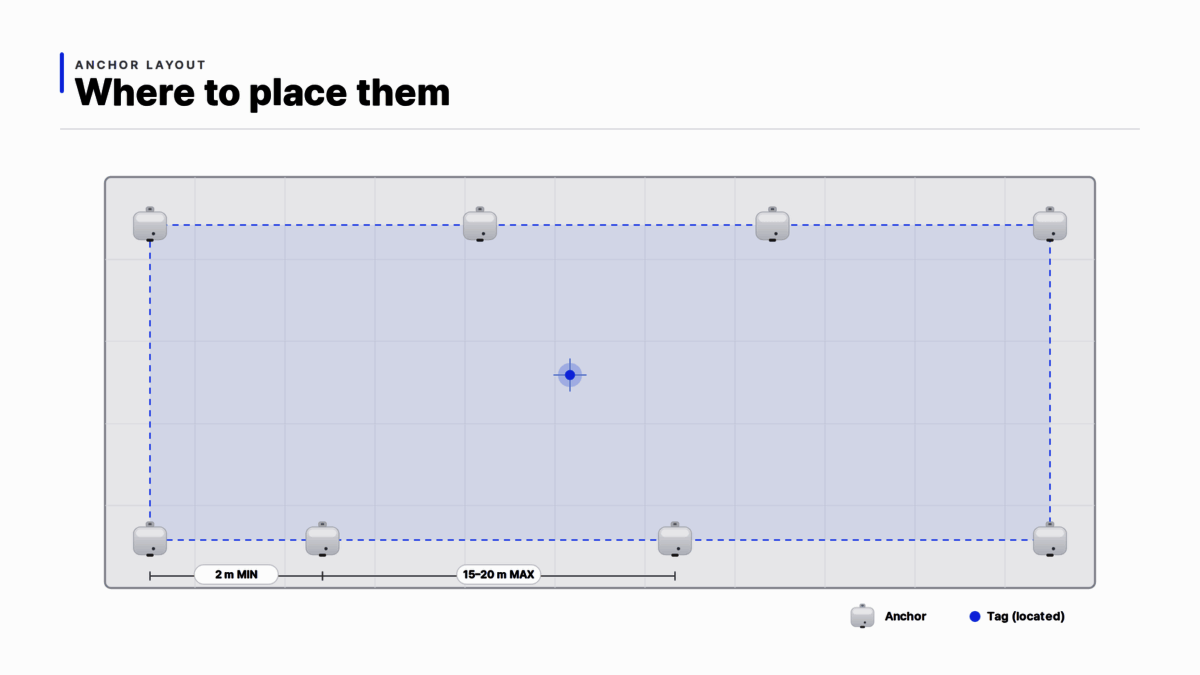
On this kit, keep anchors at least 2 meters apart, and within about 15 meters indoors or 20 meters outdoors. Closer than 2 meters and the geometry gets cramped and touchy. Those figures are spacing guidelines for where you place hardware, not a statement about how far the radio reaches, since the link itself carries up to roughly 25 meters in the open on the Creator Kit.
Distance is only half the story. Line of sight is the other half, and it usually wins the argument. A clear sightline between tag and anchor beats a shorter path that has to punch through a steel rack every single time you test it. In a warehouse packed with metal, or anywhere signals bounce and get swallowed on the way through (the NLOS case), plan the layout around what the tag can genuinely see rather than around a tidy number on a tape measure. More anchors will not cancel NLOS on their own. One blocked anchor still drags the fix. Sightline wins.
A few more placement rules fall out of the kit setup itself. Keep the tag inside the area the anchors surround, because coverage runs strongest through the middle of that ring and thinnest at the edges, and a tag that wanders outside the ring drifts fast. Enter every anchor position in millimeters, so 2.5 meters goes in as 2500. This kit uses manual coordinate entry through the aps command, which means you type the real layout in by hand and there is no clever auto step quietly guessing the positions for you. Pick one anchor as the reference, the Initiator, one per PAN ID. Drop it at (0, 0) and the rest of the math stays simple, though putting the origin exactly there is optional.
On the Creator Kit, expect positions landing within roughly 10 to 30 centimeters under good line of sight, refreshing up to 10 times a second. Treat those as this-kit numbers in good conditions. Not a fixed law of UWB. Line of sight, anchor placement, and the room itself all push them around.
How many anchors should you actually buy?
Start from the shape of your space, then add a margin on top. Need only X and Y in a single room? Three anchors covers it, which is exactly the count the Creator Kit ships with out of the box. Want tighter, steadier numbers in that same room? Step up to four, five, or six and watch the jitter fall. A tag that has to report height puts your floor at four, placed with real spread. For a large floor, say 40 by 20 meters or bigger, drop four in the corners and add two or three more down the middle or along the walls so no gap runs much past 15 to 20 meters. Then keep a spare. One or two anchors beyond whatever you counted, sitting in the box for testing and quick swaps, because anchors do lose line of sight, take a knock, or fall off the network mid-test, and a spare on the shelf beats a stalled deployment while you wait on a reorder that ships next week.
A long, narrow corridor is its own animal. Only need to know how far a tag has traveled down the line? One anchor and plain ranging gets you there. The moment you want a true X and Y in that same corridor you are back to three, and you want them deliberately offset from the centerline instead of strung out in a neat row, because anchors in a straight line hand the solver almost nothing to work with sideways and the position just smears along the wall.
Count for the space. Then add a couple.
How do I read the position data?
The kit streams finished coordinates. Not raw signal you have to solve yourself. Two ways in.
The listener pushes a serial string out over USB in the format POS, PAN ID, TAG ID, X, Y, Z, QF. That final field is a 0-to-100 quality score the kit stamps on every fix, a fast read on how much you should trust the numbers in front of it. The gateway publishes the very same position as MQTT JSON, in meters. Because the coordinates land already calculated, there is no SDK to wire up and no solver to build. You subscribe to the MQTT topic in whatever language suits you, or you read the serial line straight off UART and parse it there. Python. Node. A microcontroller sketch. All fine. Our Raspberry Pi guide walks the whole pipeline end to end.
Keep an eye on the QF as you set up. When it sags, treat that fix as soft, because a tag parked near the edge of coverage or tucked behind a steel rack tends to flash a low score there before anything else goes visibly wrong. That one number quietly points at where your geometry runs weak long before you ever walk over and move a single anchor.
Troubleshooting: position jumps or never shows up
When a position bounces around or flat refuses to appear, the cause is almost always sitting somewhere on this short list. Fewer than three anchors online. Coordinates typed in wrong. A Z value missing on a 3D setup. Anchors jammed too close or stretched too far apart. The tag sitting outside the area the anchors actually cover. Or plain obstacles breaking the sightline. Walk the list top to bottom, one line at a time, and most cases quietly sort themselves out before you reach the end.
Start with what the kit gives you
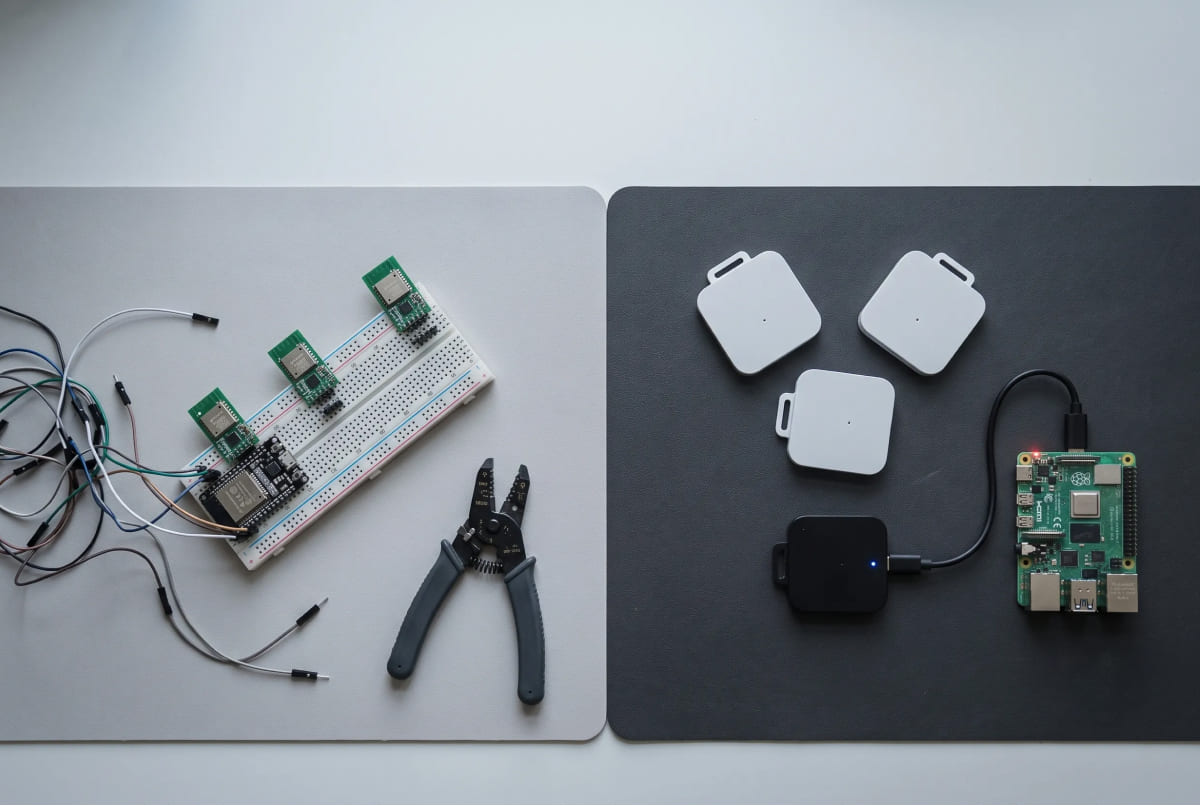
You do not need a big order to get moving. The Creator Kit arrives with three anchors, a listener, a developer tag, and three brackets, which together make a working 2D setup the moment you open the box. Stand it up. Type in your coordinates. Read real positions the same afternoon. When you graduate to 3D or a larger floor, add anchors to hit the count you just worked out here.
See the Creator Kit page for what comes in the box and how to add anchors, and follow the setup guide once your hardware lands.