GrowSpace
Manual

Arduino Mega 2560 Integration

2026년 09월 25일

In This Article

This guide shows how to connect the GrowSpace developer tag to an Arduino Mega 2560 board over serial, and how to receive and parse position data in real time using the lec and lep commands. It also provides example code and a method for building stable, high-speed communication using the Mega 2560’s hardware serial support.


What You’ll Need

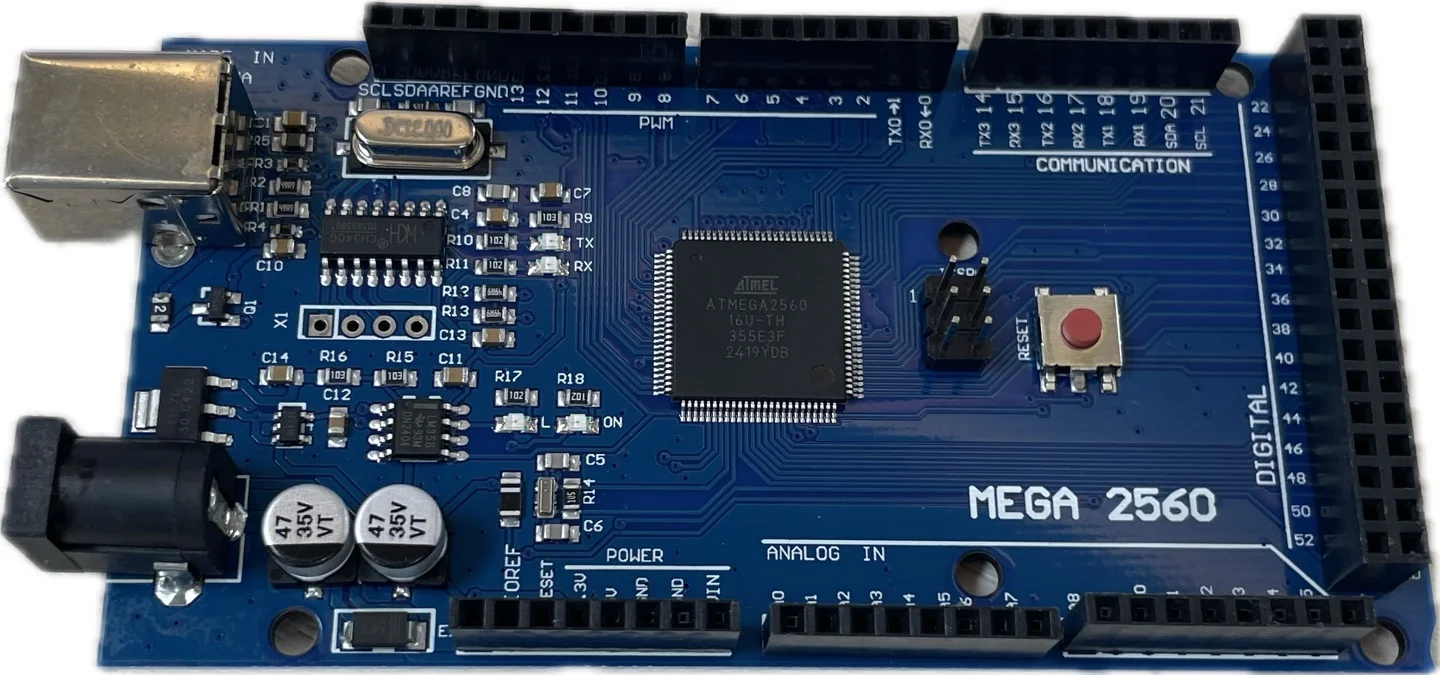
  • Arduino Mega 2560 board
Arduino Mega 2560 Integration – What You'll Need Screen 1
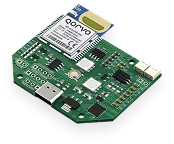
  • GrowSpace developer tag
Arduino Mega 2560 Integration – What You'll Need Screen 2
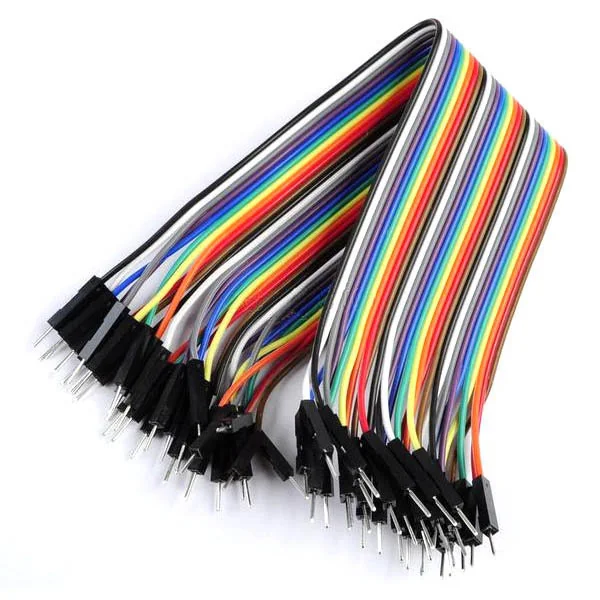
Jumper cables
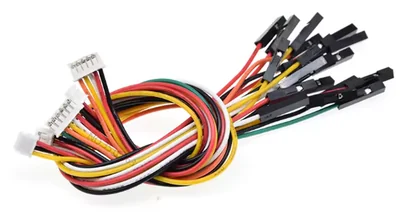
Included serial connection cable

⚠️ The UNO board has only one hardware serial port, which can cause errors during high-speed communication. The Mega 2560 provides Serial1–3, enabling stable communication.


Arduino IDE Setup and Board Connection

  • Install and launch the Arduino IDE

  • Apply the following settings from the top menu

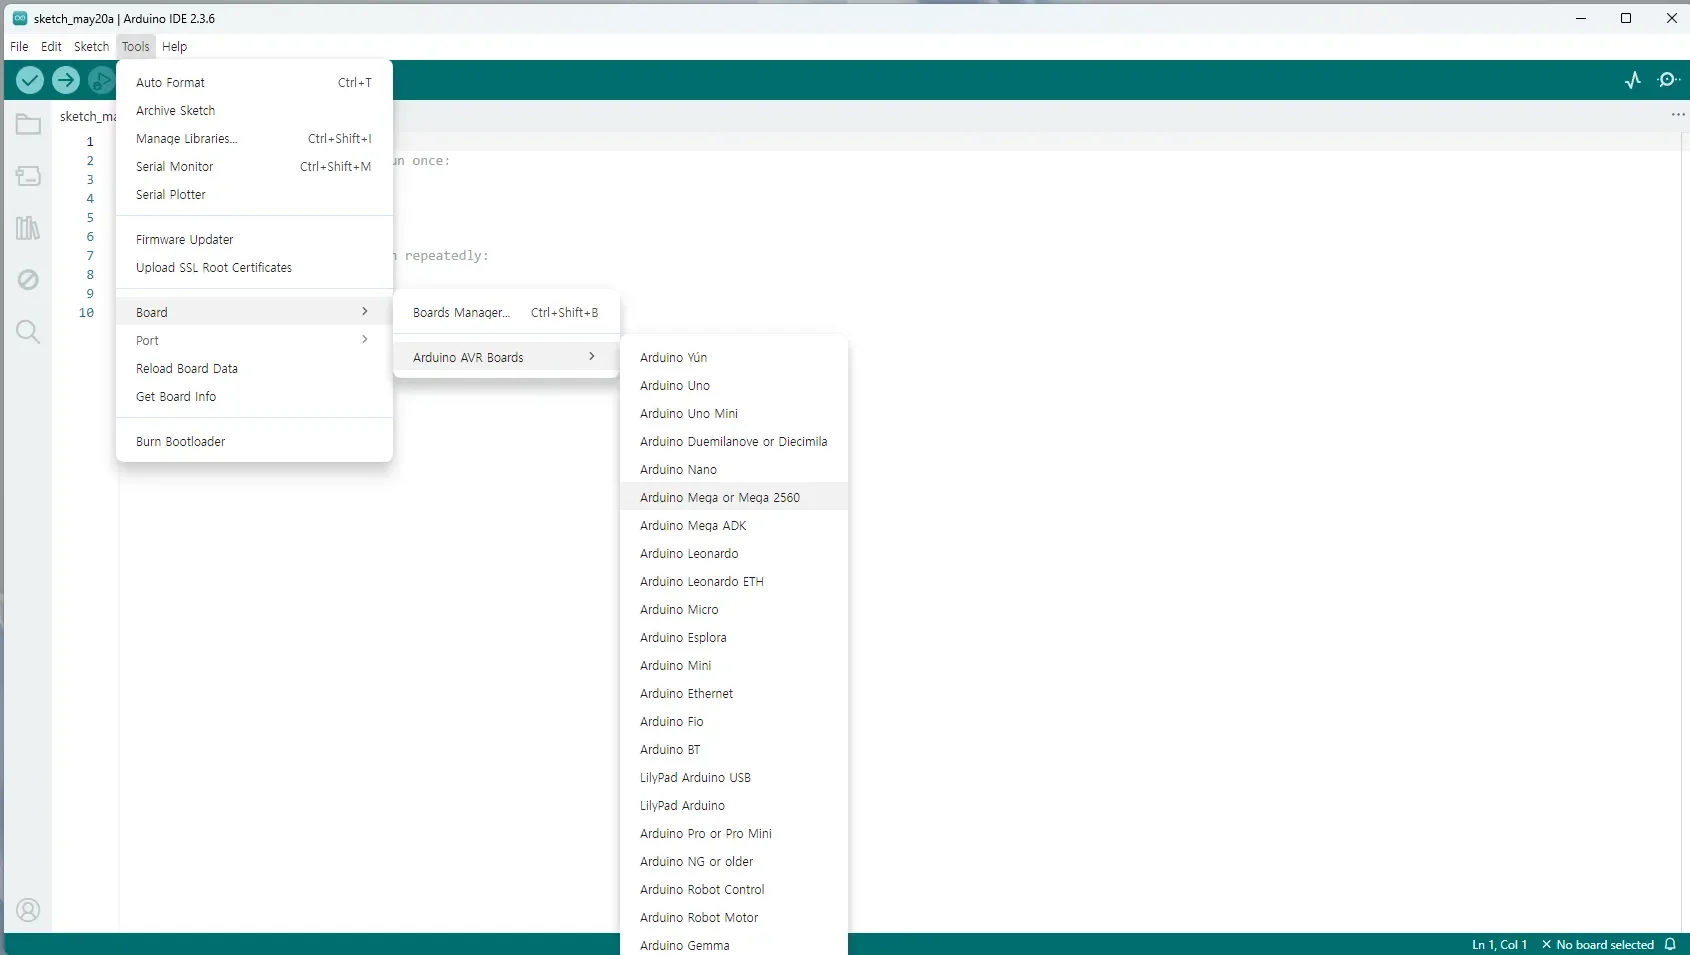
  • Tools > Board > Arduino Mega or Mega 2560

Arduino Mega 2560 Integration – Arduino IDE Setup and Board Connection Screen 5
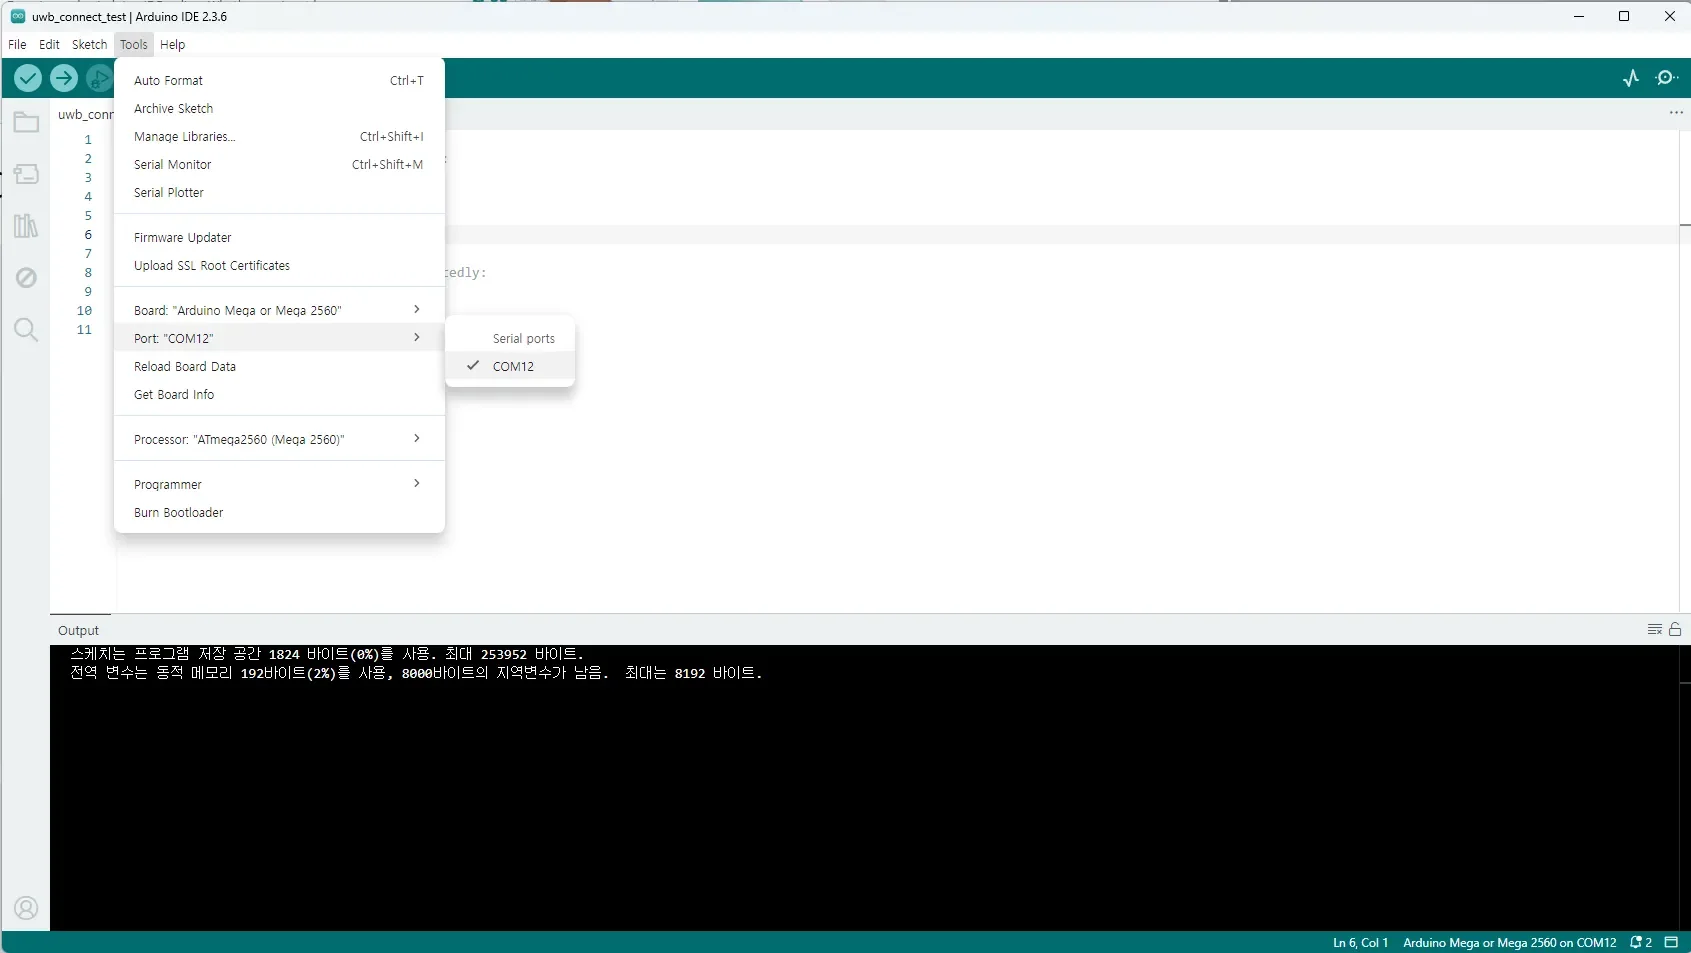
  • Tools > Port > select the connected COM port (e.g., COM3)
Arduino Mega 2560 Integration – Arduino IDE Setup and Board Connection Screen 6
  • Connect the Arduino Mega 2560 to your PC via USB

Hardware Pin Connection

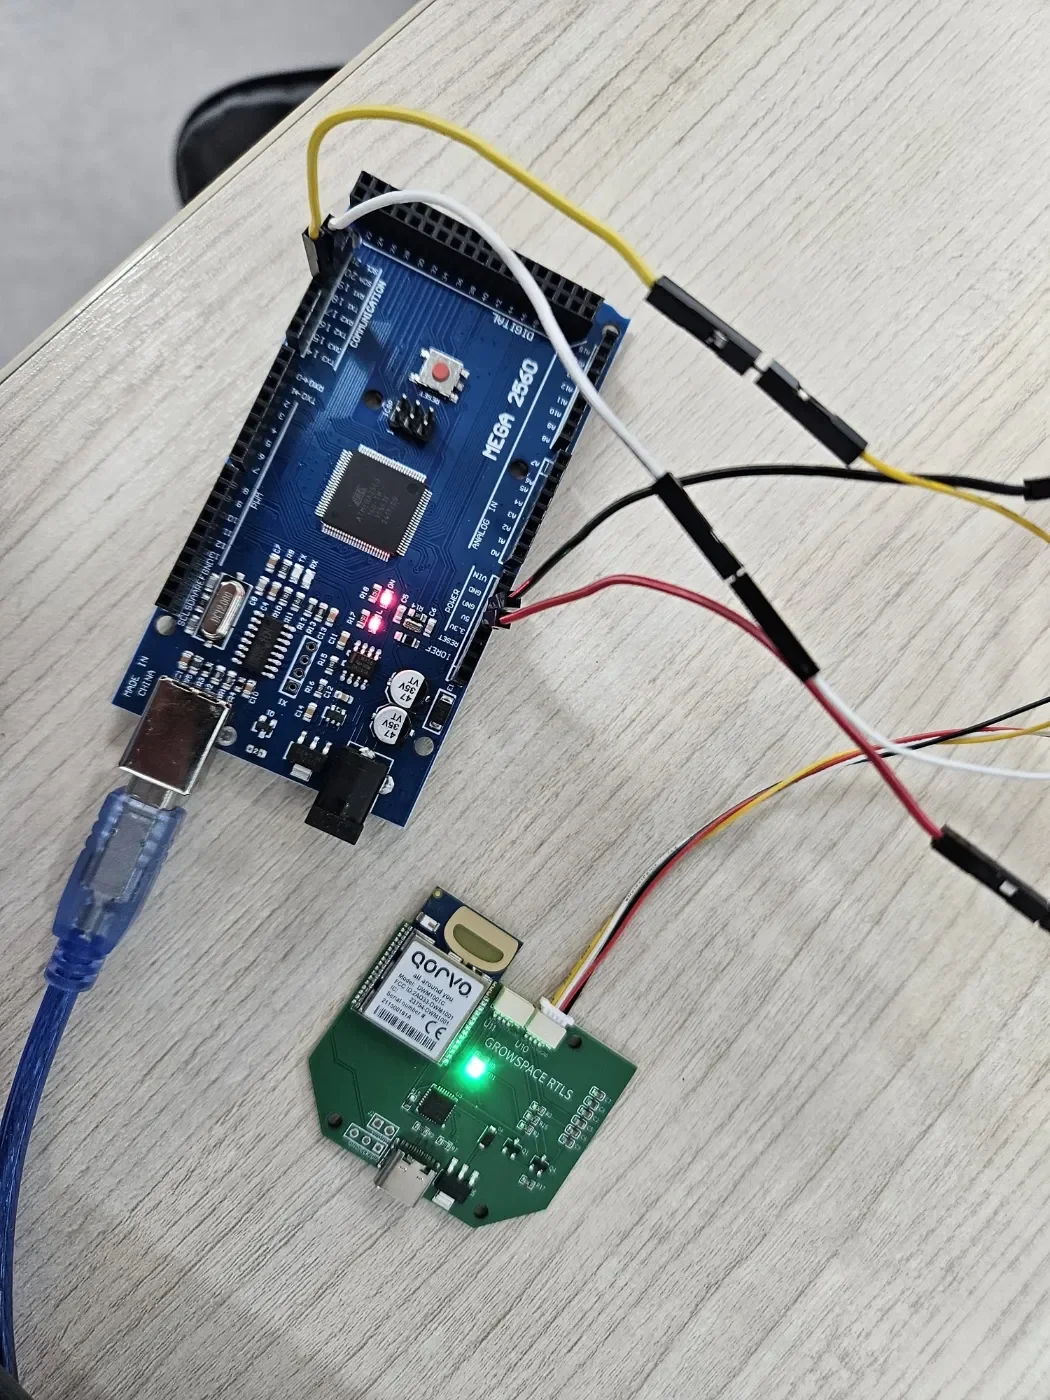
Connect as follows, using the right connector (5V only) of the GrowSpace developer tag:

Developer Tag PinArduino Mega Pin
TXRX1 (Pin 19)
RXTX1 (Pin 18)
5V5V
GNDGND

🔄 TX ↔ RX must be cross-connected for communication to work.

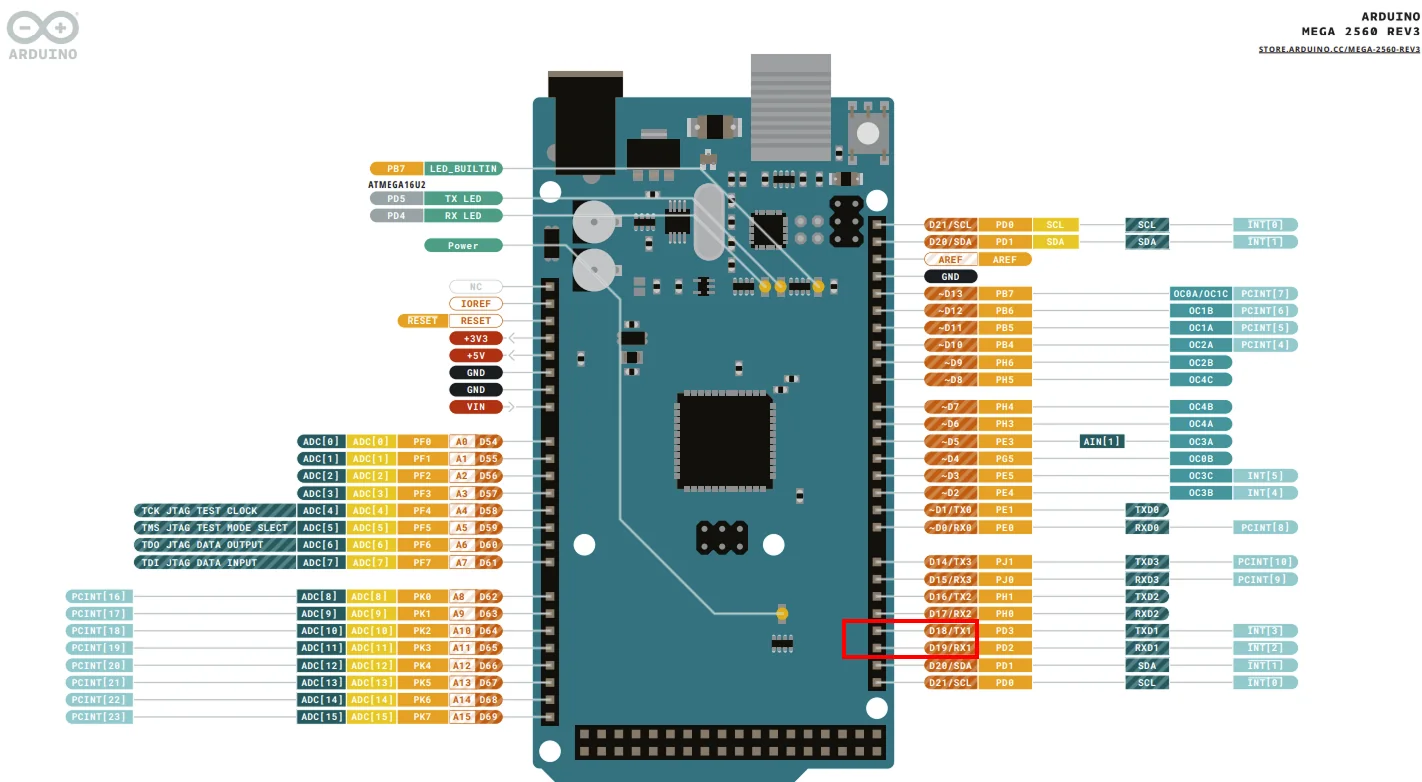
Below is an example pin layout for the Arduino Mega board.

Connect based on the Serial1 port’s TX1 (pin 18) / RX1 (pin 19).

Arduino Mega 2560 Integration – Hardware Pin Connection Screen 7

The developer tag connected to the Arduino Mega 2560

Arduino Mega 2560 Integration – Hardware Pin Connection Screen 8

Serial Relay Example (Basic Communication Check)

String inputFromSerial0 = "";
String inputFromSerial1 = "";

void setup() {
  Serial.begin(115200);    // USB Serial (Serial0)
  Serial1.begin(115200);   // Hardware Serial1 (Pin 18 TX1, 19 RX1)
}

void loop() {
  // serialEvent() and serialEvent1() are called automatically
}

// Serial0 input -> Serial1 output (adds CR only)
void serialEvent() {
  while (Serial.available()) {
    char inChar = (char)Serial.read();
    if (inChar != '\n') {
      inputFromSerial0 += inChar;
    }

    if (inChar == '\n') {
      Serial1.print(inputFromSerial0);
      Serial1.print('\r');
      inputFromSerial0 = "";
    }
  }
}

// Serial1 input -> Serial0 output
void serialEvent1() {
  while (Serial1.available()) {
    char inChar = (char)Serial1.read();
    inputFromSerial1 += inChar;

    if (inChar == '\n') {
      Serial.print("From Serial1: ");
      Serial.print(inputFromSerial1);
      inputFromSerial1 = "";
    }
  }
}

Explanation

  • In setup(), the USB serial and the hardware serial (Serial1) are each initialized.
  • serialEvent() sends the string typed on the PC (Serial0) to the tag.
  • serialEvent1() outputs the response received from the tag to the PC.
  • When sending a command, it is parsed by the newline character (\n), and a \r carriage return is automatically appended.

Serial Monitor Setup Tip

  • Baud rate: 115200bps
  • Newline transmission setting: New Line
  • After sending the si command, if the tag prints system information, communication is successful.

If you enter the si command in the serial monitor and get a valid response, the connection is successful.

Arduino Mega 2560 Integration – Serial Monitor Setup Tip Screen 9

Command-Based Position Parsing Example

String bufferSerial0 = "";
String bufferSerial1 = "";

void setup() {
  Serial.begin(115200);    // USB Serial
  Serial1.begin(115200);   // Serial1 for connecting the developer tag
}

void loop() {
  // loop left empty, serialEvent / serialEvent1 run automatically
}

// Receive commands from Serial0
void serialEvent() {
  while (Serial.available()) {
    char inChar = (char)Serial.read();
    if (inChar != '\n') {
      bufferSerial0 += inChar;
    }

    if (inChar == '\n') {
      bufferSerial0.trim();  // remove newline

      if (bufferSerial0.equalsIgnoreCase("lec") || bufferSerial0.equalsIgnoreCase("lep")) {
        Serial.print("Sending command: ");
        Serial.println(bufferSerial0);
        Serial1.print(bufferSerial0); // adds CR only
        Serial1.print('\r');
      } else {
        Serial.println("⚠ Unsupported command.");
      }

      bufferSerial0 = "";
    }
  }
}
// Receive response from Serial1 -> parse lec/lep
void serialEvent1() {
  while (Serial1.available()) {
    char inChar = (char)Serial1.read();
    bufferSerial1 += inChar;

    if (inChar == '\n') {
      bufferSerial1.trim();

      if (bufferSerial1.startsWith("POS,")) {
        parseLEP(bufferSerial1);
      } else if (bufferSerial1.startsWith("DIST,")) {
        parseLEC(bufferSerial1);
      } else {
        Serial.println("[Response] " + bufferSerial1);
      }

      bufferSerial1 = "";
    }
  }
}

// --- Position-only parsing (lep) ---
void parseLEP(String line) {
  Serial.println("[LEP Position Result]");
  int idx = 0;
  String parts[5];
  while (line.length() > 0 && idx < 5) {
    int comma = line.indexOf(',');
    if (comma == -1) {
      parts[idx++] = line;
      break;
    } else {
      parts[idx++] = line.substring(0, comma);
      line = line.substring(comma + 1);
    }
  }

  Serial.print("X: "); Serial.println(parts[1]);
  Serial.print("Y: "); Serial.println(parts[2]);
  Serial.print("Z: "); Serial.println(parts[3]);
  Serial.print("Quality Factor (QF): "); Serial.println(parts[4]);
  Serial.println();
}
// --- Full lec parsing ---
void parseLEC(String line) {
  Serial.println("[LEC Distance + Position Result]");
  int posIndex = line.indexOf("POS,");
  if (posIndex == -1) {
    Serial.println("→ Missing position info");
    return;
  }

  String distPart = line.substring(0, posIndex - 1);
  String posPart = line.substring(posIndex);

  Serial.println("▶ Anchor distance info:");
  int anchorIdx = 0;
  int anStart = 0;
  while ((anStart = distPart.indexOf("AN", anStart)) != -1) {
    int idStart = anStart + 2;
    int idEnd = distPart.indexOf(",", idStart);
    String id = distPart.substring(idStart, idEnd);

    int valStart = idEnd + 1;
    float x = distPart.substring(valStart, distPart.indexOf(",", valStart)).toFloat();
    valStart = distPart.indexOf(",", valStart) + 1;
    float y = distPart.substring(valStart, distPart.indexOf(",", valStart)).toFloat();
    valStart = distPart.indexOf(",", valStart) + 1;
    float z = distPart.substring(valStart, distPart.indexOf(",", valStart)).toFloat();
    valStart = distPart.indexOf(",", valStart) + 1;
    float d = distPart.substring(valStart, distPart.indexOf(",", valStart)).toFloat();
    Serial.print("AN"); Serial.print(anchorIdx++); Serial.print(" (ID "); Serial.print(id); Serial.print("): ");
    Serial.print("x="); Serial.print(x); Serial.print(", y="); Serial.print(y); Serial.print(", z="); Serial.print(z);
    Serial.print(" → distance: "); Serial.print(d); Serial.println("m");

    anStart = valStart;
  }

  Serial.println("▶ Tag position info:");
  parseLEP(posPart);
}
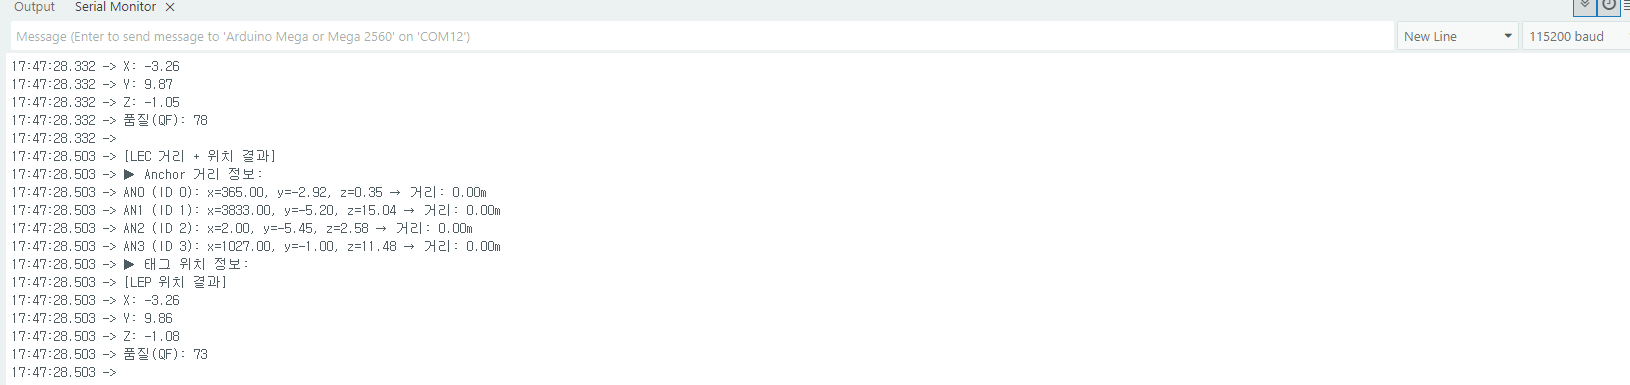
  • lep execution result
Arduino Mega 2560 Integration – Command-Based Position Parsing Example Screen 10
  • lec execution result
Arduino Mega 2560 Integration – Command-Based Position Parsing Example Screen 11

Wrap-Up

With this guide, you can set up serial communication between the Arduino Mega 2560 and the GrowSpace developer tag, and practice parsing and printing real-time position data based on the lec and lep commands.

  • lep: Check X, Y, Z coordinates + Quality Factor (QF)
  • lec: Get anchor info + distance + position data
PDF로 내려받아 현장에서 보세요

Table of Contents