In This Article
This article explains how to use MQTT-Studio to connect to a Mosquitto broker and subscribe to real-time UWB location data sent from the GrowSpace gateway.
If you want to integrate tag and anchor location data with a server or cloud system via an MQTT broker,
setting up the MQTT subscription environment by following this article first will make the later data integration much easier.
⚠️ If you are installing or configuring the MQTT server (Mosquitto broker) for the first time,
please refer to the document below first to prepare your server environment.
Go to the MQTT Server Setup Guide
However, even before setting up your own server,
you can set up a test environment with MQTT-Studio separately first,
so we recommend following the steps in this article first to get familiar with connecting to the broker and subscribing to data.
Creating an MQTT-Studio Project
Creating a Project
- Launch MQTT-Studio.
- Click New Project in the left menu.
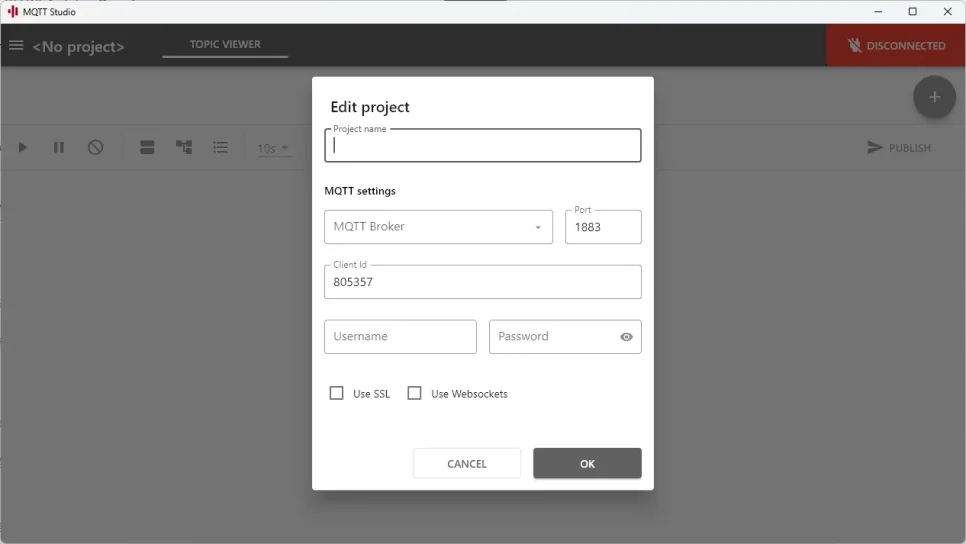
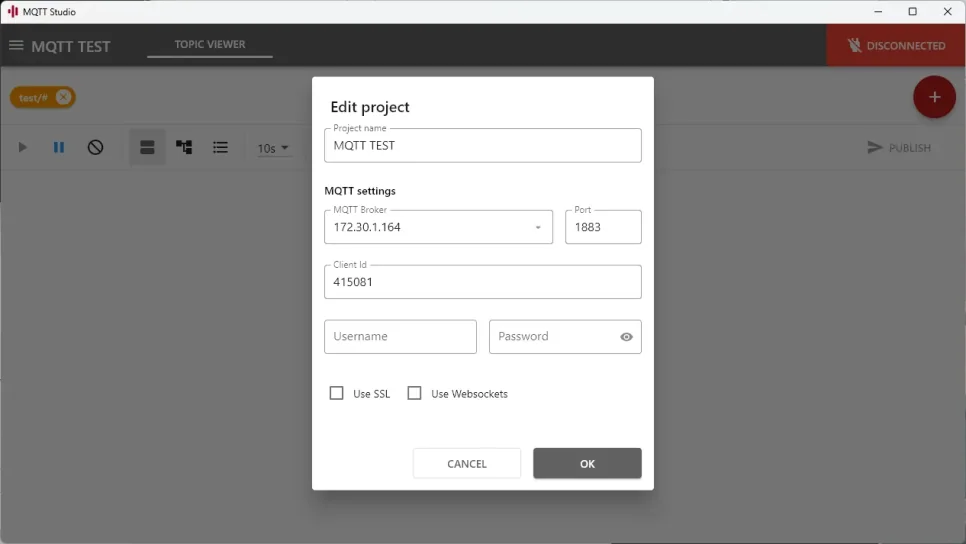
- Enter the following fields.
| Field | Description |
|---|---|
| Project name | Project name (e.g., growspace-test) |
| MQTT Broker | The IP address of the PC where the Mosquitto broker is installed |
| Port | Keep the default 1883 |
| Client ID | Any unique name (e.g., testclient1) |
| Username / Password | Enter according to the broker’s configuration, or leave blank if none |
If connecting from within the same network, entering just the IP address is enough to connect.
For external access, you’ll need to set up port forwarding for port 1883 on the router.
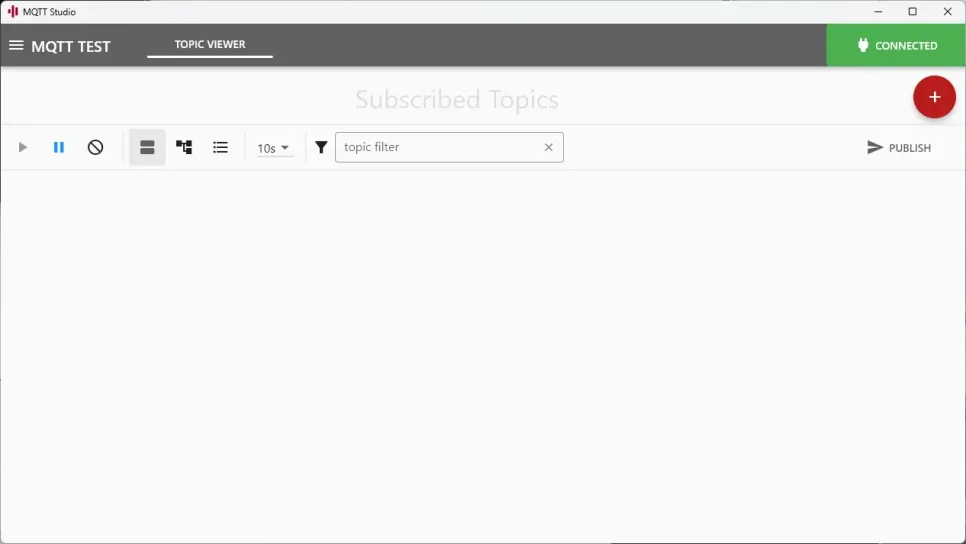
- Once the connection is successfully established, the status in the upper right changes to CONNECT.
How to Check Your IP Address (Windows)
- Type
cmdinto the Windows search bar and run Command Prompt - Type the
ipconfigcommand and press Enter
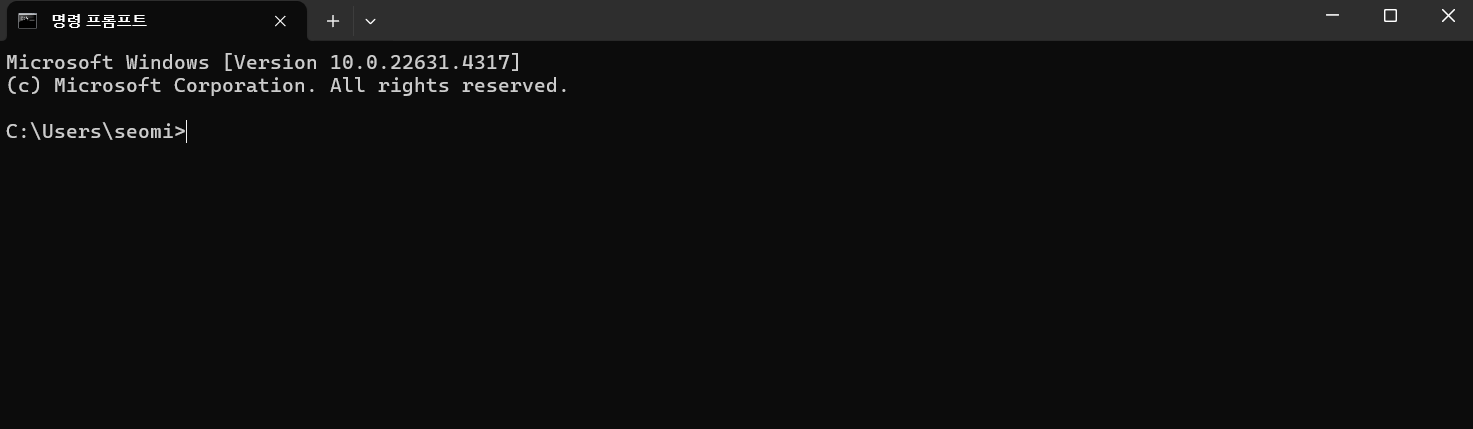
- This address is the IP you’ll enter in the MQTT Broker field.
Configuring Gateway Data Subscription
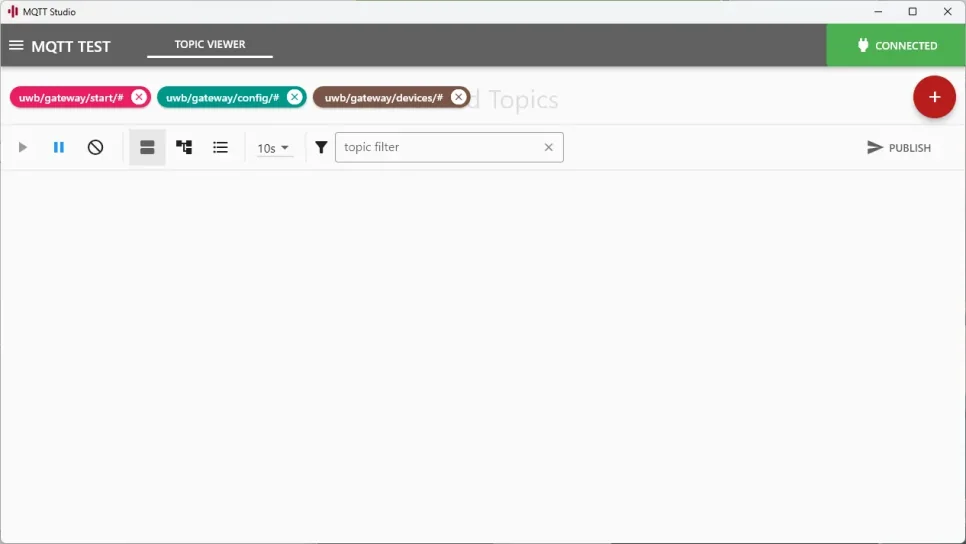
Once connected to the Mosquitto broker, subscribe to topics in MQTT-Studio so it can receive location data.
- Click the + button in the top right.
- Add each of the 3 topics below.
| Topic | Description |
|---|---|
uwb/gateway/start/# | Status information when the gateway boots |
uwb/gateway/config/# | Gateway configuration info such as settings and measurement interval |
uwb/gateway/devices/# | Real-time location data for tags and anchors |
The
#symbol subscribes to all data under that path.
TheprojectIdincluded in the topic structure is based on the API key issued from the GrowSpace web settings page.
Saving the Project
Once the topics are registered, click Save Project in the top left menu to save the settings.
After that, you can quickly reconnect with the same settings using Open Project.
Configuring the Gateway and Sending Data
Through the GrowSpace settings web page, you can configure the Gateway Q1 device to send data to your private Mosquitto broker.
Setup Steps
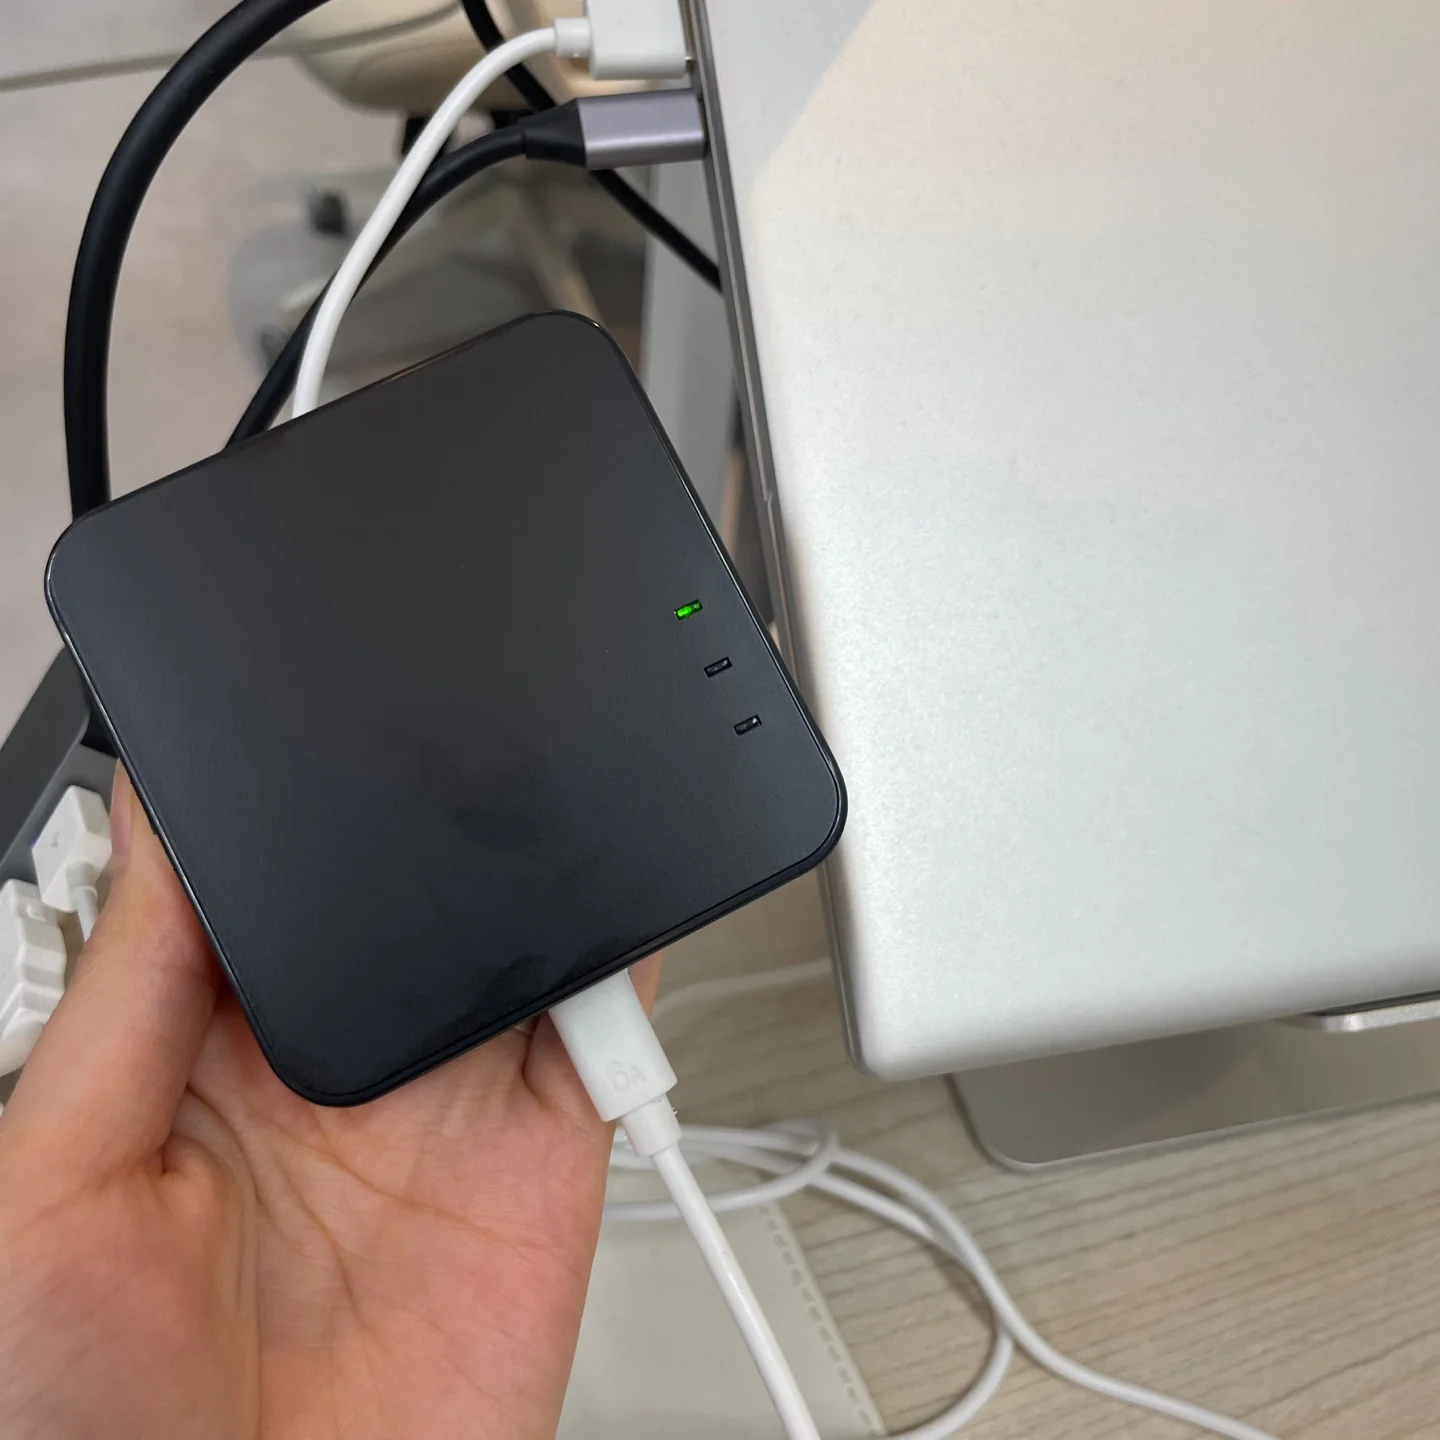
- Connect power to the gateway.
- Open Chrome and go to the web page below.
https://uwb-gateway.web.app - Go to the Gateway Settings menu at the top of the page.
- Enter the following fields.
| Field | Description |
|---|---|
| Wi-Fi Name / Password | Enter your 2.4GHz Wi-Fi info (5GHz is not supported) |
| MQTT IP | Enter the IP address of the PC where the Mosquitto broker is installed |
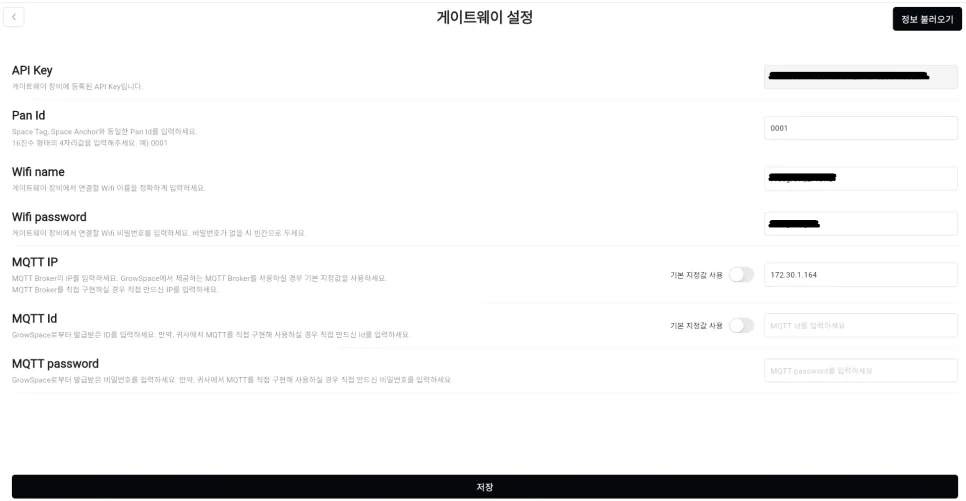
- After entering all fields, click Save, and the gateway will restart automatically.
It will then start sending data to the configured MQTT broker.
5. Verifying Data Reception in MQTT-Studio
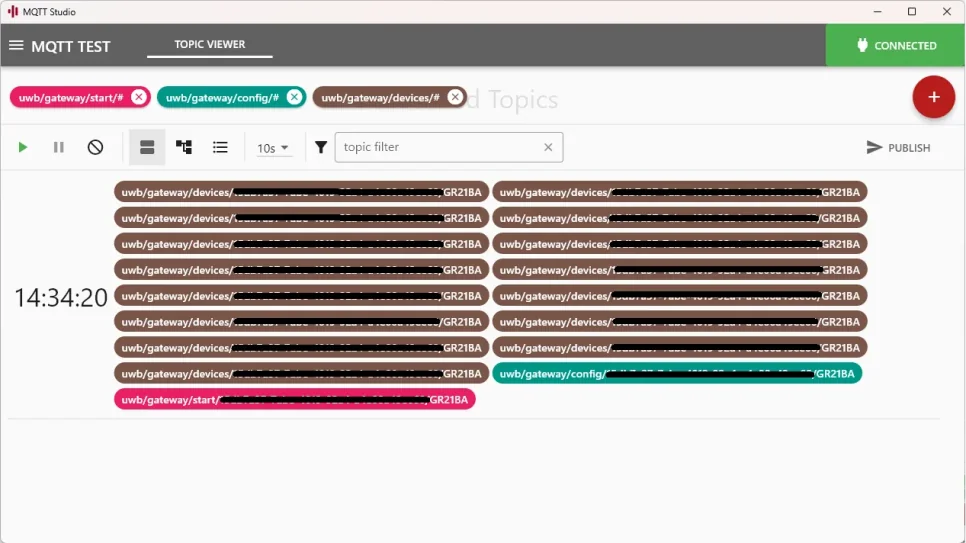
Once the gateway is configured, real-time location data will start appearing automatically in MQTT-Studio.
Below is an example of an actual received message.
Topic: uwb/gateway/devices/project-1234/TAG-001
{
  "tagId": "TAG-001",
  "x": 12.34,
  "y": 56.78,
  "z": 1.23,
  "timestamp": 1723850283
}
You can use this data to check the tag’s location or integrate it with a real-time monitoring system.