
In This Article
This guide walks you through placing UWB Anchors from your GrowSpace Creator Kit Q1 or Expansion Kit around your space and measuring their coordinates — the foundation for accurate positioning.
This document covers two things:
- How to choose where to install your Anchors
- How to measure and record their coordinates after installation
What Is an Anchor?
An Anchor is a fixed UWB device that acts as a reference point for calculating a Tag’s position in a real-time location system (RTLS). GrowSpace Anchors are installed in fixed locations, where they receive distance data from Tags and provide the core signal used for real-time position estimation.
Anchor Installation Overview
In a UWB-based RTLS, placing your Anchors is not just a matter of mounting devices — it is a core step that directly affects positioning accuracy and overall system stability.
Anchor placement and spacing have a major impact on positioning accuracy. See below for the recommended spacing, height, and layout.
To start positioning, you need to:
Understand your space
Choose your reference Anchor (Initiator)
Place the remaining Anchors following a consistent standard
Precisely measure each device coordinates and enter them into the system
Before You Install
Before choosing and placing your Anchor locations, gather the following:
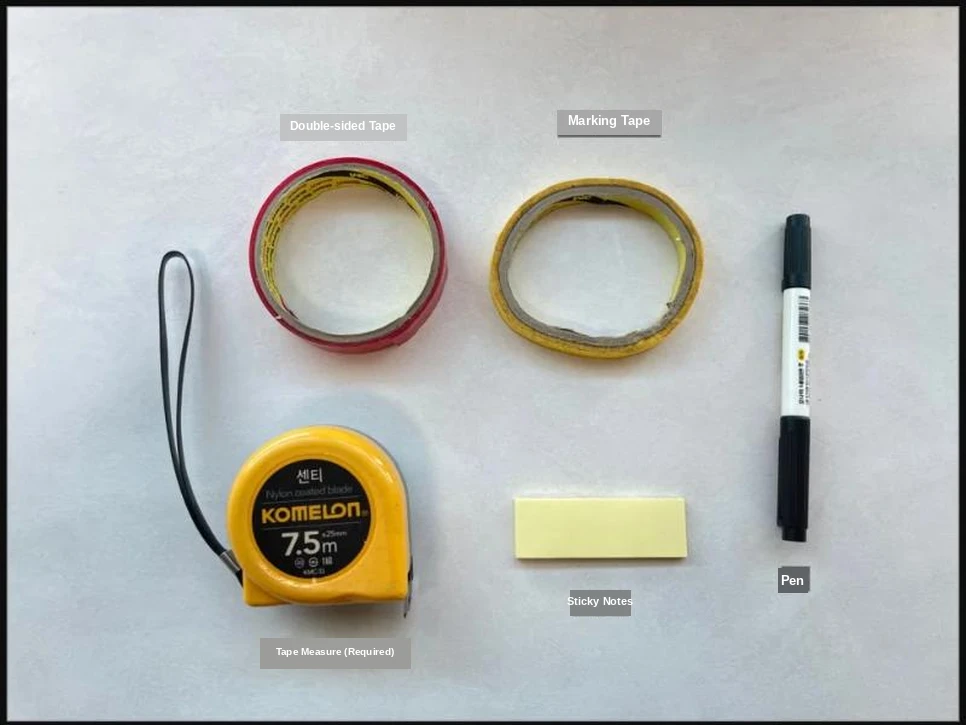
| Item | Description |
|---|---|
| Tape measure or laser distance meter | For accurate distance measurement |
| Masking tape, notepad, pen | For marking locations and recording distances |
| USB power cable, power strip | For powering the Anchors |
| Drill, screws (optional) | For a permanent mount |
Tip
- Measure distances between Anchor centers
- Measure at least twice to verify accuracy
Setting the Reference Anchor (Initiator)
The reference Anchor is the device that transmits the reference signal for RTLS calculations. Every Tag and Anchor in the system calculates position relative to this reference Anchor signal.
- Only one Initiator can be set per Pan ID.
- The reference Anchor is typically set to position (0, 0), though other coordinates work too.
- If you set an arbitrary reference position, enter the remaining Anchor coordinates relative to that position.
Choosing an Installation Location
| Factor | Recommended Location |
|---|---|
| Open line of sight | Avoid areas near columns, glass walls, or metal structures |
| Accessibility | A wall or ceiling that is easy to install on and power |
| Coverage | Most of the space should have a clear signal path to the reference Anchor |
Examples by Space Type
| Space Type | Recommended Reference Anchor Location |
|---|---|
| Factory, warehouse | A wall corner or ceiling corner |
| Office, hospital | An entrance wall or the start of a corridor |
| Multi-floor space | Separate Pan IDs per floor, with its own reference point per zone |
Placing the Remaining Anchors
Place the remaining Anchors efficiently based on the shape of your space.
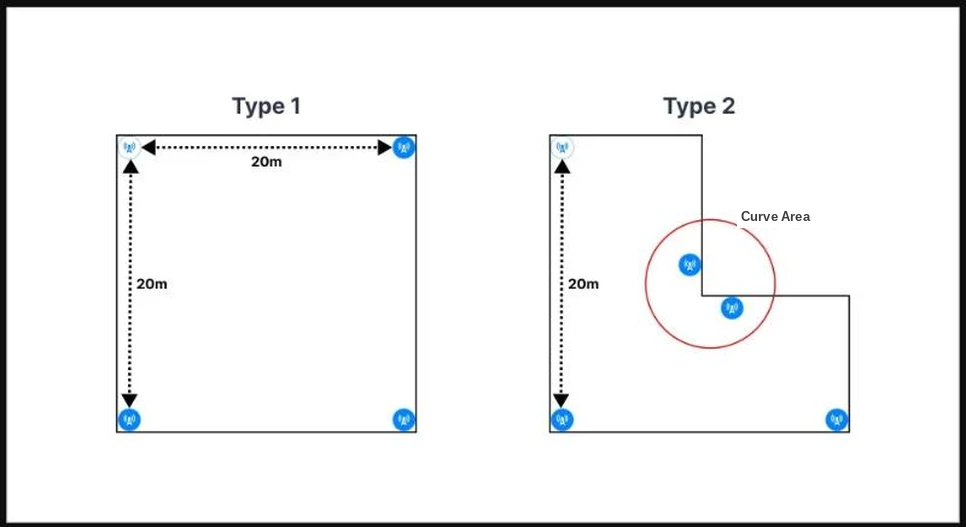
| Space Shape | Placement Approach |
|---|---|
| Square / rectangular | Place 4 Anchors evenly at the four corners |
| Irregular / open space | Place at least 3 Anchors in a triangular layout for trilateration |
Trilateration – This method estimates a Tag position by calculating the intersection point from distance measurements to 3 or more Anchors. Make sure the Tag can always reach at least 3 Anchors for stable positioning. For the details, see [Understanding Trilateration].
Recommended Distance and Height
In large or complex spaces, add extra Anchors at midpoints to fill in coverage.
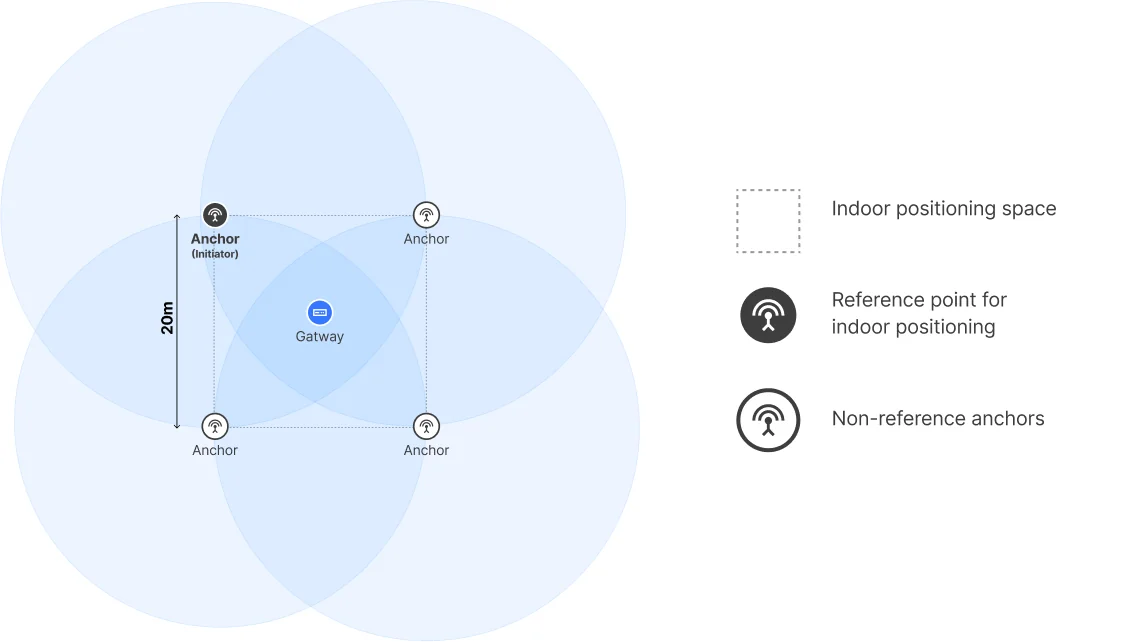
| Item | Recommended Value | Notes |
|---|---|---|
| Distance between Anchors | 15m – 20m | Space Anchors farther apart in larger areas, but keep signal range in mind |
| Installation height | 2m – 5m | Avoids interference from complex structures and optimizes reception |
Measuring and Entering Coordinates
Once each location is finalized, measure and record the X, Y, Z coordinates for each Anchor. You will enter these values directly in the Web Console later.
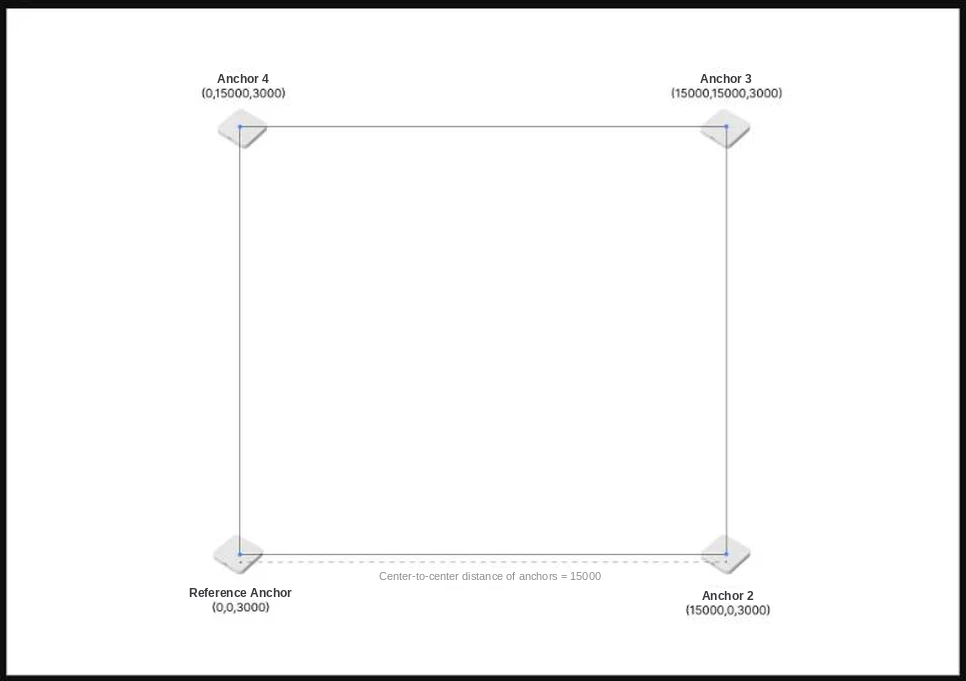
Measurement Notes
- Measure from Anchor center to Anchor center.
- Use millimeters (mm) as the unit.
- Z is the installation height (distance from floor to the mounting point).
- Measure every value at least twice to check for errors.
Example Coordinate Table
| Anchor | X (mm) | Y (mm) | Z (mm) |
|---|---|---|---|
| Reference Anchor | 0 | 0 | 3000 |
| Anchor 2 | 15000 | 0 | 3000 |
| Anchor 3 | 15000 | 15000 | 3000 |
| Anchor 4 | 0 | 15000 | 3000 |
You will enter this information per device in the Web Console. Accurate coordinates have a major impact on positioning accuracy.
Next Steps
Once your Anchors are physically installed and their coordinates measured, the next step is to enter and save each Anchor coordinates in the GrowSpace Web Console.